


Beginning with today’s funny thought : Code never lies, comments sometimes do right 😜. Well, today we will discuss about Sendbird which is one of the popular chat SDKs that has an inbuilt chat UI kit with a Voice/Video calling feature. It makes our life easier while integrating the chat feature into our existing app. It helps to build the modern chat app and messaging experiences with delivery receipts, offline messaging, translation, moderation tools, and analytics.
Further in this article, we will integrate the Sendbird Chat SDK into the android app and then integrate the Stipop stickers for a smooth chat experience 🤞. So, community members fasten your seatbelts for a joyous ride today. I am sure you will not be disappointed.
Prerequisites👇
Android SDK (API 16 or higher)
Sendbird Android SDK
Java 8
androidX
Gradle 4.0.1 or higher
Get SendbirdApp Key🗝️
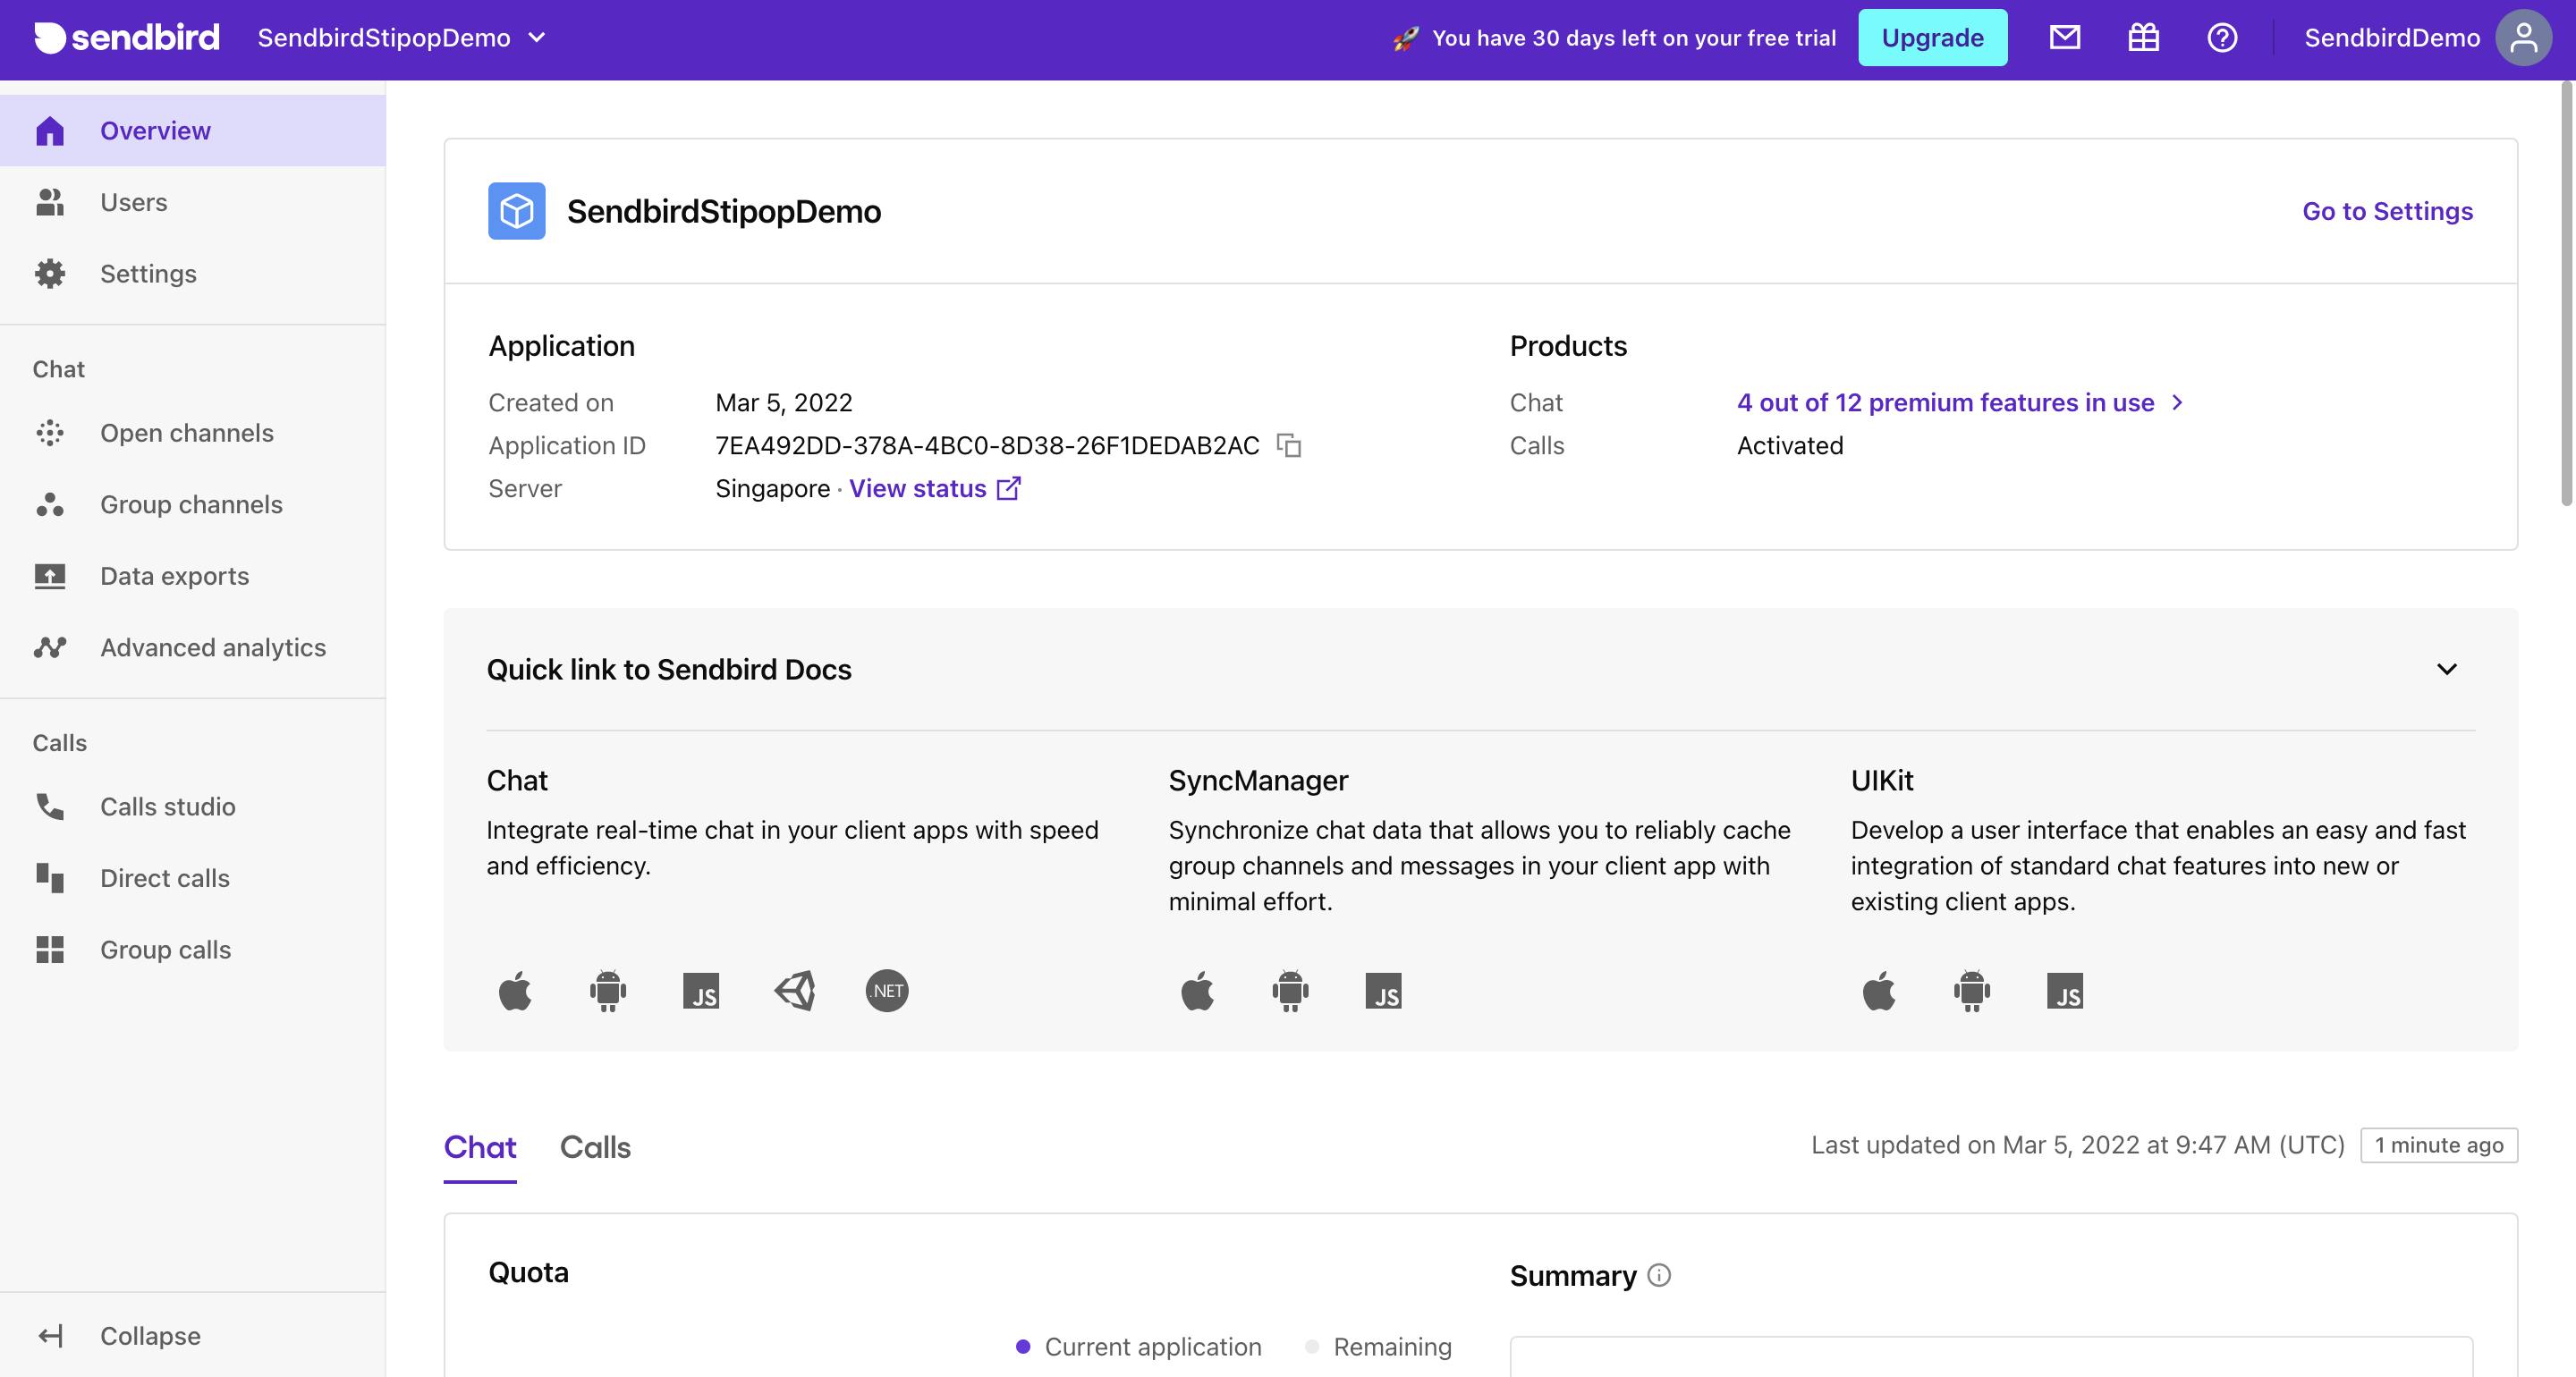
Just to let you all know before installing Sendbird Chat SDK, you need to create a Sendbird application on the Sendbird Dashboard, which contain everything required in a chat service including users, calls, and channels.
Next, you will need the Application ID of your Sendbird application when initializing the Chat SDK.
Well, instead of building it from scratch, we will rather clone the Sendbird sample repository and then integrate the Stipop stickers into the Android app. Cool right 😎🤘. So, without any further ado let’s get started with the development of the chat app🙌
The Coding part 😈
We will start the development of the Android chat app using the Stream SDK. Let’s clone the Sendbird sample repository with an inbuilt chat SDK.
git clone https://github.com/6vedant/StipopSendbirdAndroid.git
Now,navigate to Android Studio and open the project and clean/rebuild the project. We are interested in the uikit-custom-sample module of the repository. After the successful rebuild of the project, navigate to build.gradle(sample project level) and then add the below code snippet.
buildscript {
    repositories {
        google()
        jcenter()
    }
    dependencies {
        classpath 'com.android.tools.build:gradle:4.0.1'
    }
}

allprojects {
    repositories {
        google()
        jcenter()
        maven { url "https://jitpack.io" }
        maven { url "https://repo.sendbird.com/public/maven" }
    }
}
After that sync the project and rebuild the gradle.
Again, we now have to add a few more dependencies for the Sendbird and Stipop to the build.gradle(sample app level), and rebuild the project to use the classes in the project.
apply plugin: 'com.android.application'

android {
    ...

    dataBinding {
        enabled = true
    }

    compileOptions {
        sourceCompatibility JavaVersion.VERSION_1_8
        targetCompatibility JavaVersion.VERSION_1_8
    }
    ...

}

dependencies {
    implementation 'com.sendbird.sdk:uikit:LATEST_VERSION'
// Stipop
 implementation 'com.github.stipop-development:stipop-android-sdk:0.3.0'

    ...

}
I hope everything is clear till this part because this is crucial . Considering that moving on to the next part.
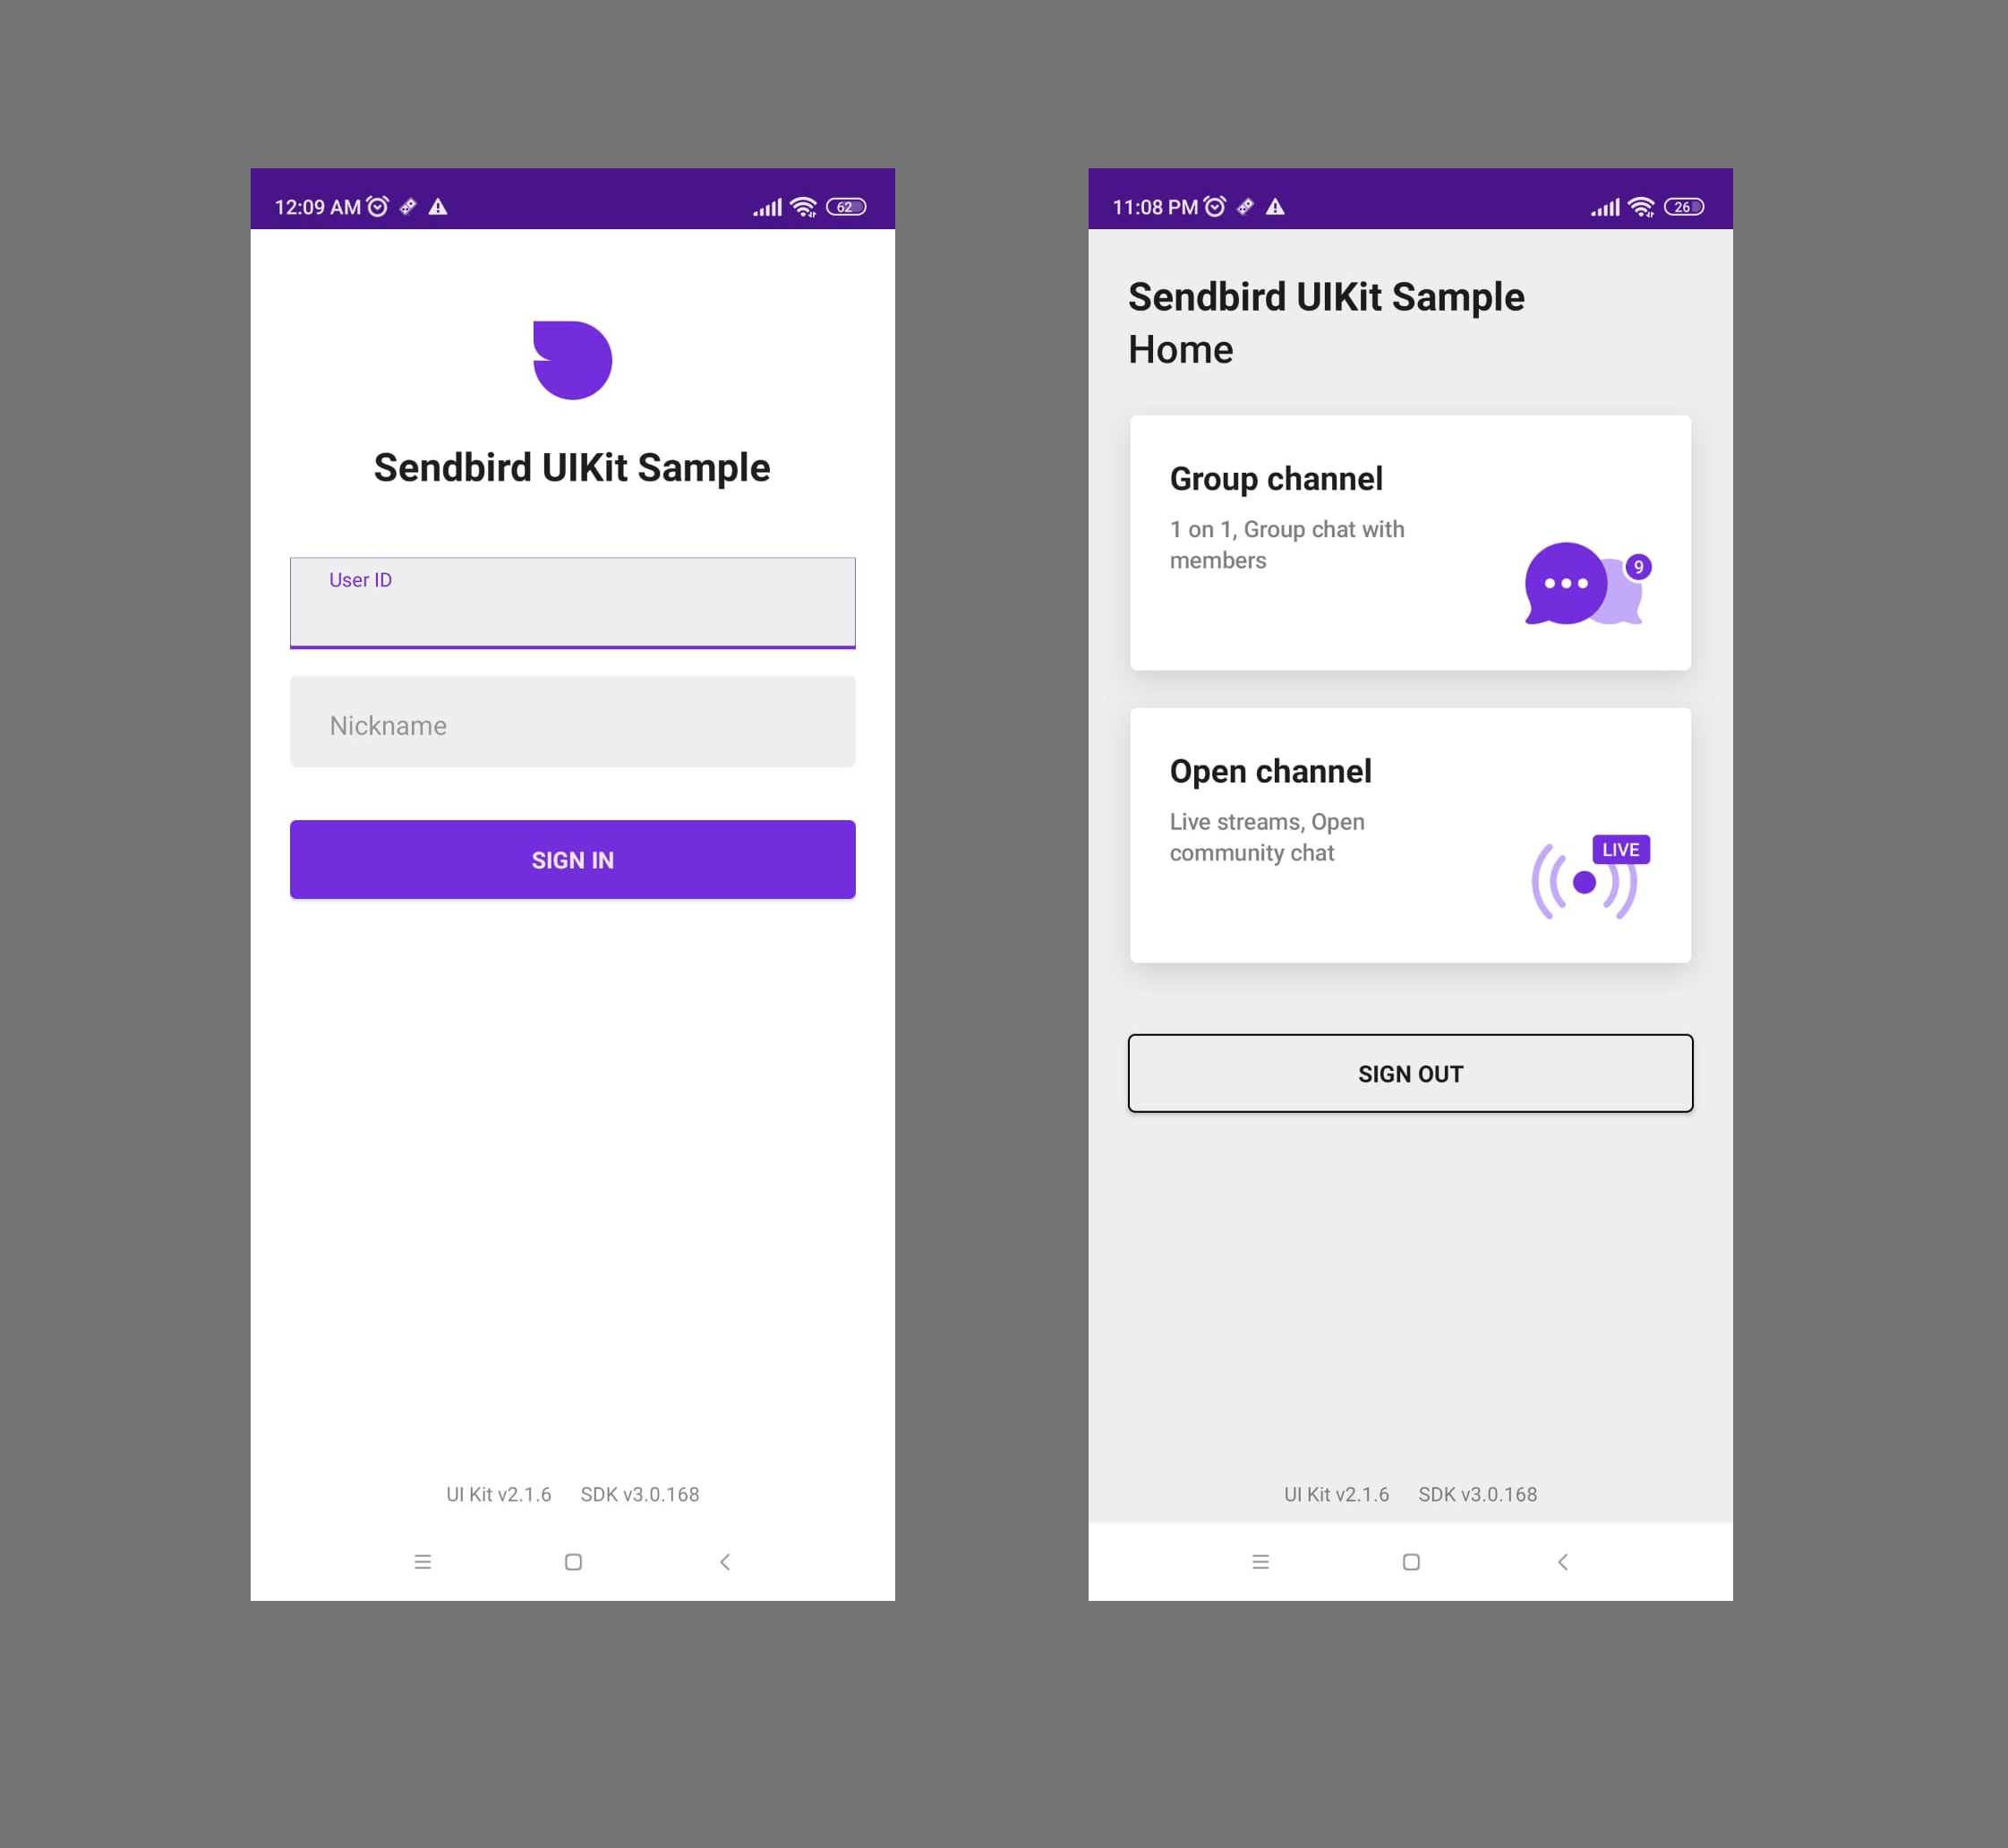
Create Login Page
We will first create the LoginActivity.java to enable user authentication before we proceed to the chat room.
Also, for the UI, we will need two EditText to enter the userID and userName of the chat user.
EditText etUserId = findViewById(R.id.etUserId);
EditText etNickname = findViewById(R.id.etNickname);
When the user clicks on the SignIn button he will be able to connect the android app to the SendBirdUIKit.
SendBirdUIKit.connect((user, e) -> {
   WaitingDialog.dismiss();
   PushUtils.registerPushHandler(new MyFirebaseMessagingService());
   Intent intent = new Intent(LoginActivity.this, HomeActivity.class);
   startActivity(intent);
   finish();
});
To logout the user from the Sendbird chat backend, we will trigger the disconnect() function of SendBirdUIKit.
SendBirdUIKit.disconnect(() -> {
   WaitingDialog.dismiss();
   PreferenceUtils.clearAll();
   startActivity(new Intent(HomeActivity.this, LoginActivity.class));
   finish();
});
So, time to run the app and test if the Login screen is working as expected.
After the successful login of the user, it should redirect to the HomeActivity screen.
Well here it is -
Create Chat Screen
We will now proceed with the creation of the Chat screen for which please navigate to the CustomChannelFragment.java which contains the chat room for the user to exchange messages for the Group channel.CustomChannelFragment is a child class of the ChannelFragment which has an inbuilt chat room UI.
Finally, now we will integrate the Stipop stickers in the Group channel. The similar procedure will be applicable for the Open Channel chat room as well.
public ChannelFragment build() {
   ChannelFragment fragment = this.customFragment != null ? this.customFragment : new ChannelFragment();
   fragment.setArguments(this.bundle);
   fragment.setHeaderLeftButtonListener(this.headerLeftButtonListener);
   fragment.setHeaderRightButtonListener(this.headerRightButtonListener);
   fragment.setMessageListAdapter(this.adapter);
   fragment.setItemClickListener(this.itemClickListener);
   fragment.setItemLongClickListener(this.itemLongClickListener);
   fragment.setInputLeftButtonListener(this.inputLeftButtonListener);
   fragment.setMessageListParams(this.params);
   fragment.setEmojiReactionClickListener(this.emojiReactionClickListener);
   fragment.setEmojiReactionLongClickListener(this.emojiReactionLongClickListener);
   fragment.setEmojiReactionMoreButtonClickListener(this.emojiReactionMoreButtonClickListener);
   fragment.setOnProfileClickListener(this.profileClickListener);
   fragment.setLoadingDialogHandler(this.loadingDialogHandler);
   fragment.setOnInputTextChangedListener(this.inputTextChangedListener);
   fragment.setOnEditModeTextChangedListener(this.editModeTextChangedListener);
   return fragment;
}
It calls the sendUserMessage() method of the parent class with the userMessage as input parameter to send the messages.
protected void sendUserMessage(@NonNull UserMessageParams params) {
   if (this.viewModel != null) {
       CustomParamsHandler cutsomHandler = SendBirdUIKit.getCustomParamsHandler();
       if (cutsomHandler != null) {
           cutsomHandler.onBeforeSendUserMessage(params);
       }

       this.onBeforeSendUserMessage(params);
       this.viewModel.sendUserMessage(params);
   }

}
Well, other methods in ChannelFragment are also available for example: to edit the existing message, delete the message, resend the message etc.
protected void updateUserMessage(long messageId, @NonNull UserMessageParams params) {
 if (this.viewModel != null) {
       CustomParamsHandler cutsomHandler = SendBirdUIKit.getCustomParamsHandler();
       if (cutsomHandler != null) {
           cutsomHandler.onBeforeUpdateUserMessage(params);
       }

       this.onBeforeUpdateUserMessage(params);
       this.viewModel.updateUserMessage(messageId, params);
   }

}
protected void deleteMessage(@NonNull BaseMessage message) {
   if (this.viewModel != null) {
       this.viewModel.deleteMessage(message);
   }
}

protected void resendMessage(@NonNull BaseMessage message) {
   if (this.viewModel != null) {
       if (message.isResendable()) {
           this.viewModel.resendMessage(message);
       } else {
           this.toastError(string.sb_text_error_not_possible_resend_message);
       }
   }

}
Wow we have got so far now smoothly and just a few more tricks in the pocket and then I shall reveal the magic to you . You know what is coming - development is done so it's time for the testing because you are never too sure.
Let’s Run the App
We are now ready to test the chat feature of the Sendbird Android app.
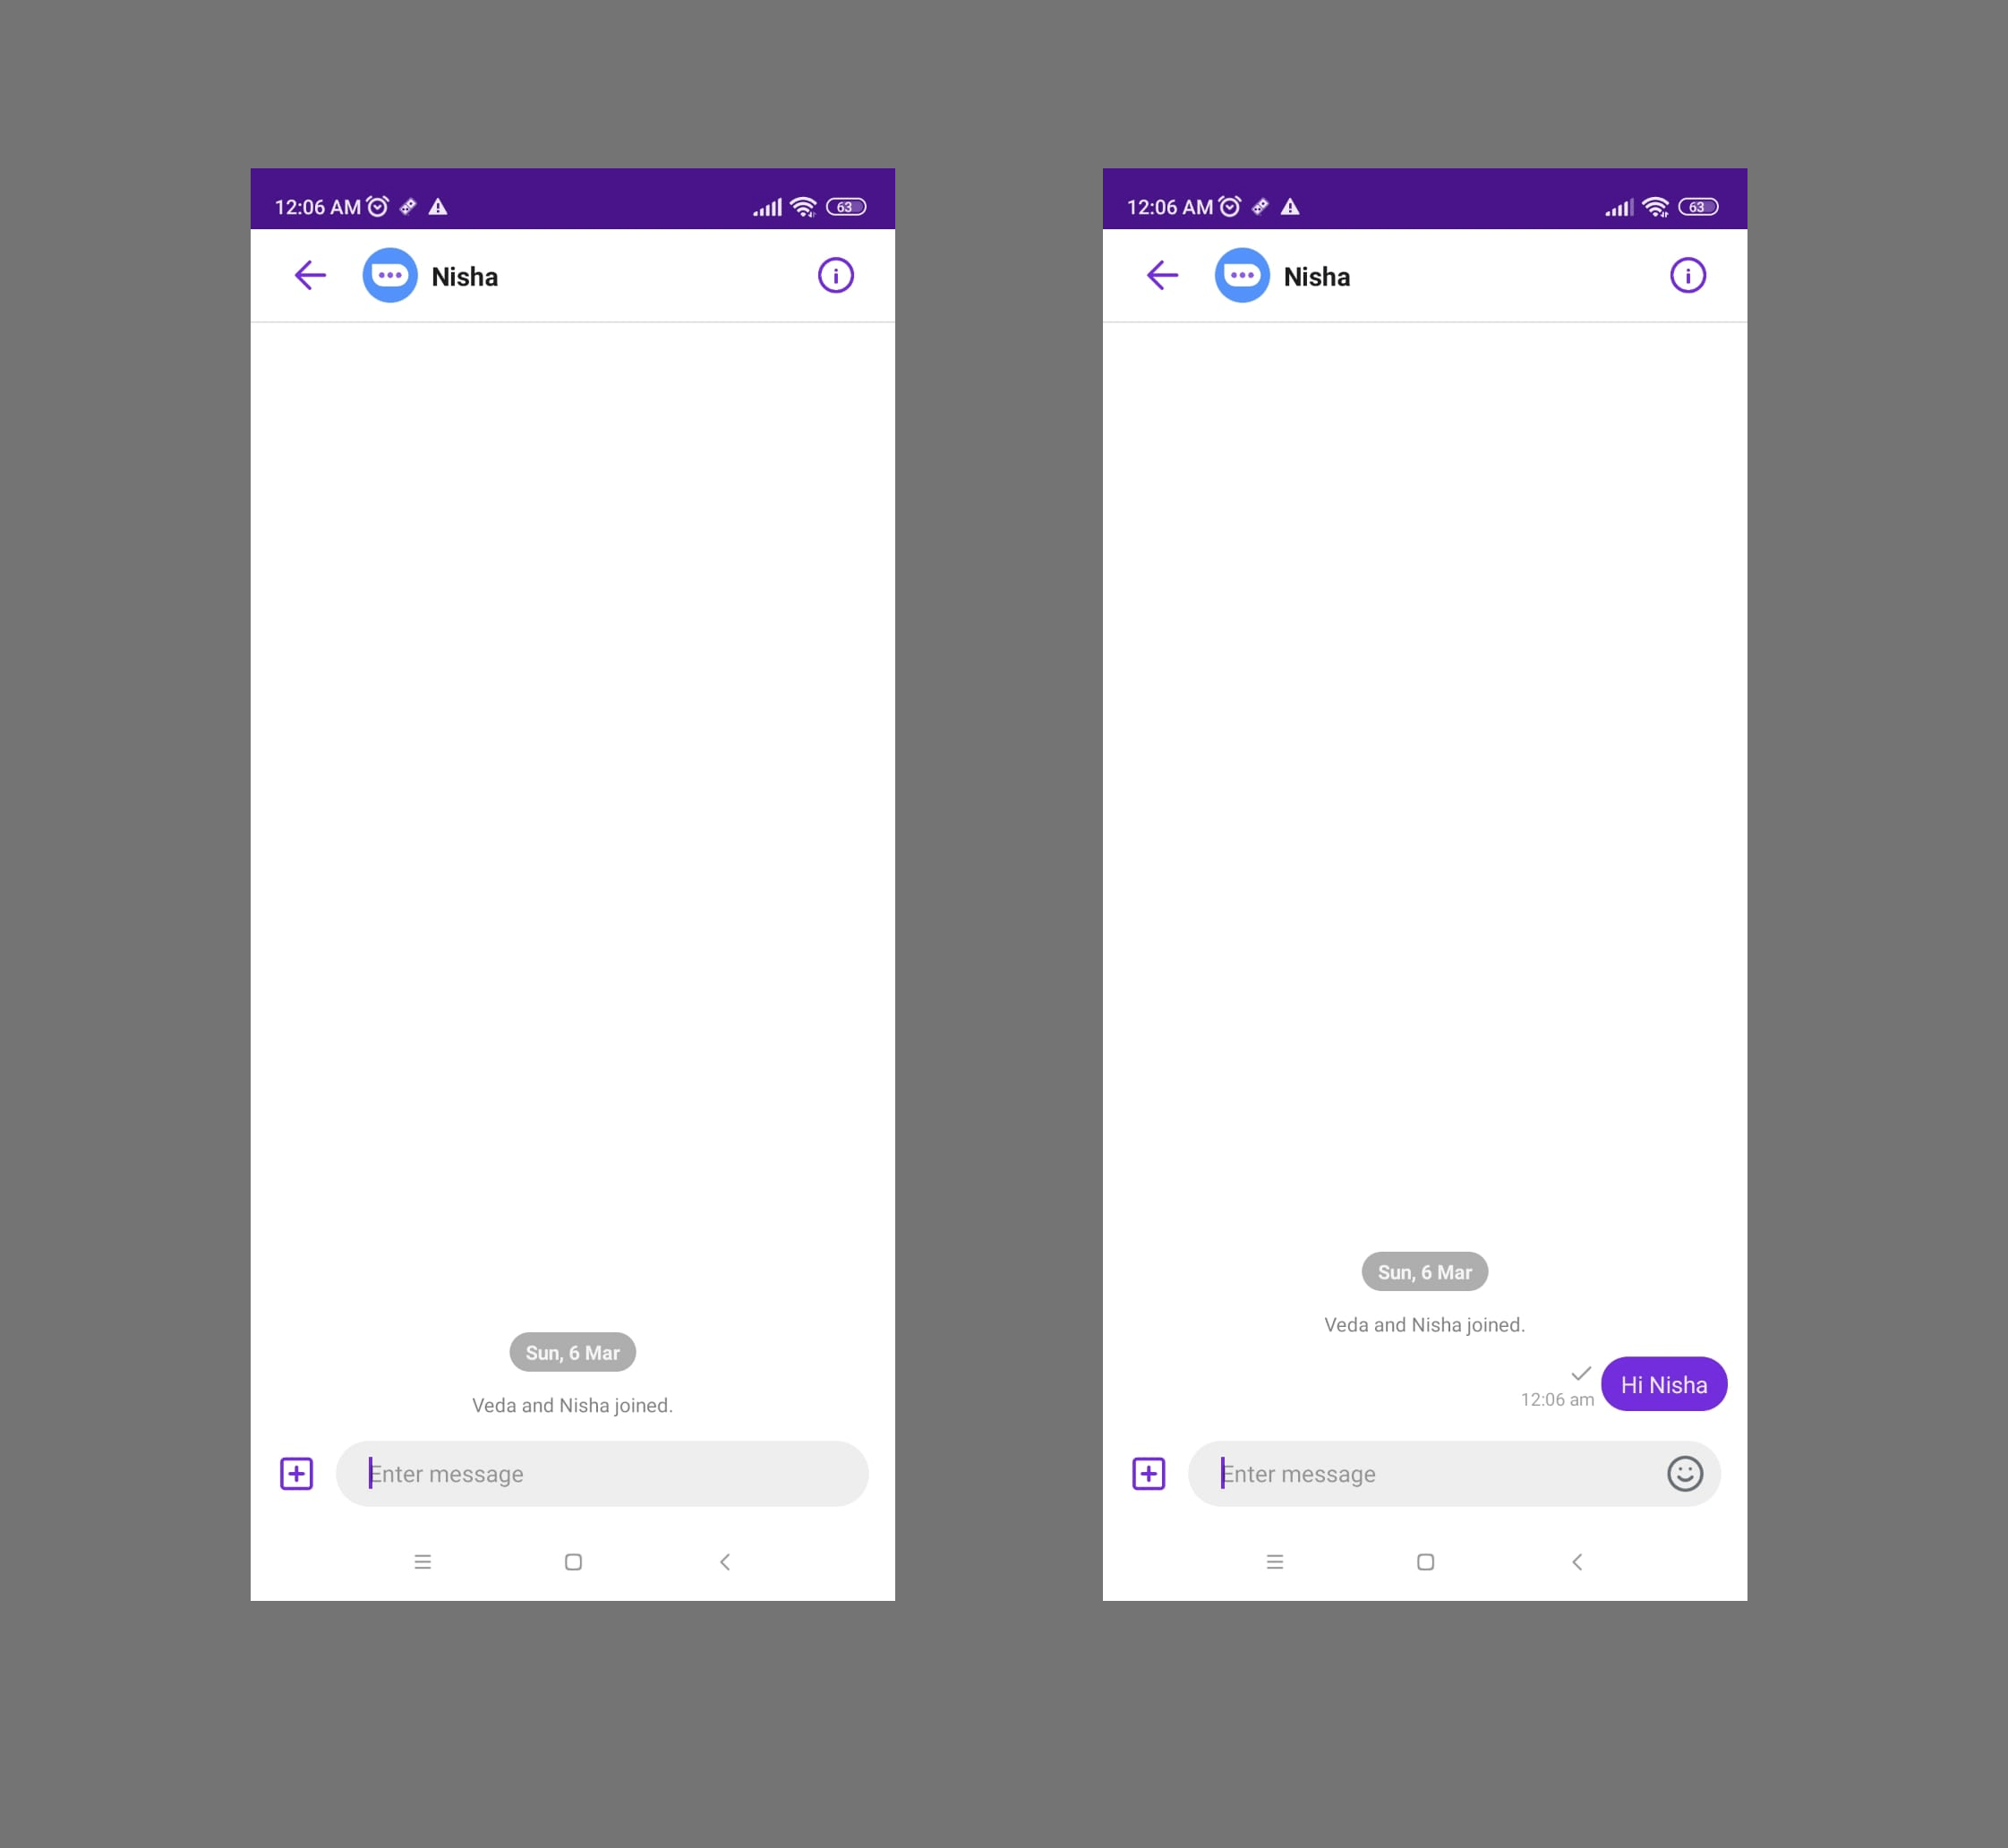
Awesome !! Everything is working smoothly with no issues and thereby I announce to you all that we are able to run the Sendbird chat app successfully and we can now send a few messages to test the chat feature. Quite an announcement right😅.
Now, lets start with my favorite part now which I can do blindfoldedly😉 the integration of Stipop stickers.
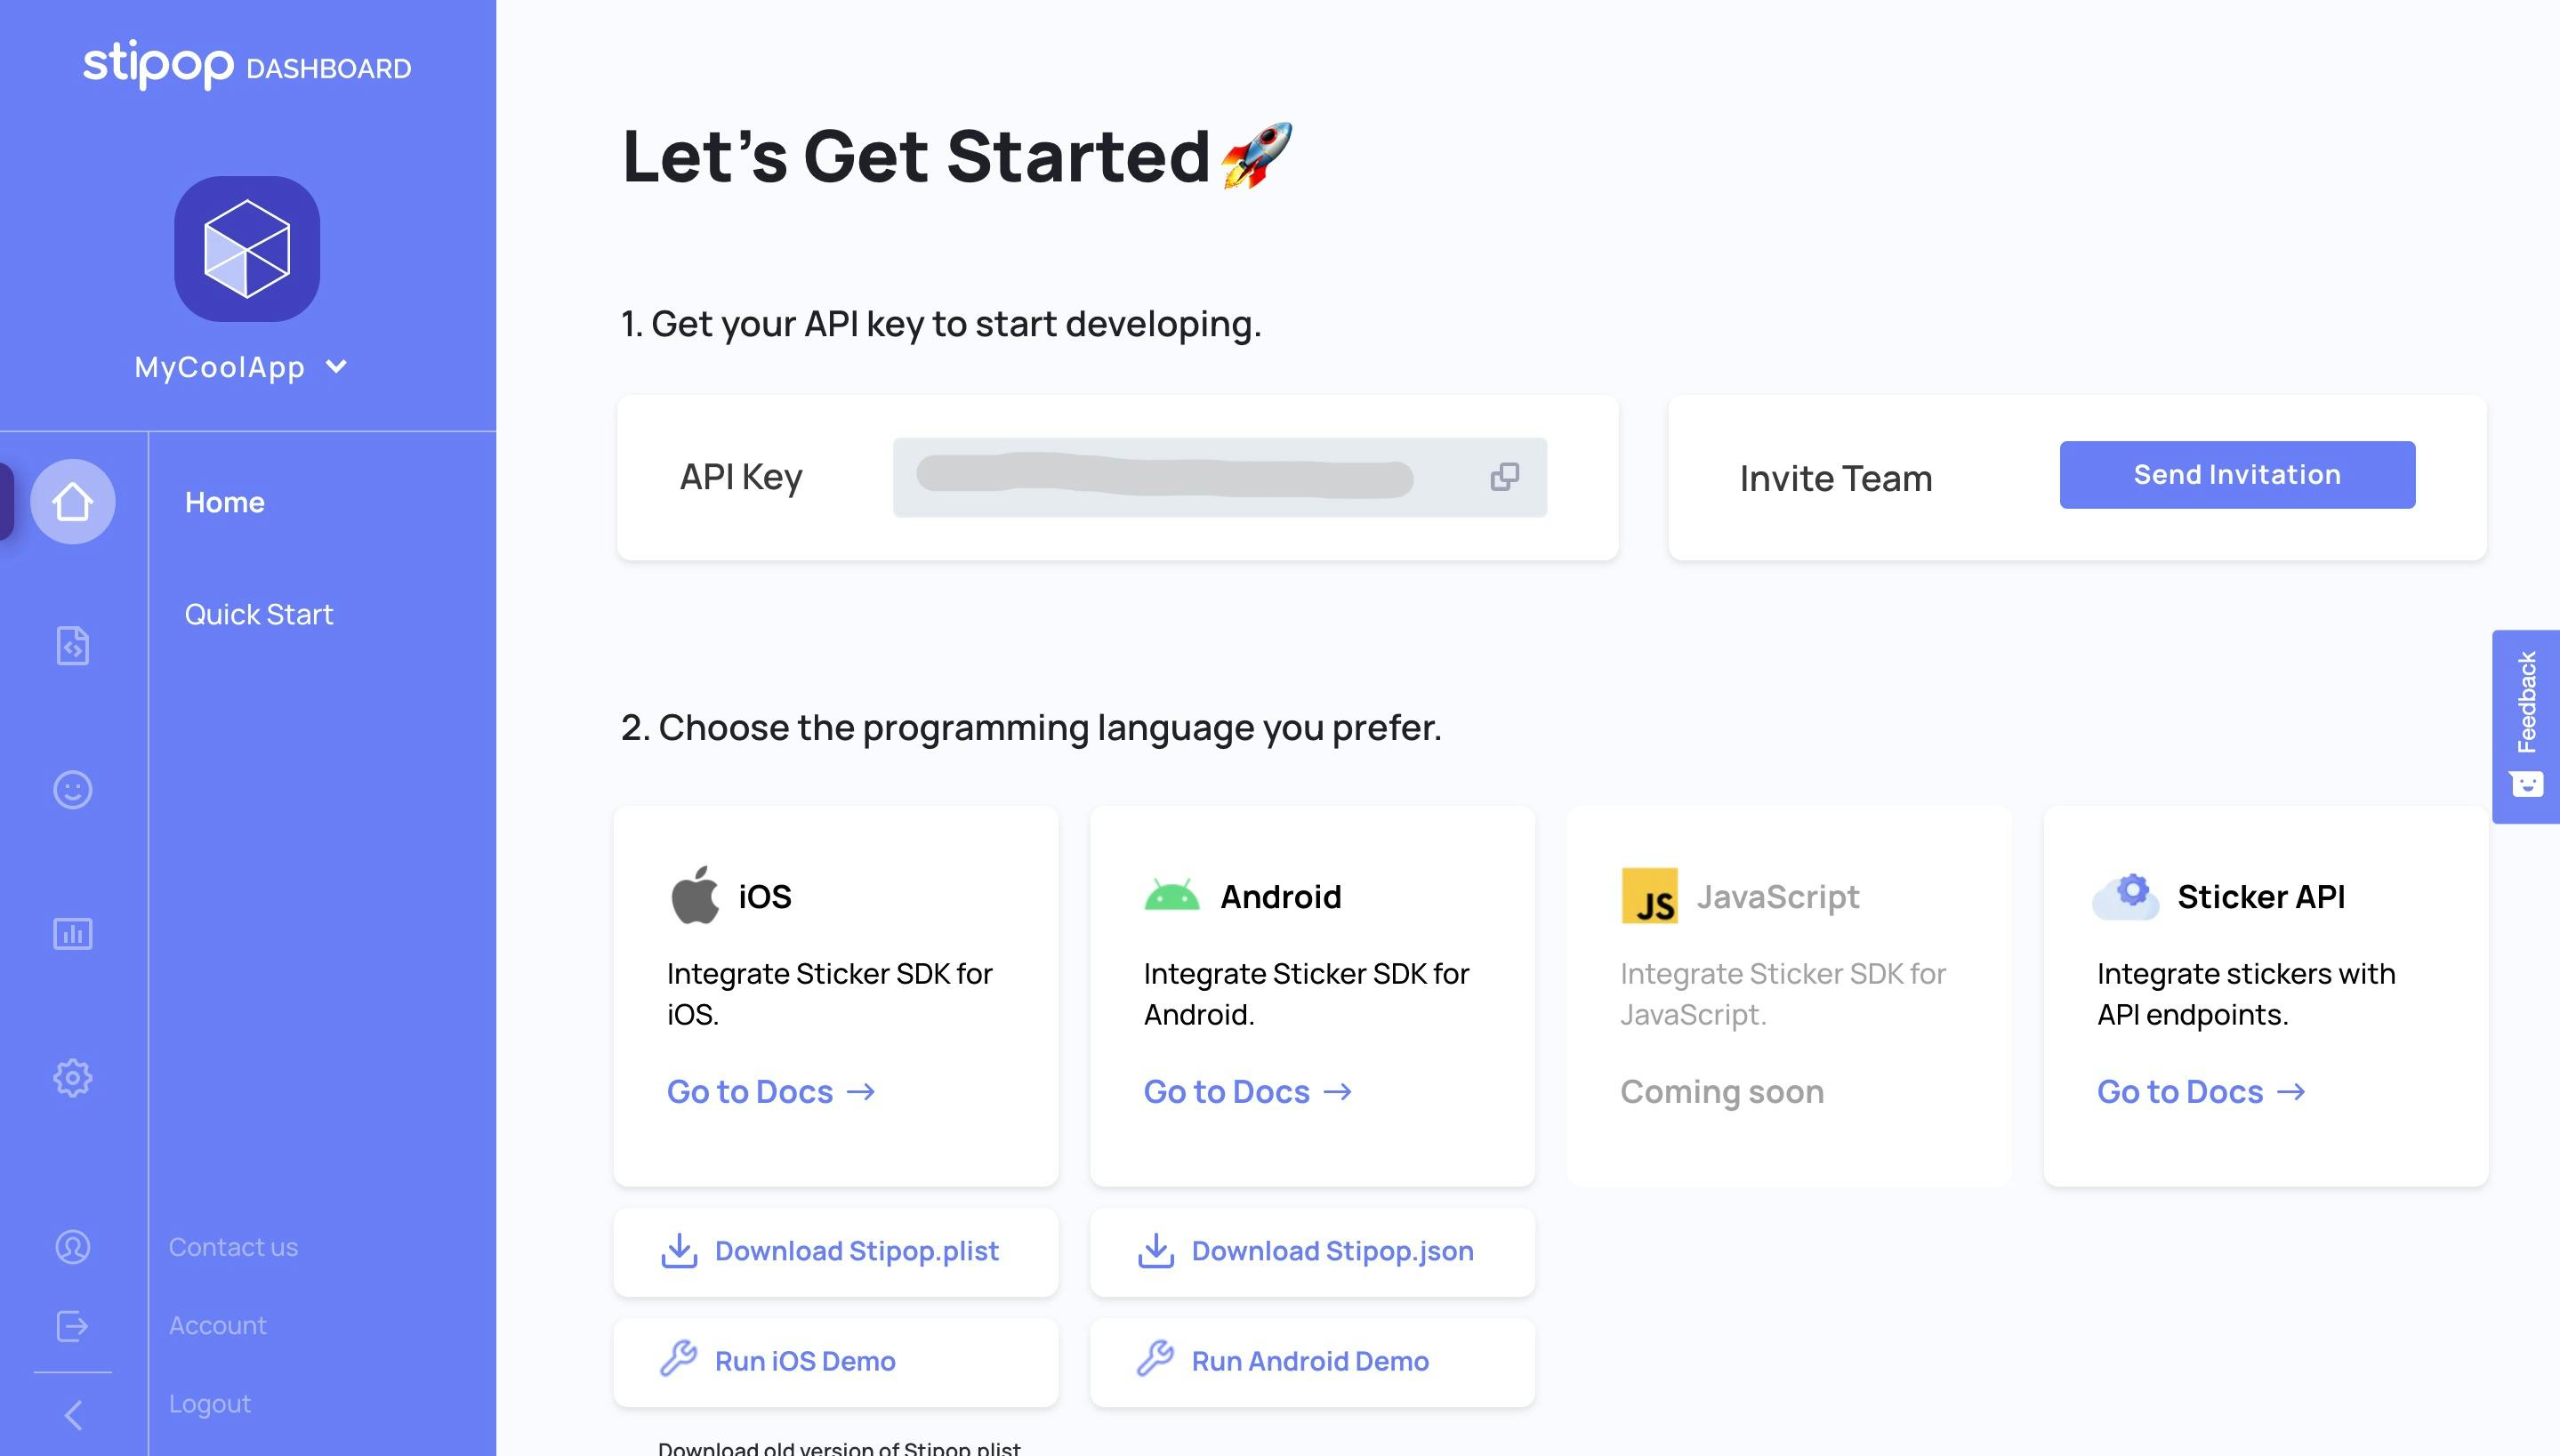
Get Stipop API Config
Like always we need the API Key for Stipop SDK integration to our existing Sendbird android chat app. Then, login to Stipop Dashboard and create a free account.
After successful sign-in, create an application with App Name, Region, etc.
You can now see the API Key. Please download the Stipop.json file under android settings as shown below.
Then paste the Stipop.json file inside the uikit-sample/src/main/assets folder and rebuild the project.
After the successful sync of the uikit-sample project, create a class GlobalApplication.java and add the configuration for the Stipop.
public class GlobalApplication extends BaseApplication {
   static GlobalApplication instance;

   @Override
   public void onCreate() {
       super.onCreate();
       instance = this;
       Stipop.Companion.configure(this, aBoolean -> null);
   }
}
Now we will navigate to the AndroidManifest.xml file and add the below code snippet to include the Application name and tools:replace attribute.
<application
   android:name=".GlobalApplication"
   android:allowBackup="true"
 android:icon="@mipmap/ic_launcher"
   android:label="@string/app_name"
   android:roundIcon="@mipmap/ic_launcher"
   android:supportsRtl="false"
   android:resizeableActivity="false"
   android:theme="@style/AppTheme"
   tools:replace="android:theme,android:allowBackup,android:roundIcon,android:supportsRtl"
   tools:ignore="GoogleAppIndexingWarning">
Please navigate to the CustomChannelFragment.java class and add the below snippets inside onCreateView to show the Stipop image(Smiley 😊) in the message input box layout.
StipopImageView stipopIV = new StipopImageView(view.getContext());
stipopIV.setId(View.generateViewId());
stipopIV.setImageResource(R.mipmap.ic_sticker_normal);
stipopIV.setMaxWidth(24);
stipopIV.setMaxHeight(24);

Stipop.Companion.connect(getActivity(), stipopIV, SendBird.getCurrentUser().getUserId(), "en", "US", this);

stipopIV.setOnClickListener((v) -> {
   Stipop.Companion.showKeyboard();
});
Now, we will require the Stipop image button to be added in the existing chat layout so instead of adding it into the XML layout, we will add it programmatically in the java class.
ConstraintLayout constraintLayout = view.findViewById(R.id.inputPanel);

assert constraintLayout != null;

constraintLayout.addView(stipopIV);

AppCompatEditText textField = view.findViewById(R.id.etInputText);

assert textField != null;

ConstraintSet constraintSet = new ConstraintSet();

constraintSet.clone(constraintLayout);
We still need to do a bit of resizing for the Stipop image button which upon click will display the sticker keyboard.
constraintSet.connect(stipopIV.getId(), ConstraintSet.RIGHT, R.id.etInputText, ConstraintSet.RIGHT, margin);
constraintSet.connect(stipopIV.getId(), ConstraintSet.TOP, R.id.etInputText, ConstraintSet.TOP, 0);
constraintSet.connect(stipopIV.getId(), ConstraintSet.BOTTOM, R.id.etInputText, ConstraintSet.BOTTOM, 0);

constraintSet.applyTo(constraintLayout);
After the frontend changes, we will implement the StipopDelegate interface in CustomChannelFragment and override the necessary Stipop methods.
public class CustomChannelFragment extends ChannelFragment implements StipopDelegate {
@Override
public boolean canDownload(@NonNull SPPackage spPackage) {
   return true;
}

@Override
public boolean onStickerSelected(@NonNull SPSticker spSticker) {
   final UserMessageParams userMessageParams = new UserMessageParams(spSticker.getStickerImg());
   userMessageParams.setCustomType("sticker");
   sendUserMessage(userMessageParams);
   return true;
}
The onStickerSelected() method will get the URL of the selected sticker by the user. Then it will append the sticker url in the userMessageParams object and will call the sendUserMessagse method.
We are DONE 🤩🤩
Finally we are all set to test the Stipop stickers in the Sendbird Android app. No finger crossing required because I know it will work😎😎.
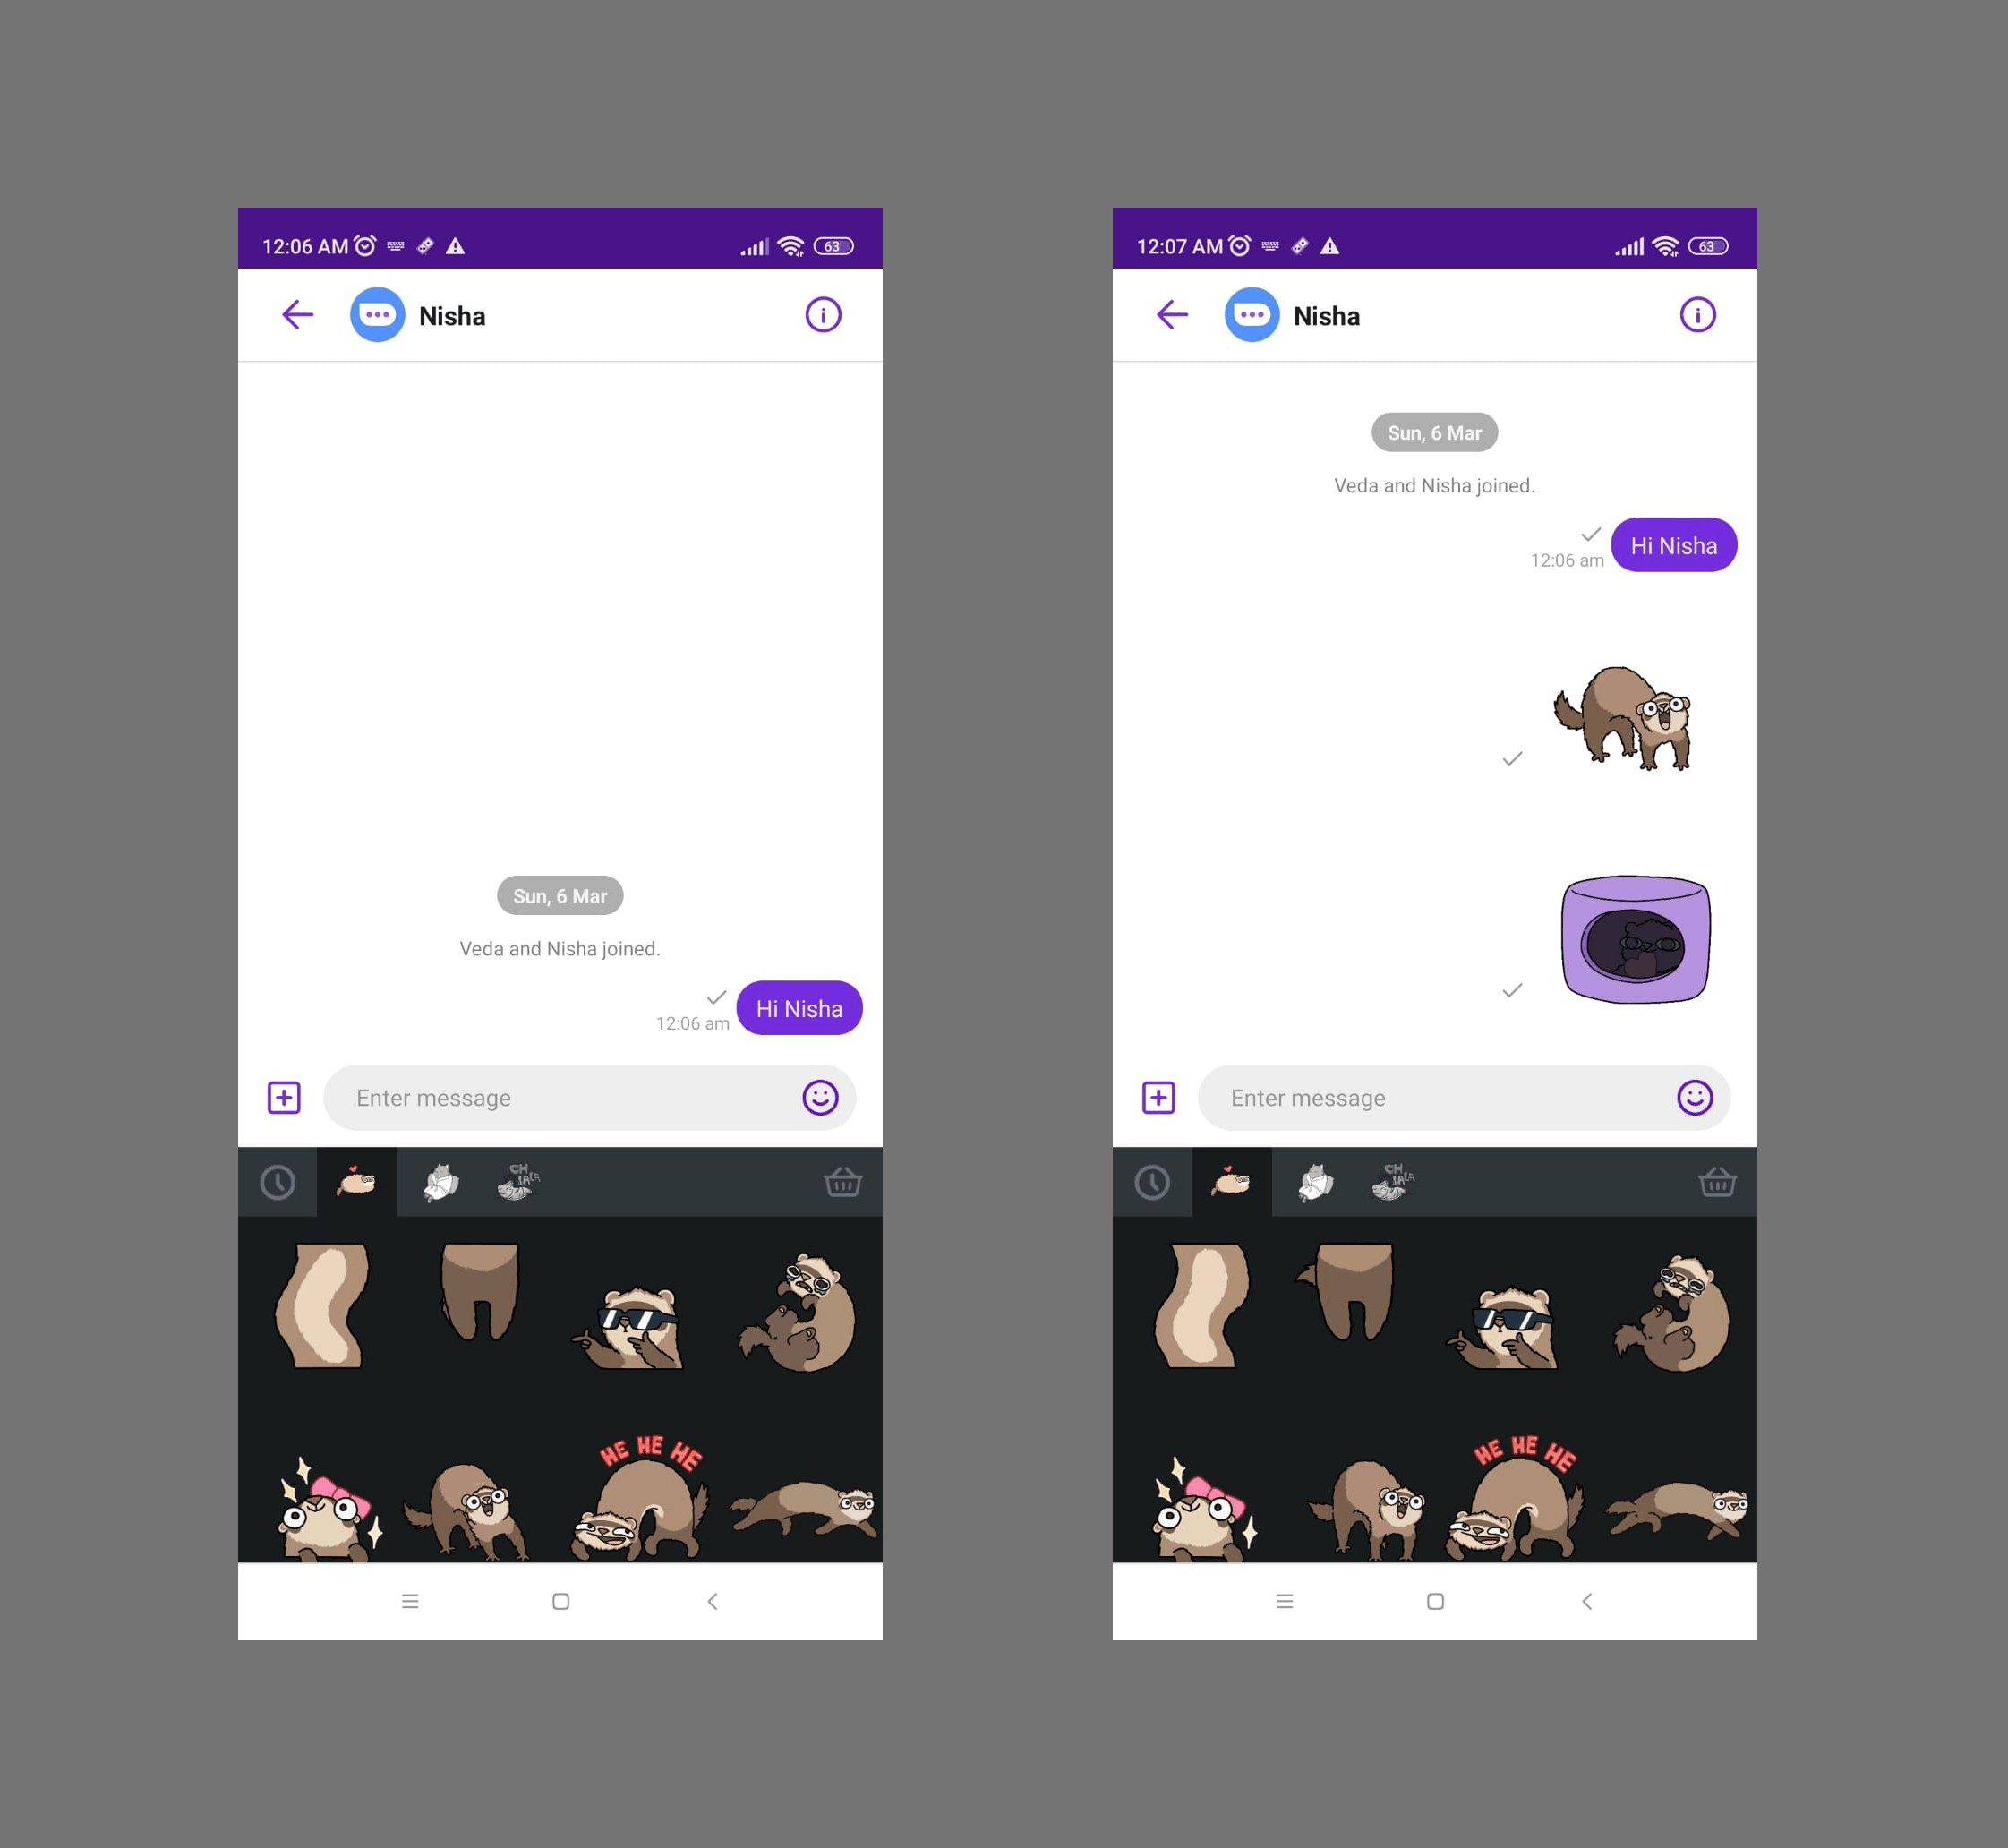
👊Bingo !! We have successfully intergrated Stipop stickers into the Sendbird Android chat app. You can also send a few sample stickers to explore more about the Stipop stickers. Integrating Stipop SDK is easy as it comes with an inbuilt Sticker Keyboard and Sticker Search option, which make it a great addition for any video or image editing app. You should definitely try the Stipop SDK/API if you are building a frontend app that uses stickers.
Thanks for reading everyone and wishing everyone good health and safe days ahead .
Happy Coding everyone🎯🎯.
🎅🏼 About Vedant
Vedant Jha is a full-stack developer and a technical writer at Stipop. Have a question about this article? Contact Vedant here.