

Build an engaging iOS chat app with CometChat and Stipop
If you are looking for the tools to build an iOS chat app, look no further! I will show you how to quickly build one with CometChat and Stipop.

Integrate stickers into your app with Stipop API and SDK.
Hello everyone 👋
My name is Vedant, and today I am going to show you how to quickly build an iOS chat app using CometChat iOS SDK. If you are not yet familiar with CometChat, it is a ready-made chat solution that also offers a comprehensive list of extensions to make chats easy to use.
They have recently partnered with Stipop, so now any CometChat user can integrate free Stipop stickers into their apps. Today we are going to give it a try and add Stipop extension to our future CometChat app for an ultimate chat experience.
But let’s start building our chat app first!
Prerequisite
- XCode 12 and iOS 11 or higher
- Free account on the CometChat Dashboard
Getting started with CometChat
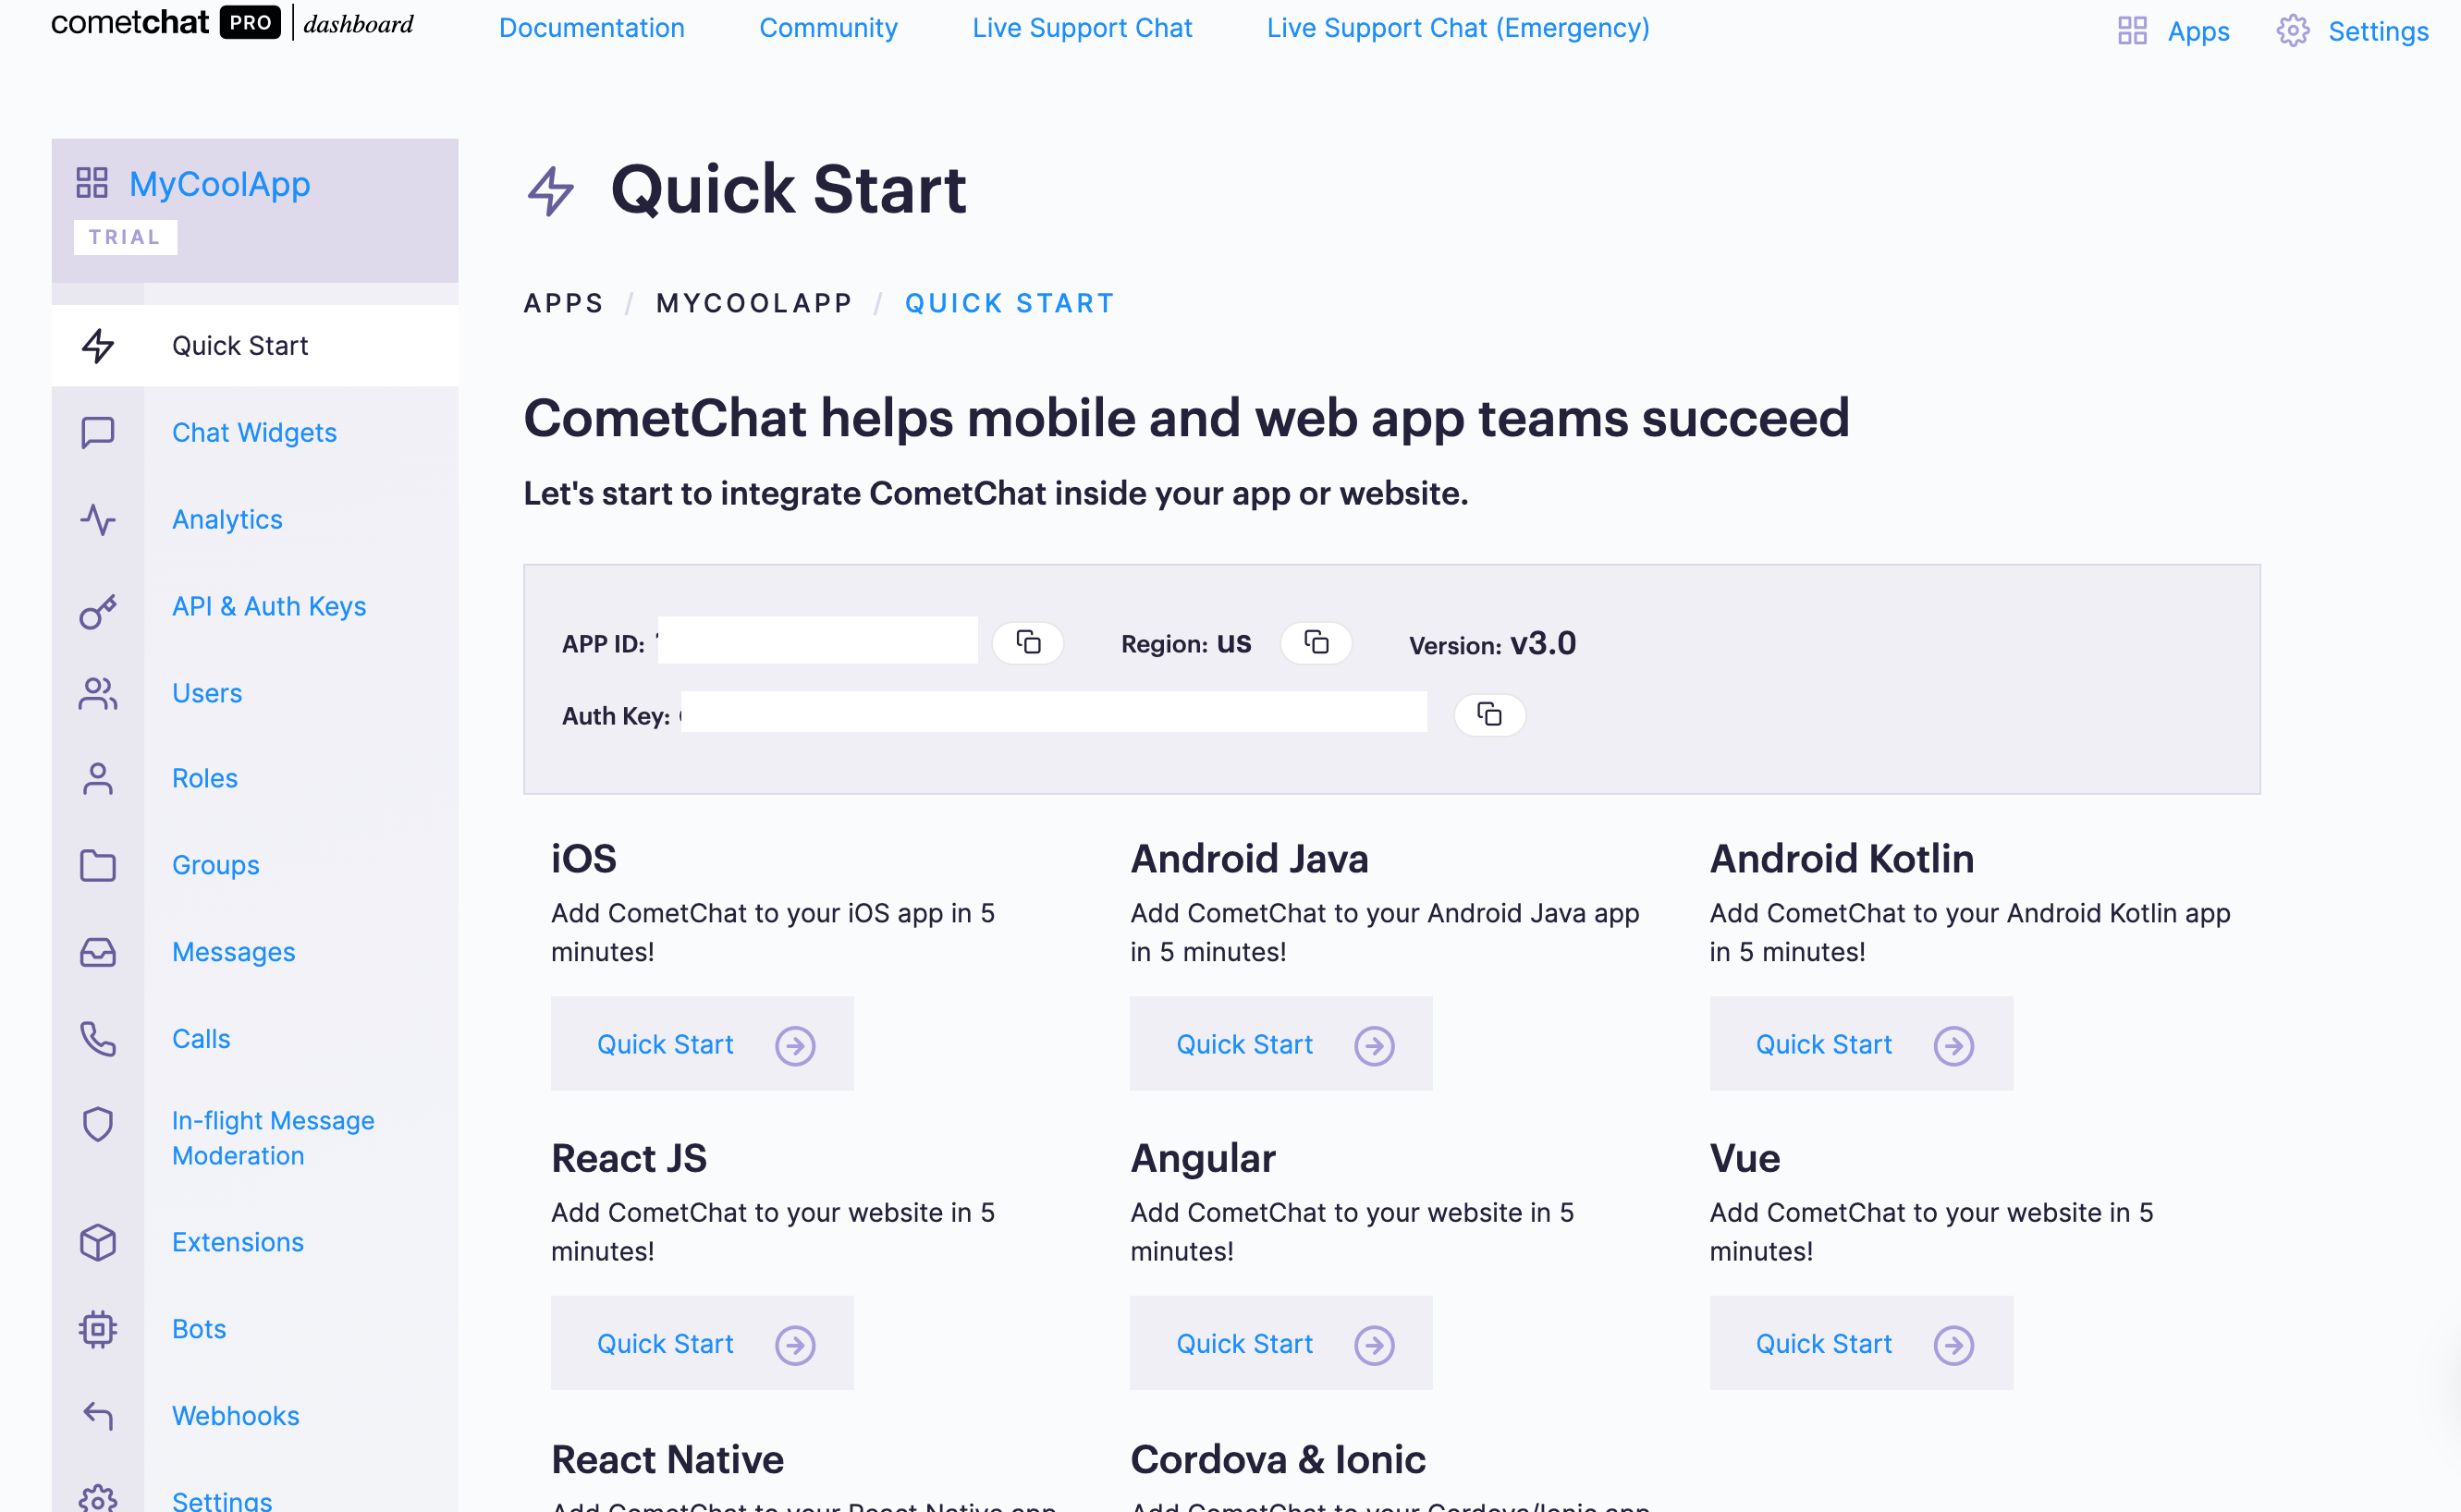
We are going to start with creating a new app on CometChat dashboard. To do that, click add a new app and choose v3 as the version.
Once done, we land on the dashboard itself, where we can see all the necessary confidential API keys. Keep your API keys secure, and if they ever get compromised, regenerate new ones.
Installation of CometChat SDK
Create a new iOS swift project in XCode. I recommend installing the CometChat SDK via CocoaPods. To install/update the CocoaPods, refer to this link.
Now we go to the iOS project directory in the terminal and create a Podfile. To initialize the file, we use this command:
pod init
We will now include the CometChatPro of the latest version in the pod file.
platform :ios, '11.0'
use_frameworks!

target 'CometChatStipop' do
  pod 'CometChatPro', '3.0.3'
end
Now run the following commands in the terminal to install and update the latest version of CometChat SDK.
pod install
pod update CometChatPro
Initialize CometChat SDK
Create a class named Constants, and store the APP ID, AUTH KEY, and the region as static values.
class Constants {

    static var appId = "XXXXXXXXXXX"
    static var authKey = "XXXXXXXXXXXXXXXXXXXXXXXXXXXXXXXXXXXXX"
    static var region = "xx"

}
It is a good practice to initialize the Cometchat instance in the didFinishLaunchingWithOptions of AppDelegate class, which is the root object of any iOS application. CometChat.init() method is responsible for initialization with the appID(use it from the Constants) as an input parameter.
func application(_ application: UIApplication, didFinishLaunchingWithOptions launchOptions: [UIApplication.LaunchOptionsKey: Any]?) -> Bool {

let myAppSettings = AppSettings.AppSettingsBuilder().subscribePresenceForAllUsers().setRegion(region: region).build()

  CometChat.init(appId: appId ,appSettings: myAppSettings,onSuccess: { (isSuccess) in
            if (isSuccess) {
                print("CometChat Pro SDK intialise successfully.")
            }
        }) { (error) in
                print("CometChat Pro SDK failed intialise with error: \(error.errorDescription)")
        }
        return true
    }
Sign in and Sign up
After successful initialization, we need to add a sign-up page with the input field for the user name, and a sign-in page with uid as an input field according to your choice of UI design. We can create a user with a unique uid either programmatically or on the Cometchat Dashboard.
Create a new User:
let newUser : User = User(uid: "uid01", name: "Vedant") // Replace with your uid and the name for the user to be created.

let authKey = "AUTH_KEY" // Replace with your Auth Key.


CometChat.createUser(user: newUser, apiKey: apiKey, onSuccess: { (User) in
      print("User created successfully. \(User.stringValue())")
  }) { (error) in
     print("The error is \(String(describing: error?.description))")
}
Sign In User using UID:
let uid    = "uid01"
let authKey = "YOUR_AUTH_KEY"

if CometChat.getLoggedInUser() == nil {

    CometChat.login(UID: uid, apiKey: apiKey, onSuccess: { (user) in

      print("Login successful : " + user.stringValue())

    }) { (error) in

      print("Login failed with error: " + error.errorDescription);

    }

}
CometChat UI Kit
Now let’s move to the user interface of our chat app. We have two options here: either to build the UI from scratch or use the readymade custom iOS CometChat UI Kit. To make it quicker, in this article, we will go with the UI Kit.
First, clone the CometChat UI Kit Github repo.
git clone https://github.com/cometchat-pro/ios-swift-chat-ui-kit.git
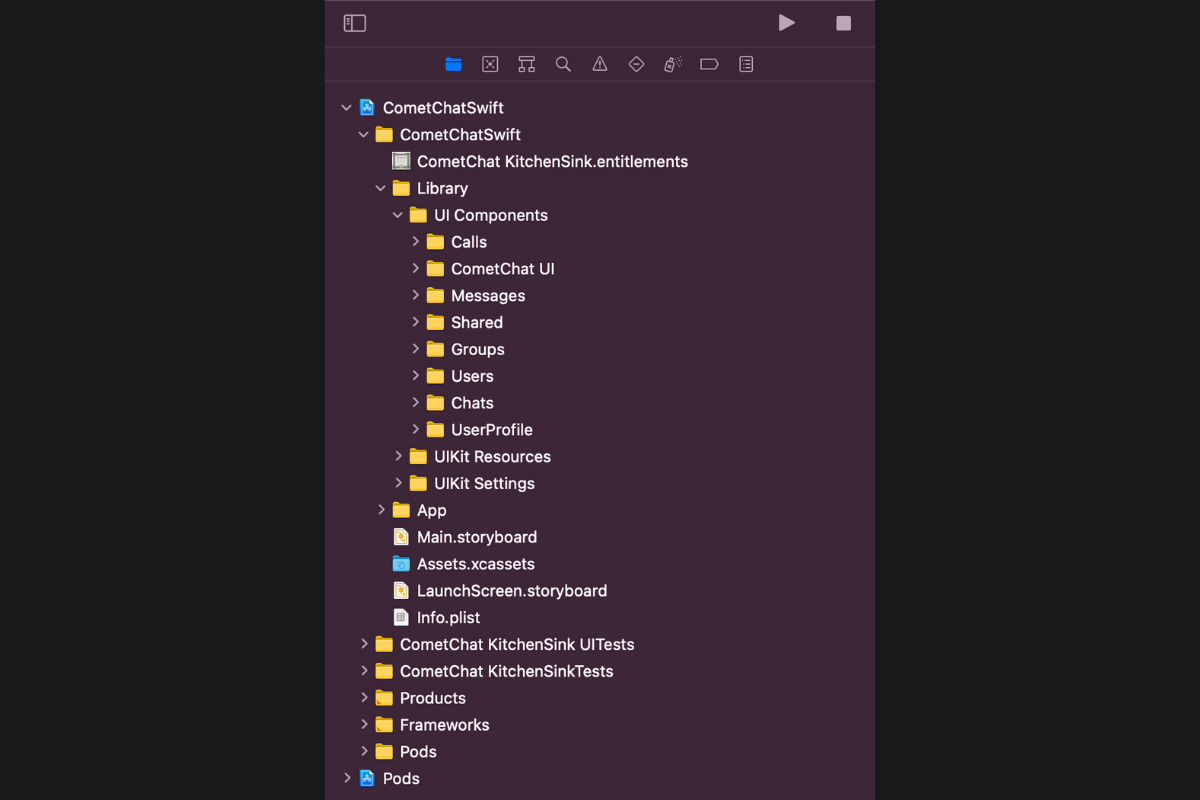
After the successful clone operation, we move the Library project inside the iOS chat project folder. After the successful migration, all folders will be in yellow and your project file structure will look similar to this:
The UI Kit provides CometChatUI class(subclass of UITabbarController) which is responsible for launching the fully operational chat screen. We just need to call it asynchronously on the main thread. Please refer to the below code snippet to use the CometChatUI class.
func didlaunchButtonPressed(_ sender: UIButton, segmentControl: UISegmentedControl) {
        let cometChatUI = CometChatUI()
        if segmentControl.selectedSegmentIndex == 0 {
            cometChatUI.setup(withStyle: .fullScreen)
        } else {
            cometChatUI.setup(withStyle: .popover)
        }
        self.present(cometChatUI, animated: true, completion: nil)
    }
In the Library module, you will be able to see the detailed implementation for the Chat functionality. CometChatConversationList contains the implementation for fetching the list of all conversations. A similar implementation can be found inside the UI Components package.
👉 Please note that the CometChat SDK also provides the feature of VoIP calling to our chat application. You can explore more here.
Now we are ready to run our chat application. Make sure to provide the necessary permissions at runtime to run the app.
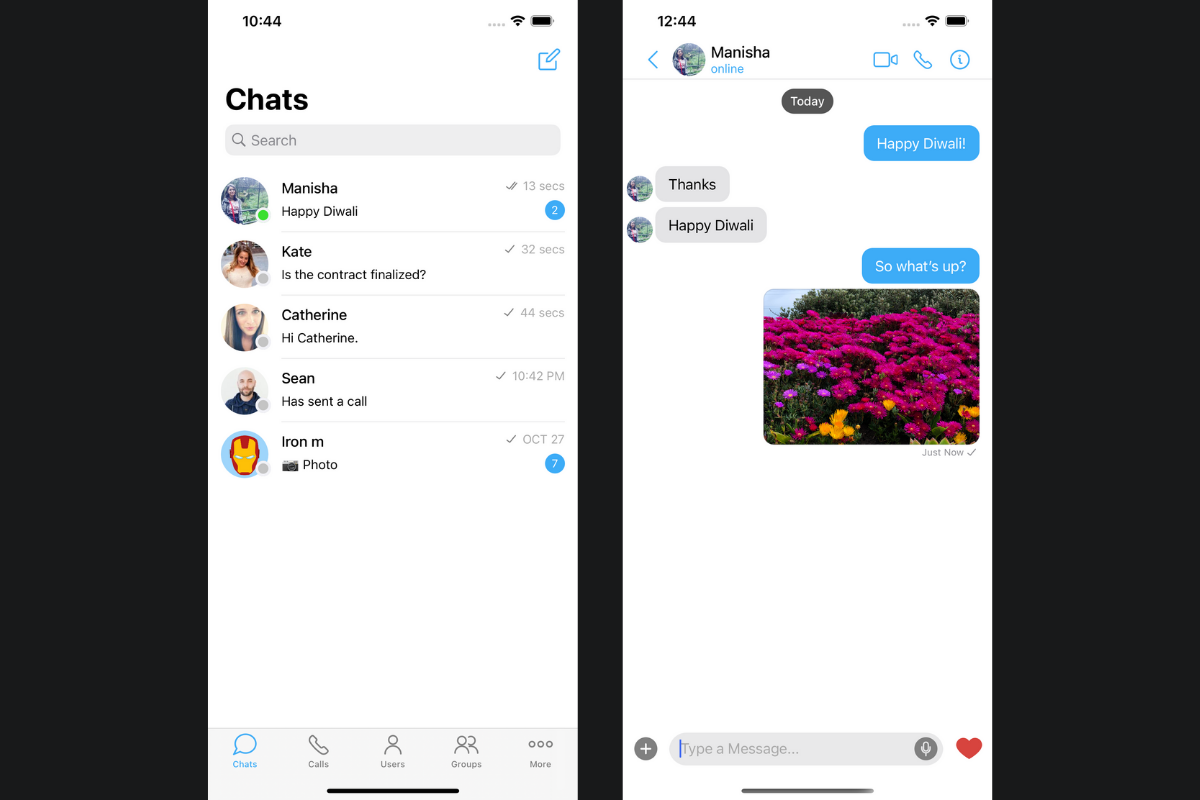
Consider our iOS chat application done!
It has in-built bottom bar with tabs for chat, call, groups, etc. The only thing that is missing is stickers. And this is what we are going to take care of next.
Integrating Stickers with Stipop SDK
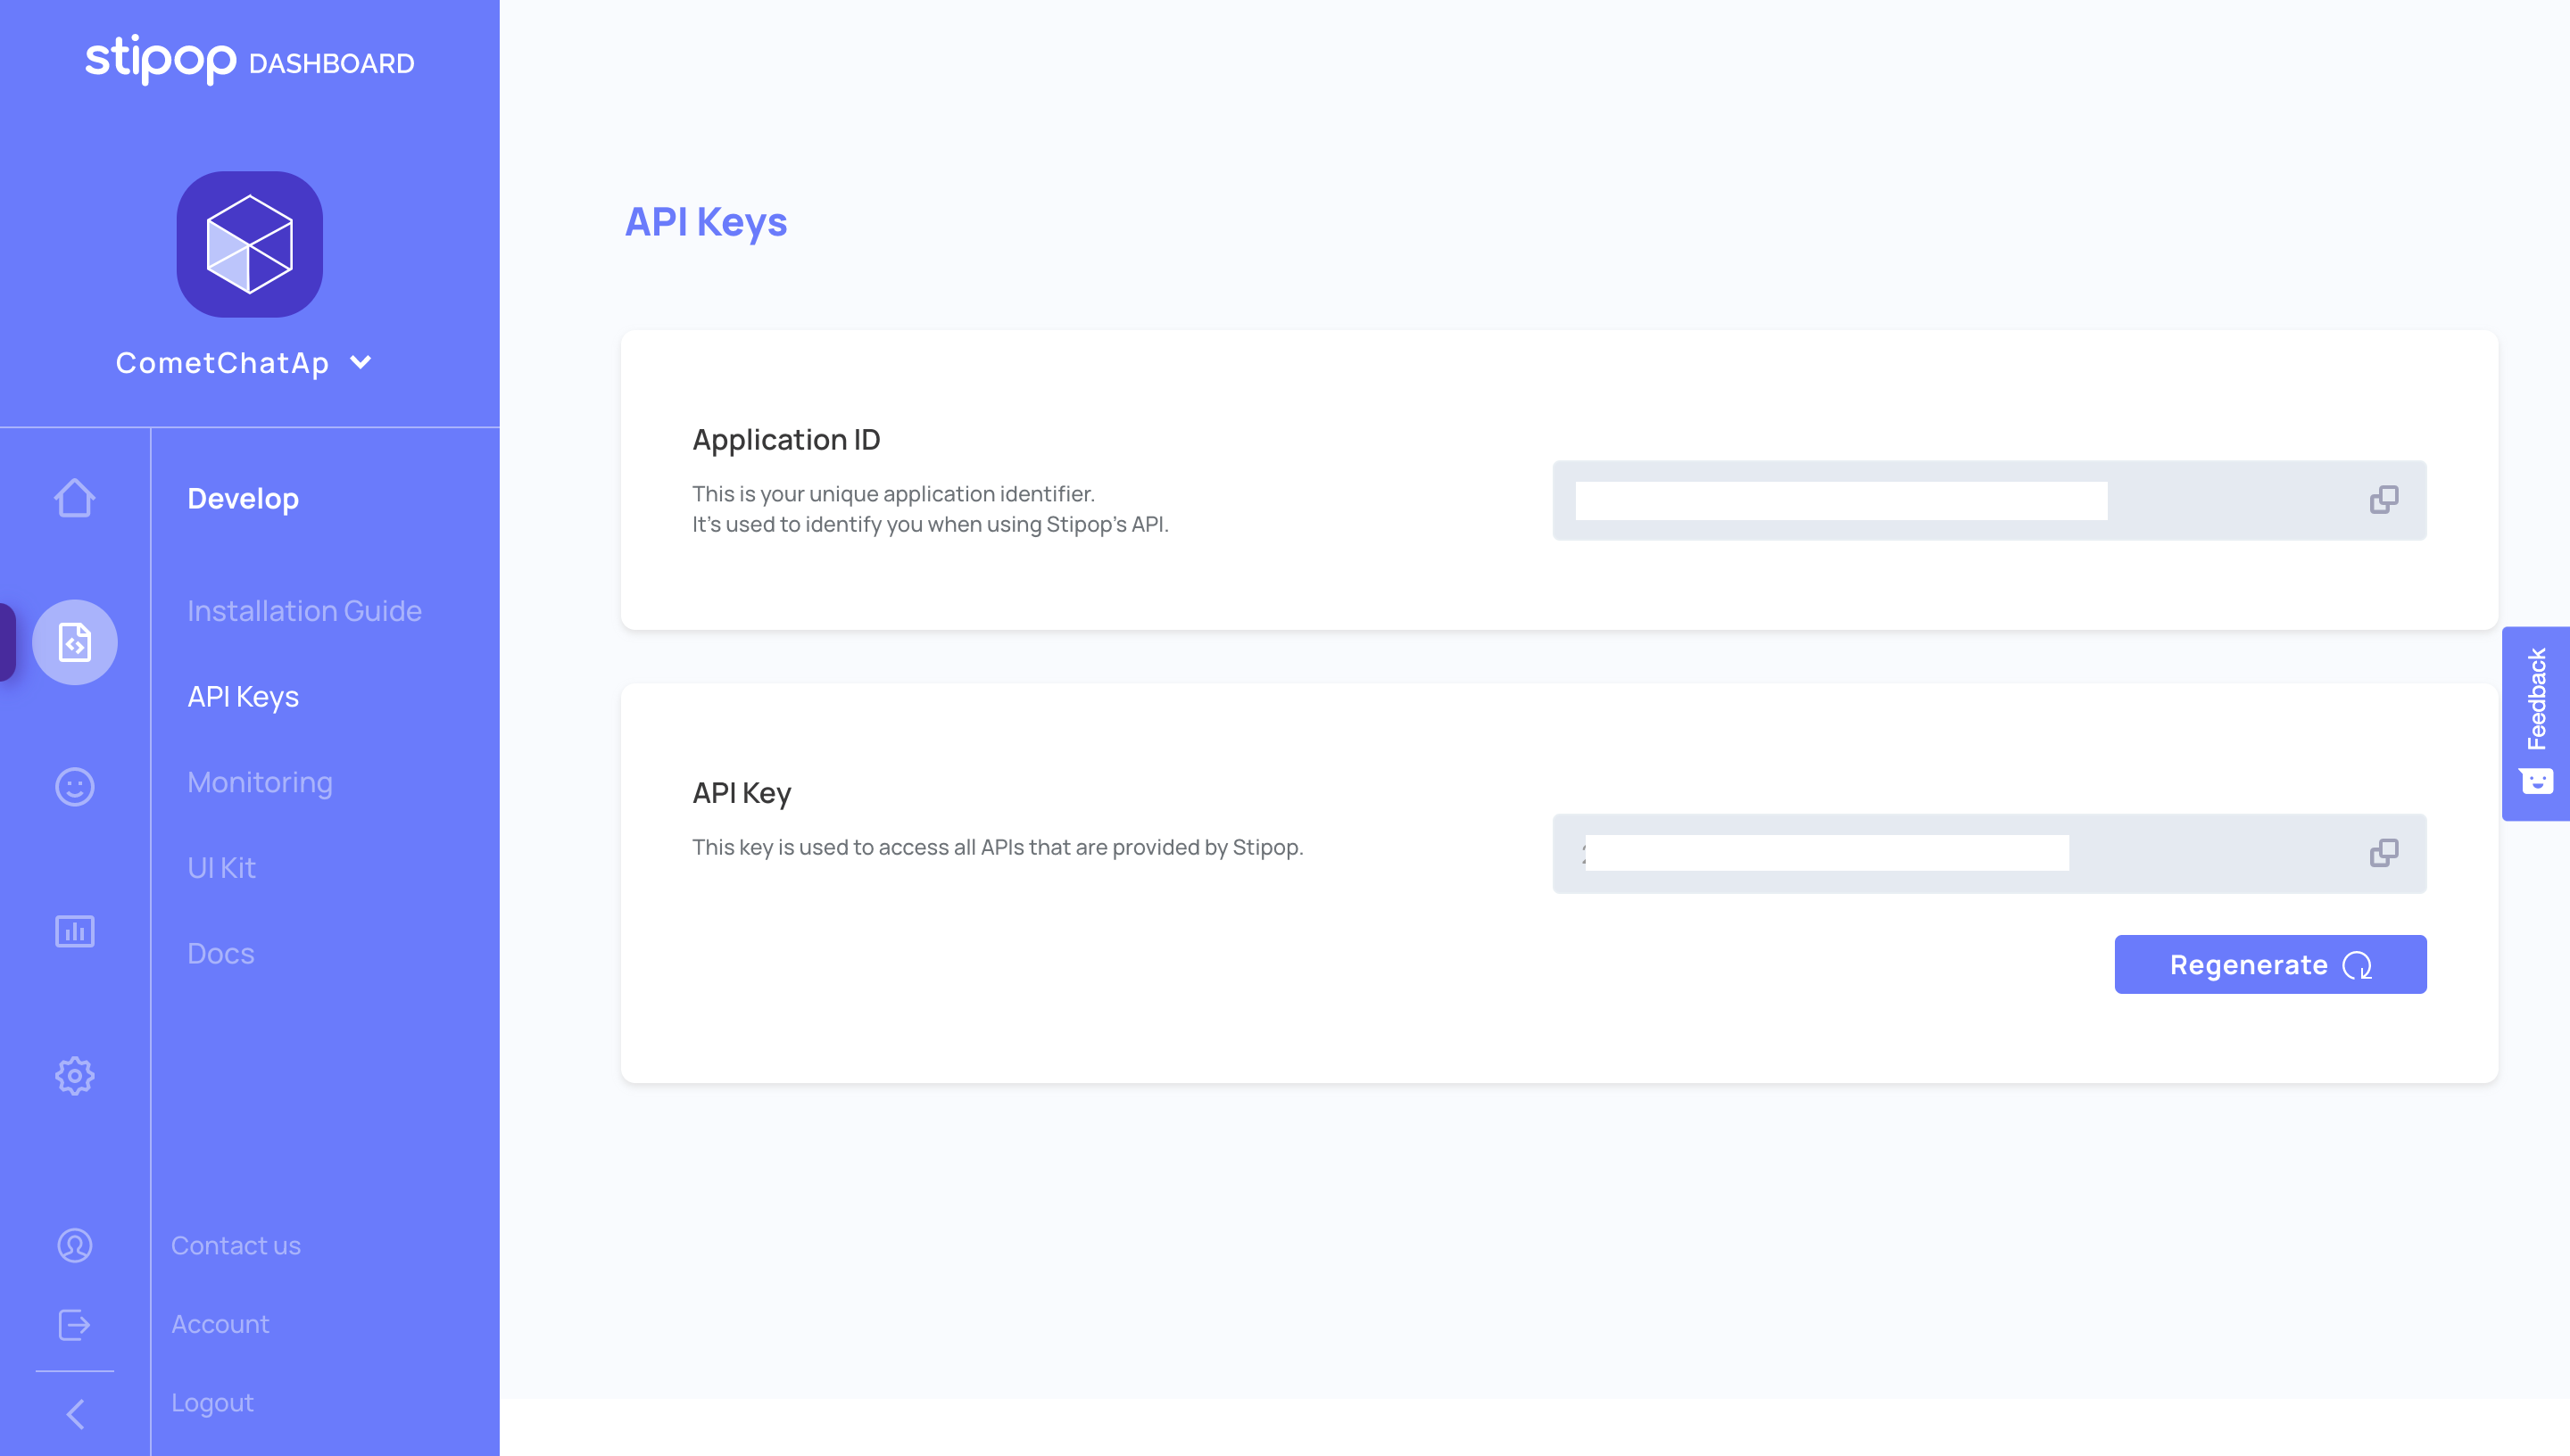
We will start with creating a free account on Stipop Dashboard. Once done, go to Develop and click API keys to access your Application ID and API Key.
We will need it a bit later, but for now, we are going back to the CometChat Dashboard. On the left, select the Extensions, and enable Stipop.
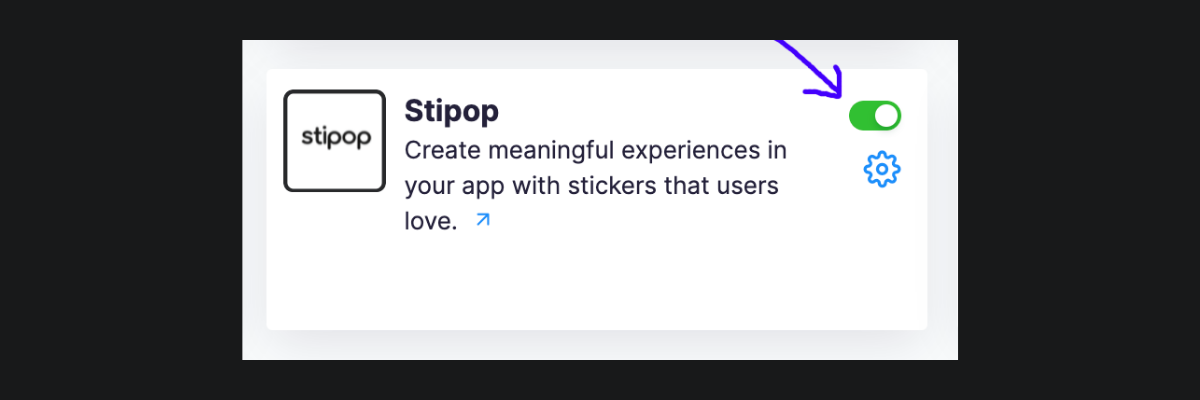
As the next step, click the Settings icon near Stipop and enter the Application ID and API Key, which you got on the Stipop Dashboard, and save the form.
Stipop API calls
The Stipop plugin offers two types of APIs to use the Stickers data in the iOS CometChat project:
- List of currently trending stickers
- Sticker search based on search queries
For our app, we will make an API call using the CometChat instance and fetch all the trending stickers. CometChat.callExtension() is the method provided by the SDK to make Stipop extension API calls.
Now let’s go to the Library / UI Components / Messages / Extensions / Sticker Keyboard / CometChatStickerKeyboard.swift class, and add the below method to fetch Stipop Trending stickers.
private func fetchStipopStickers() {
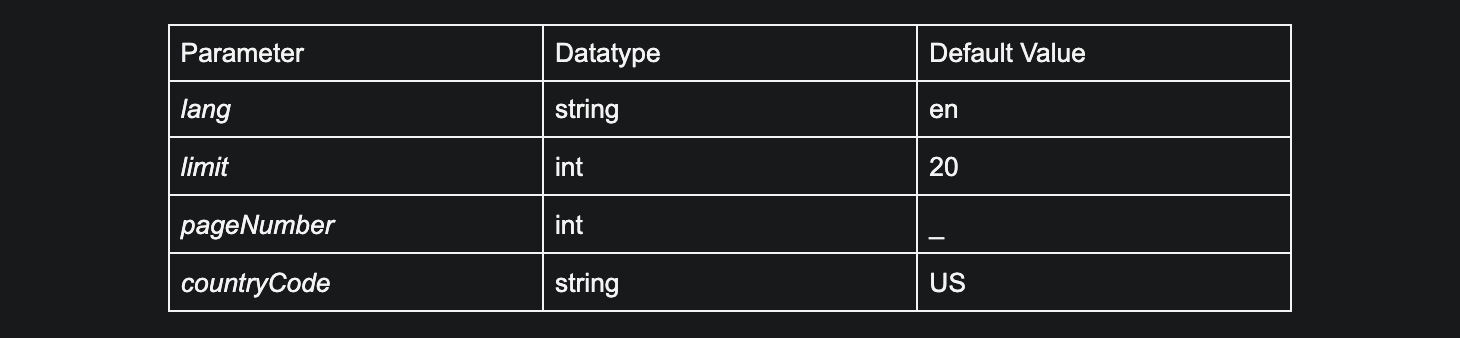
CometChat.callExtension(slug: "stickers-stipop", type: .get, endPoint: "v1/trending?lang=en"+"&limit=20"+"&pageNumber=1"+"&countryCode=us", body: nil, onSuccess: { (response) in
if let response = response {
self.parseStickersSet(forData: response) { (result) in
result.forEach { (arg0) in
let (key, value) = arg0
let stickerSet = CometChatStickerSet(order: value.first?.setOrder ?? 0, id: value.first?.setID ?? "", thumbnail: value.first?.url ?? "", name: value.first?.setName ?? "", stickers: value)
self.stickerSet.append(stickerSet)
}
self.stickerSet = self.stickerSet.sorted {$0.order ?? 0 < $1.order ?? 0}
self.stickersForPreview = self.allstickers.filter({ ($0.setID == self.stickerSet.first?.id)})
DispatchQueue.main.async {
self.activityIndicator?.stopAnimating()
self.stickersCollectionView.backgroundView?.isHidden = true
self.stickersCollectionView.reloadData()
self.stickerSetCollectionVew.reloadData()
}
}
}
}) { (error) in
DispatchQueue.main.async {
if let error = error {
CometChatSnackBoard.showErrorMessage(for: error)
}}
print("Error with Stipop fetching stickers: \(String(describing: error?.errorDescription))")
}
}
If built successfully, you should be able to see the Stipop trending stickers in the CometChat sticker panel right as in the image below:

We did it!
We have successfully integrated trending stickers with the Stipop sticker SDK into our CometChat iOS app. If you would like to implement the sticker search into your CometChat app, refer to this page.
Thanks for stopping by and happy building! 😎
⭐️ About Vedant
Vedant Jha is a full-stack developer and a technical writer at Stipop. Have a question about the article? Contact Vedant here.


