Let's begin yet another article with a funny joke: Programmer's son asks his father: Dad, why does the Sun rise on the east and set on the west? Father: It works? Then don't touch it 😁😜
So, in the previous blog, we discussed IMG.LY which is a powerful SDK to edit photos and videos effectively. Also, it provides the PhotoEditor, VideoEditor and CreativeEditor cross-platform SDKs and supports almost all the mobile and web tech stacks. Not to mention it’s a client-side SDK for a faster & easy integration which is backed by the Node.js server. As you have guessed, we will try to integrate Stipop stickers with the IMG.LY iOS SDK in this article🙌.
Prerequisites👇
IMG.LY VideoEditor SDK
XCode 12+
iOS 11 or higher
Stipop iOS SDK 0.3.0+
Let’s Code🤓
First we will start with the development of the iOS video editor app using IMG.LY’s videoEditor SDK. Good thing ,instead of creating the iOS app from scratch, we will clone the Swift example of the IMG.LY videoEditor SDK and then we will integrate it with Stipop stickers .
git clone https://github.com/imgly/vesdk-ios-examples.git
Once you are done with this please navigate to the Xcode and open the vesdk-ios-examples/Examples/SwiftExample folder. Then, Sync and rebuild the project & finally attach a Simulator (preferably iPhone 12).
Now, like last time let’s discuss some of the important methods that are used for the VideoEditor SDK-
presentVideoEditViewController():
private func presentVideoEditViewController() {
   guard let url = Bundle.main.url(forResource: "Skater", withExtension: "mp4") else {
     return
   }

   let video = Video(url: url)
   present(createVideoEditViewController(with: video), animated: true, completion: nil)
 }
The presentVideoEditViewController() takes the Video file as input and passes it to the editor in the next page. Below method createVideoEditViewController(), accepts the video file and open the IMGLY integrated controller view for editing the video.
createVideoEditViewController():
private func createVideoEditViewController(with video: Video, and photoEditModel: PhotoEditModel = PhotoEditModel()) -> VideoEditViewController {
   let configuration = buildConfiguration()

   // Create a video edit view controller
   let videoEditViewController = VideoEditViewController(videoAsset: video, configuration: configuration, photoEditModel: photoEditModel)
   videoEditViewController.modalPresentationStyle = .fullScreen
   videoEditViewController.delegate = self
   return videoEditViewController
 }
In this article, we are using the video from gallery or assets however you can do the same through IMG.LY VideoEditor SDK which has the option to capture video directly from camera .Later on you can also edit them as well.
presentCameraViewController():
private func presentCameraViewController() {
   let configuration = buildConfiguration()
   let cameraViewController = CameraViewController(configuration: configuration)
   cameraViewController.modalPresentationStyle = .fullScreen
   cameraViewController.locationAccessRequestClosure = { locationManager in
     locationManager.requestWhenInUseAuthorization()
   }
   cameraViewController.cancelBlock = {
     self.dismiss(animated: true, completion: nil)
   }
   cameraViewController.completionBlock = { [unowned cameraViewController] _, url in
     if let url = url {
       let video = Video(url: url)
       let photoEditModel = cameraViewController.photoEditModel
cameraViewController.present(self.createVideoEditViewController(with: video, and: photoEditModel), animated: true, completion: nil)
     }
   }

   present(cameraViewController, animated: true, completion: nil)
 }
The presentCameraViewController() method provides the interface to attach the video editor frame to the recorded video from the camera. CameraViewController class attaches the configuration panel along with the photoEditModel object.
Get Stipop API Config
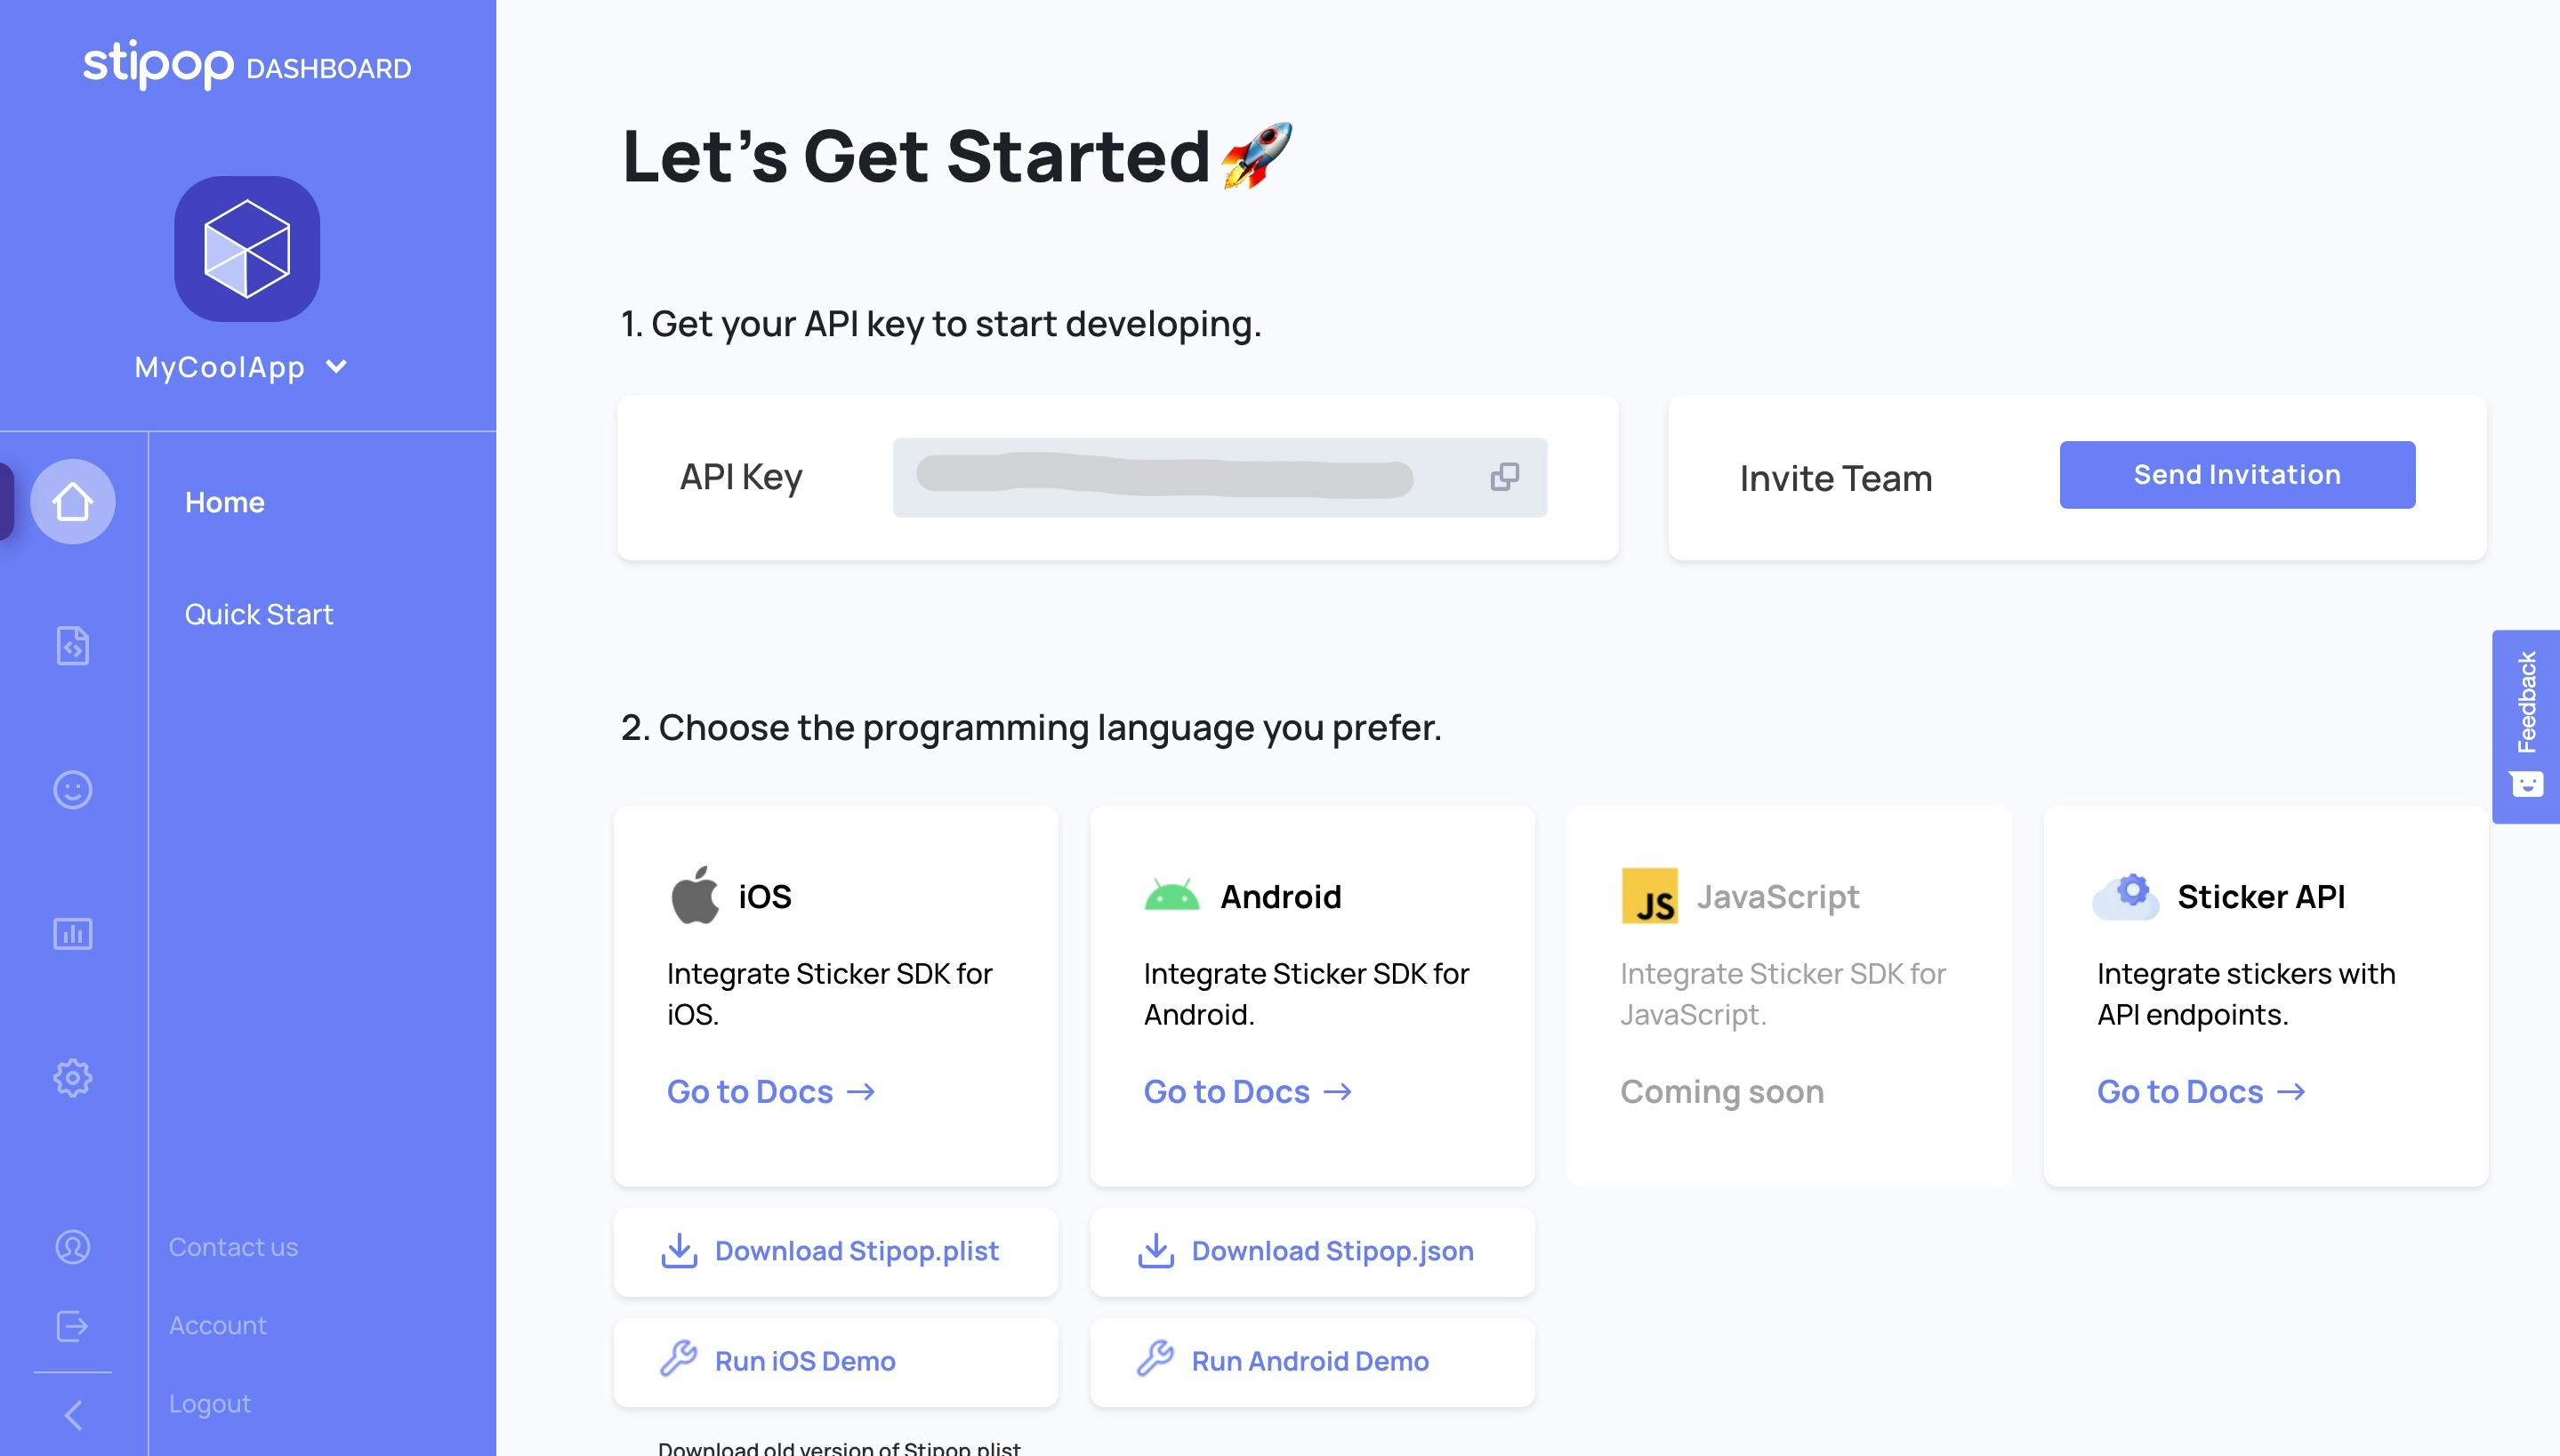
Like always we need the API Key for Stipop SDK integration to our existing IMG.LY iOS app. For this login to Stipop Dashboard and create a free account. After successful sign-in, create an application with App Name, Region, etc.
You will be able to see the API Key . Please download the Stipop.plist file under iOS settings as shown below and move it under the Examples/SwiftExample folder.
Lets do some Design Changes
Navigate to the Main.storyboard and remove the last 5 table view cells except the first one with the option “VideoEditViewController”. We need this table view cell to open the VideoEditor page.
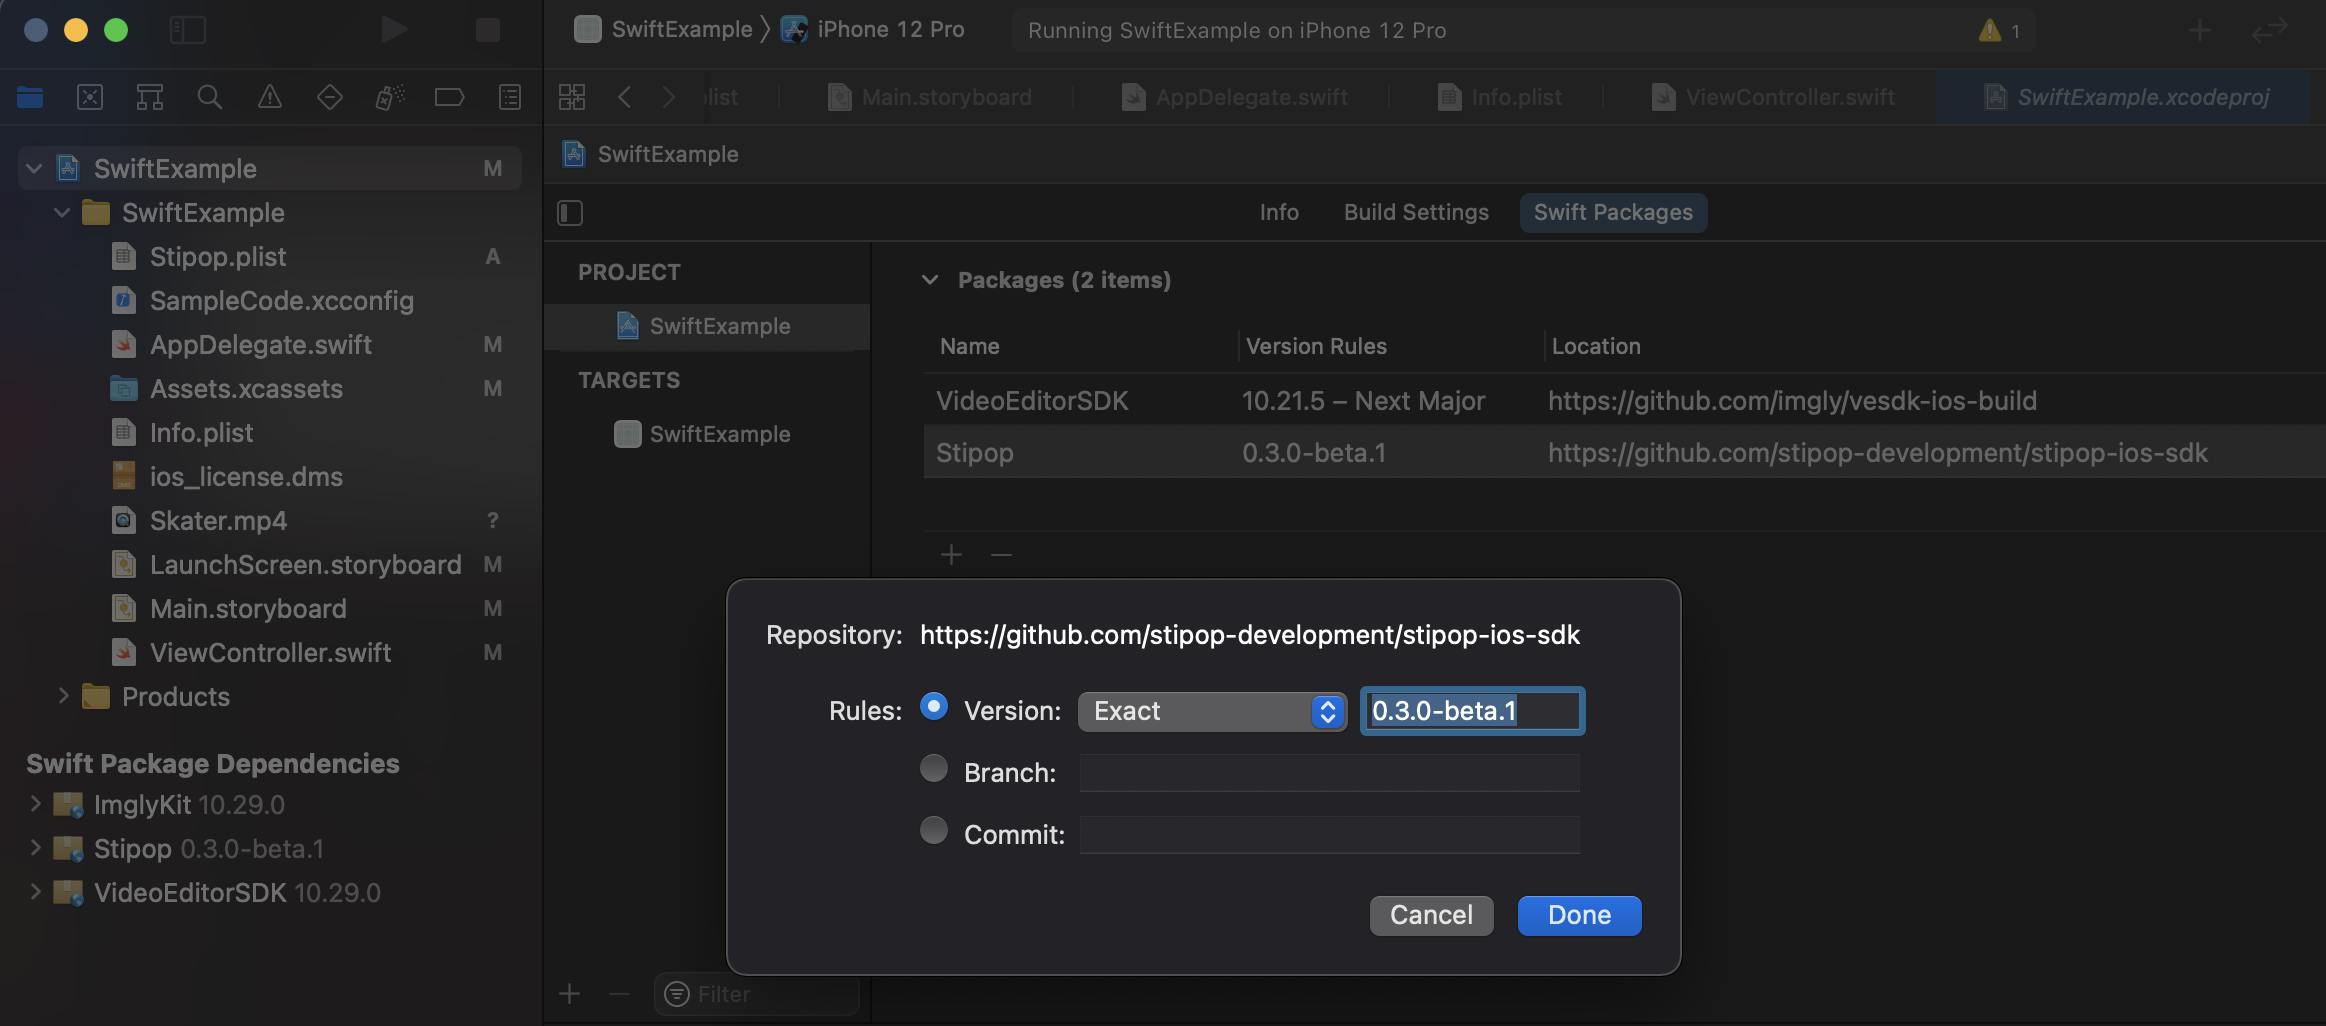
Let us now add the iOS Stipop SDK via Swift package manager. Click on File -> Swift Packages -> Add Package Dependency and then pass the below Stipop iOS repository URL with the given exact version.
https://github.com/stipop-development/stipop-ios-sdk
Exact version: 0.3.0-beta.1
After the Stipop SDK integration, rebuild the project and navigate to AppDelegate.swift to initialize the Stipop instance.
import Stipop
Stipop.initialize()
We will now add the Stipop sticker search ui widget in our main.page. So navigate to the ViewController.swift and create an empty array of URL type to hold the list of selected Stipop stickers when user selects from the sticker search view.
After this initialize the Stipop search view using the class SPUISearchViewController().
var stickerURLS: [URL?] = []
let searchVC = SPUISearchViewController()
Now initialize the stipop user and pass the userID. Please note that the Stipop search panel is added programmatically and will pass the relevant width and height parameters.
 override func viewDidLoad() {
   super.viewDidLoad()
   let user = SPUser(userID: "1234")
   searchVC.setUser(user)
   searchVC.delegate = self
 if let searchView = searchVC.view {
     self.view.addSubview(searchView)
     searchView.frame = CGRect(x: 0, y: 250, width: 900, height: 700)
   }
 }
We have to extend the SPUIDelegate class to override the spViewDidSelectSticker method. When a user clicks on any of the stickers, this method is called.
We will now append the sticker image url to the stickerURLS parameter as well .
extension ViewController: SPUIDelegate {
   func spViewDidSelectSticker(_ view: SPUIView, sticker: SPSticker) {
       // This function will be executed when user chooses a sticker.
     print("sticker url: \(sticker.stickerImg)")
     stickerURLS.append(URL(string: sticker.stickerImg))
   }
Ok breaktime😌, its time to stretch your fingers , hand , neck and maybe legs. Sitting on the chair for a long time our body needs some healthy stretch and movements as well right. A healthy mind and body brings in the perfect code I guess 😬😬LOL.
Okay dear community members, for the next step we will define the previewURL for the image of the Stipop sticker button image. You can pass the image url of your choice here . We are creating a separate Sticker category namely Stipop, with the imageURL as the previewURL of the category. It will hold the stickers of Stipop when the user clicks on any of the stickers on the search panel.
Additionally, IMGLY also provides us with some of the extra features in terms of stickers to add personal stickers or to add weather related stickers etc. If interested, you can enable/disable as shown in the below snippet, cool right👊👊.
var categories = StickerCategory.all
     let stickers = stickerURLS.compactMap { $0.map { Sticker(imageURL: $0, thumbnailURL: nil, identifier: $0.path) } }

let previewURL:URL? = URL(string: "https://img.stipop.io/2020/8/20/1597911723876_6.png")
     if previewURL != nil {
       categories.append(StickerCategory(title: "Stipop", imageURL: previewURL!, stickers: stickers))
     }
      StickerCategory.all = categories

     // Configure sticker tool
     builder.configureStickerToolController { options in
       // Enable personal stickers
       options.personalStickersEnabled = false
       // Enable smart weather stickers
       options.weatherProvider = self.weatherProvider
     }
Now, Attach the VideoEditor Frame
We are almost done with the integration of the Stipop stickers SDK. Let us now code the final part that is the VideoEditor frame.
Well,we need to extend the VideoEditViewControllerDelegate class and override the videoEditViewController methods to enable the video editor frame with the cancel method handler here .
extension ViewController: VideoEditViewControllerDelegate {
  func videoEditViewController(_ videoEditViewController: VideoEditViewController, didFinishWithVideoAt url: URL?) {
   if let navigationController = videoEditViewController.navigationController {
     navigationController.popViewController(animated: true)
   } else {
     dismiss(animated: true, completion: nil)
   }
 }
  func videoEditViewControllerDidFailToGenerateVideo(_ videoEditViewController: VideoEditViewController) {
   if let navigationController =
videoEditViewController.navigationController {
     navigationController.popViewController(animated: true)
   } else {
     dismiss(animated: true, completion: nil)
   }
 }
  func videoEditViewControllerDidCancel(_ videoEditViewController: VideoEditViewController) {
   if let navigationController = videoEditViewController.navigationController {
     navigationController.popViewController(animated: true)
   } else {
     dismiss(animated: true, completion: nil)
   }
 }
}
And with the blazing roar of thundering claps in the background , patting your own backs now lets
Run the App🤞🤖
That’s it fellas this is all the coding that we have to do. Let us now rebuild the project and run it to test if everything is working fine. You will see the Stipop sticker search layout on the first app screen. We can click on the stickers to add it to the IMGLY stickers list.
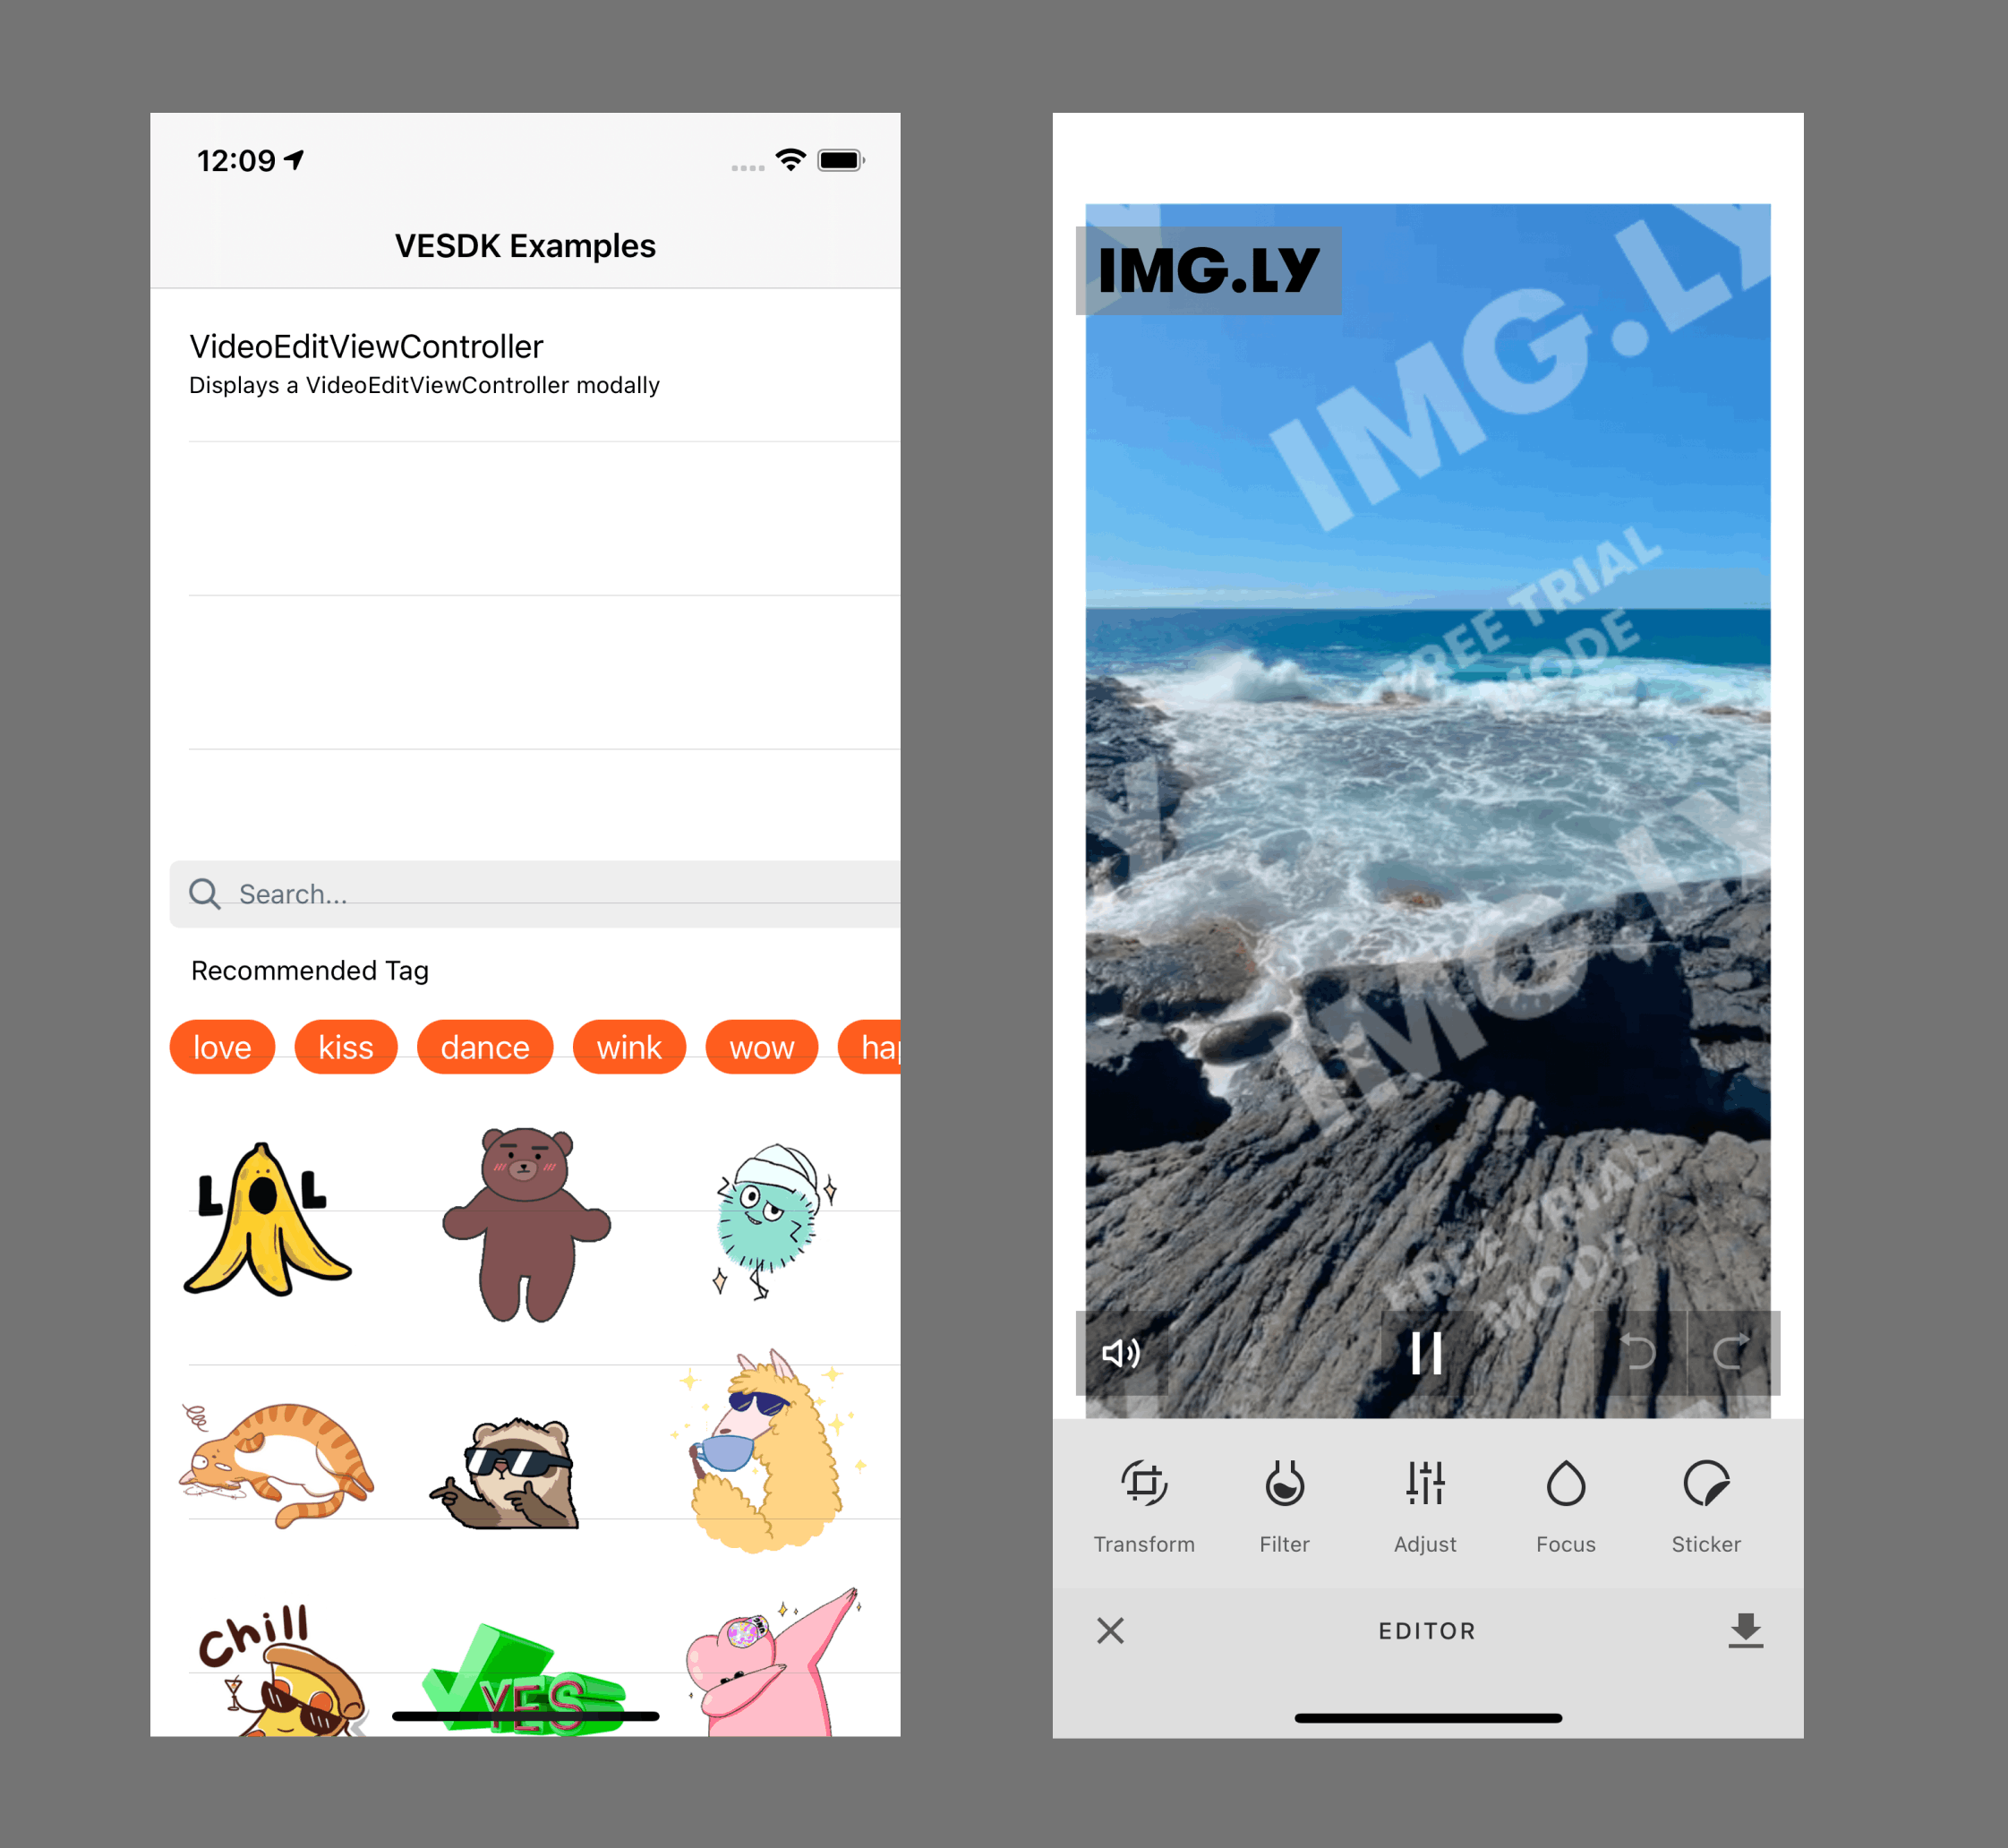
There is a button to open the IMGLY VideoEditor page where it has a list of options below like Text, Sticker, Focus, Audio, Video, etc. Now click on the Sticker option, and you will be able to see the Stipop category button which contains the selected Stickers. Choose any one of the Stipop stickers and play around with it😊🙃.
I personally like the animated ones with cute expressions but you can choose any stickers of your choice from a library of millions of stickers available through Stipop🤘.
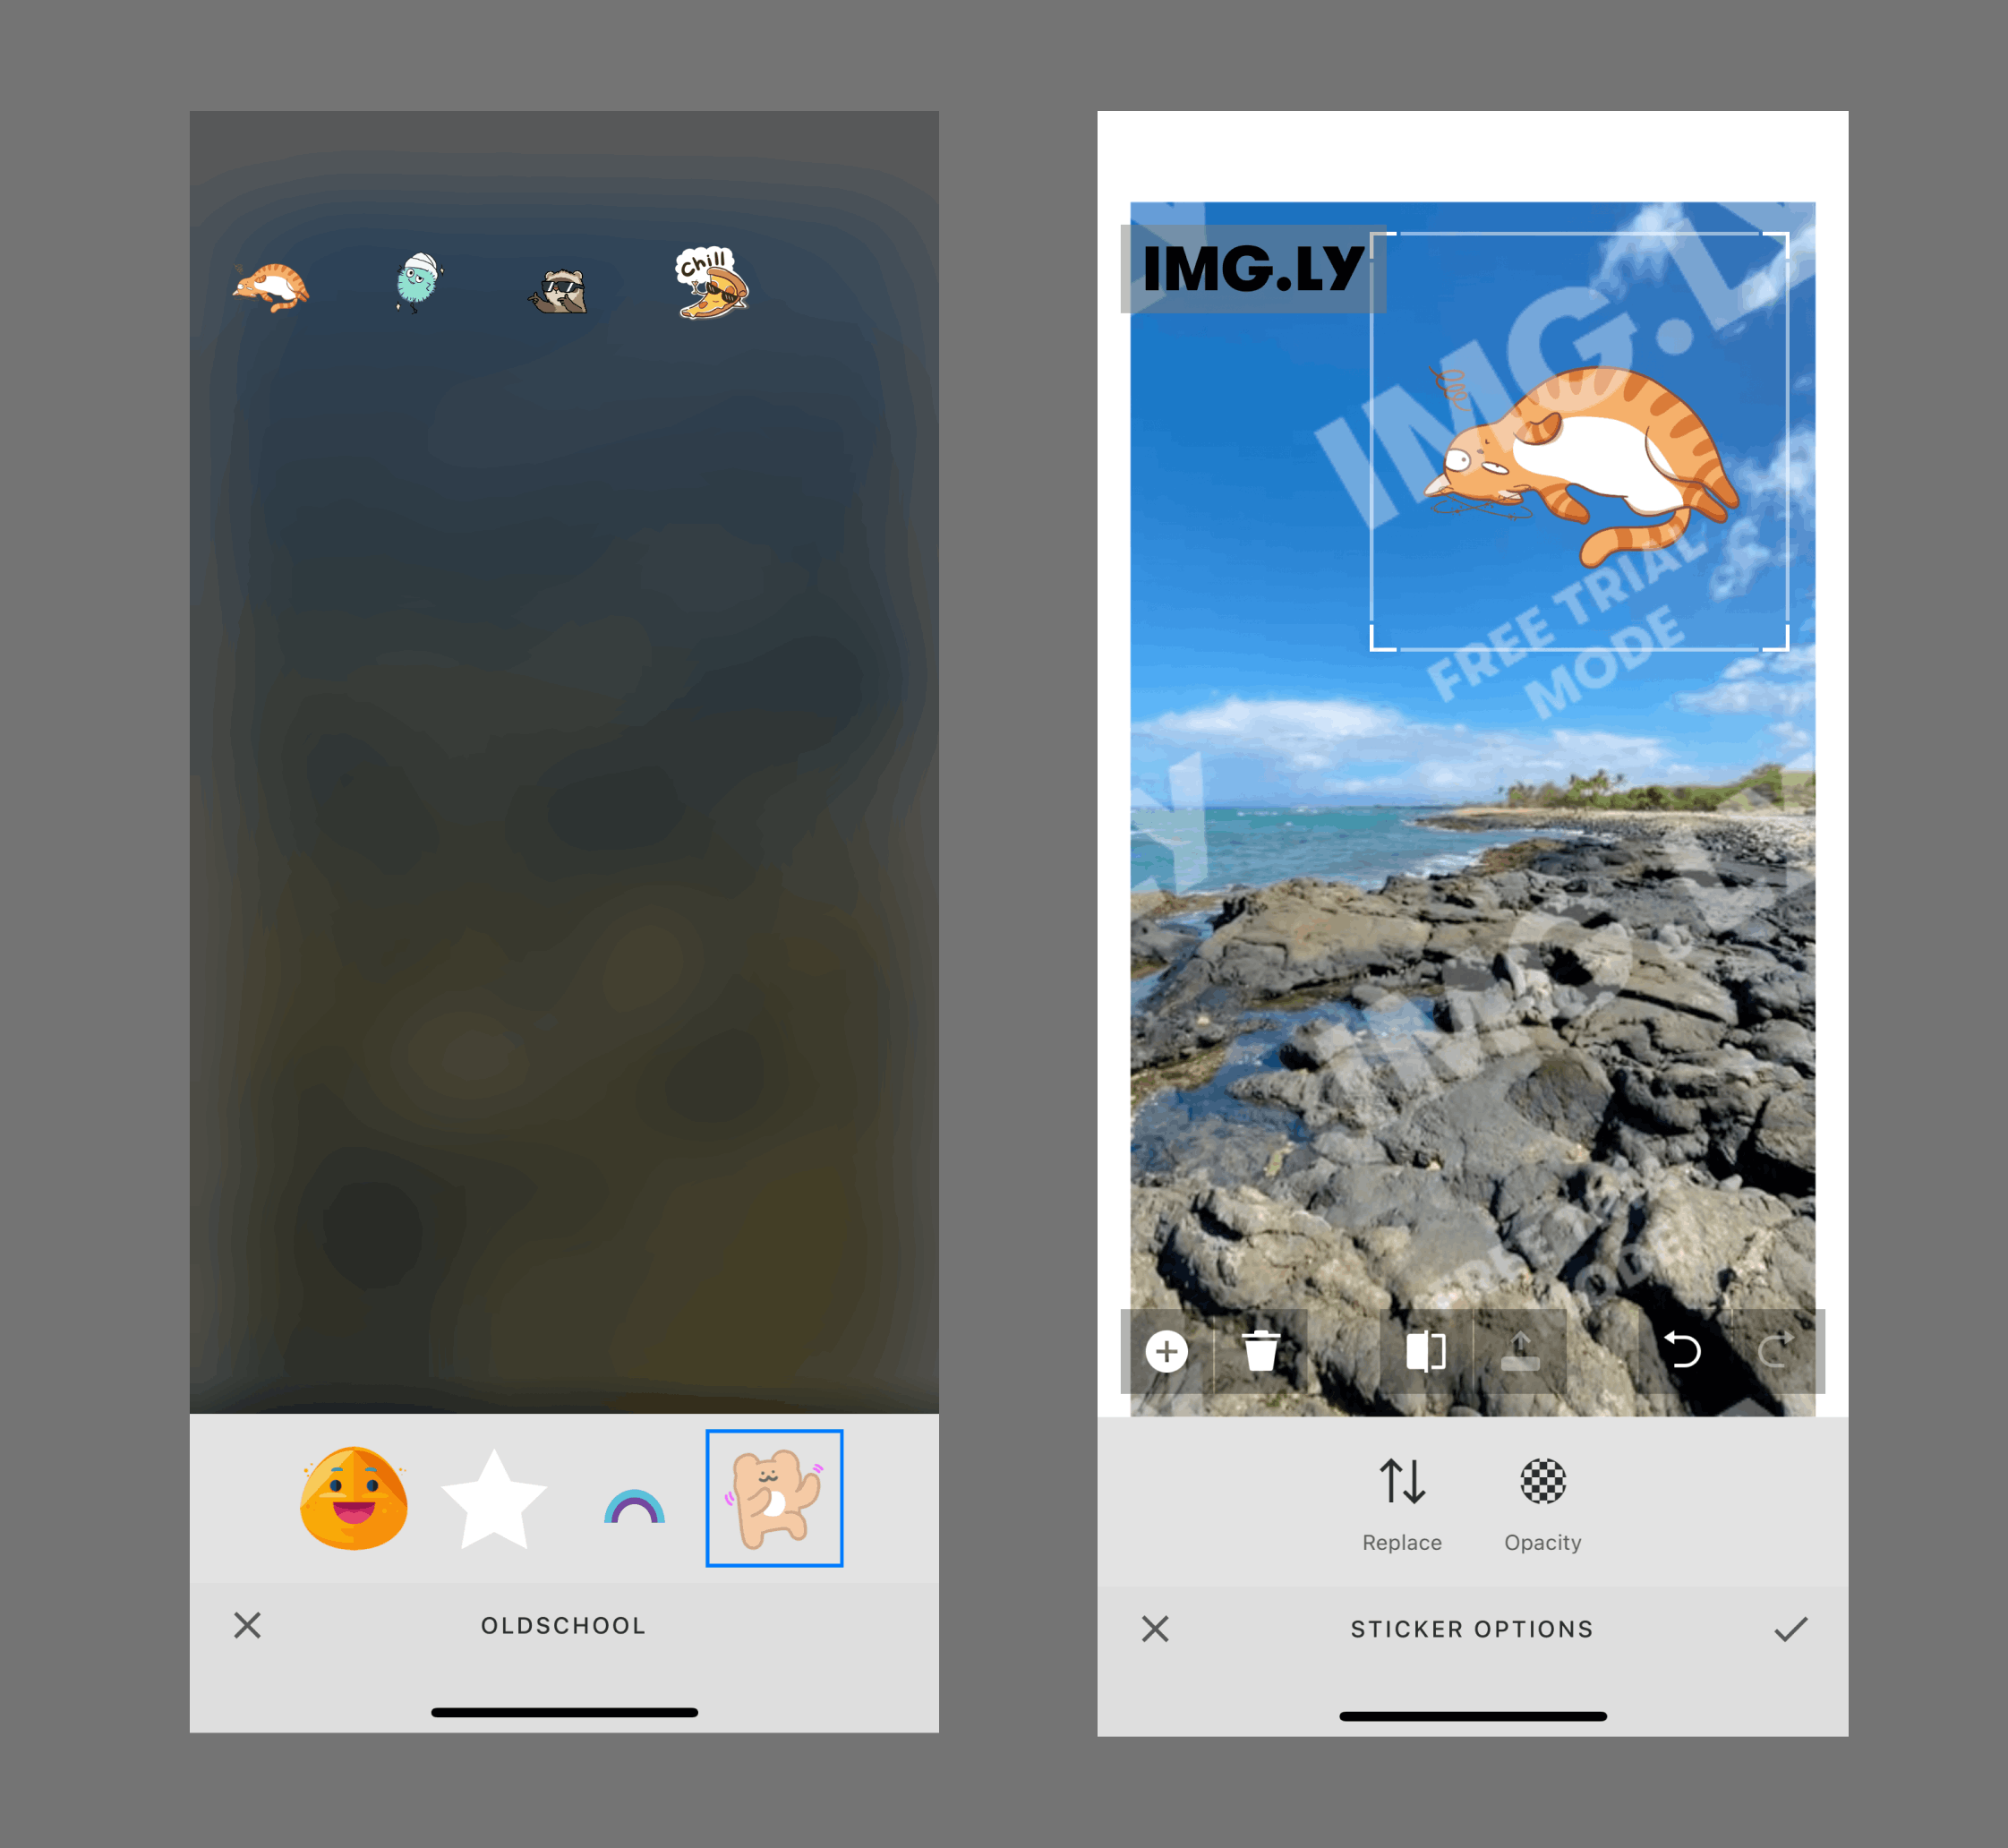
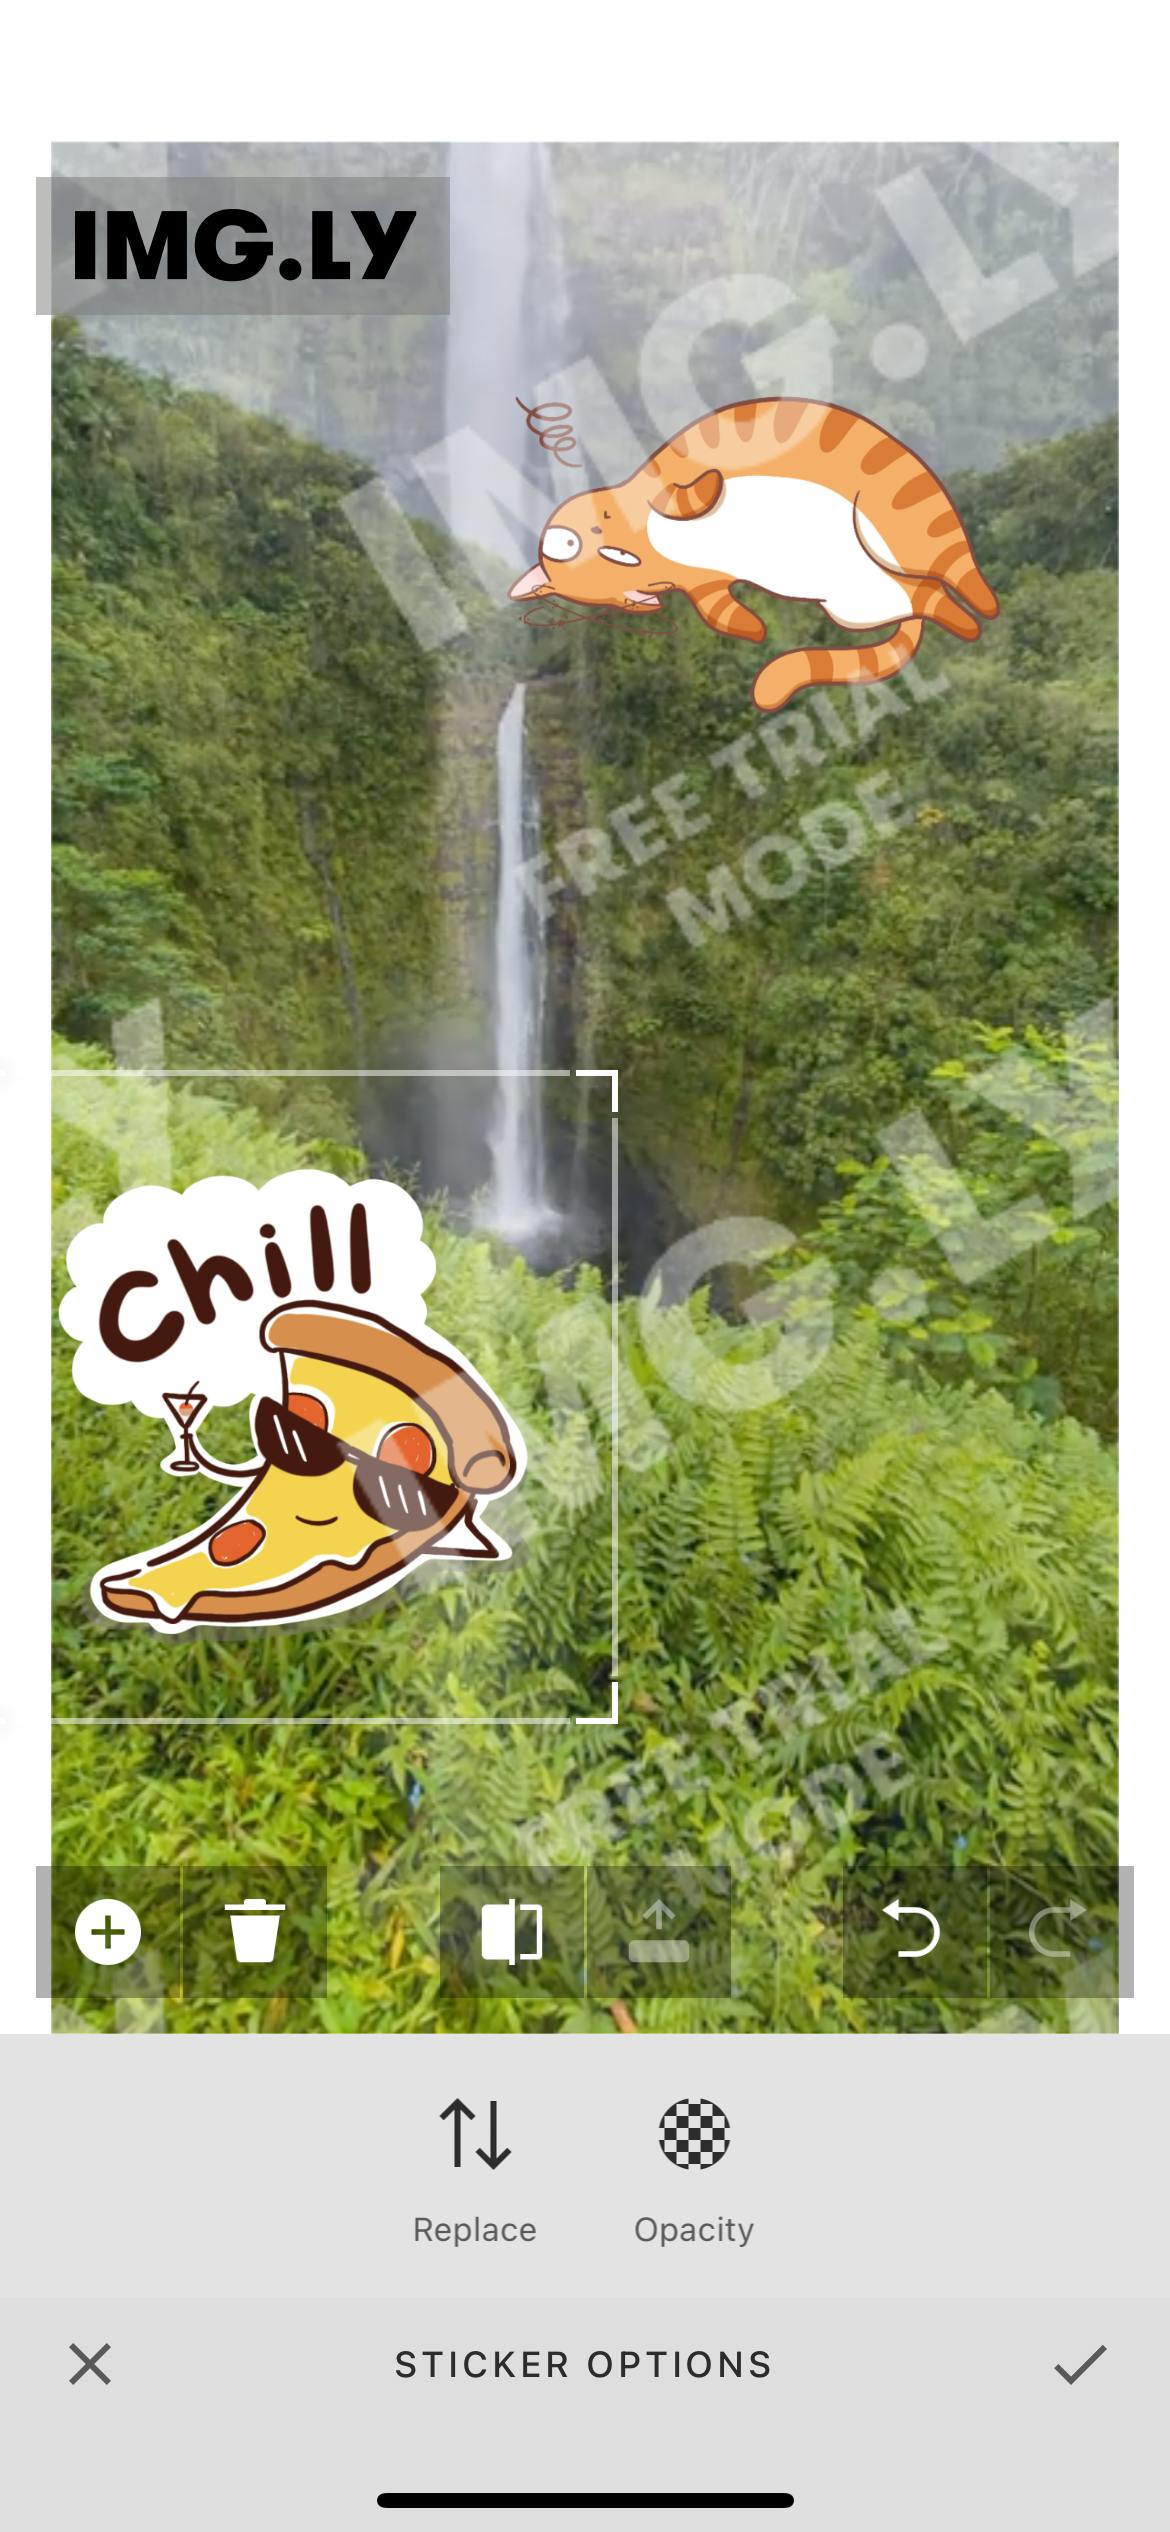
🤗Voila ! We have successfully integrated the Stipop sticker SDK into the our IMG.LY iOS app. You can also further explore more about the Stipop APIs and try to integrate them into our apps because its cool and awesome😎.
Happy Happy coding everyone !!
🎅🏼 About Vedant
Vedant Jha is a full-stack developer and a technical writer at Stipop. Have a question about this article? Contact Vedant here.

