A step-by-step guide to testing API with Postman
Test API functionality and performance with Postman in no time. In this blog, I will give you an example of how to do that. Ready, set, go!
Hello everyone! 👋
I'm Manuel, and I build all kinds of apps. Last time, for example, we built an app and integrated Stipop SDK into it. If you are more of an API person, you are in the right place at the right time because today we will test Stipop API with Postman.
What is Stipop API
Stipop API gives access to over 150k stickers in multiple languages. These stickers are free and can be integrated into any mobile, web, or desktop app and then shared in chats by the app users. To know more about Stipop API and how it works, you can check Stipop Docs. If you are like me and want to test API before integrating it into your project, Postman is the application you need.

What is Postman
If you are not yet familiar with Postman, it is a platform to explore API. It provides a comprehensive set of API tools, API repositories, workspaces, and advanced features that help get work done. Besides that, it is also:
a community of more than 17 million developers
an awesome student program with events for students
India's Best Workplace for Women 2021
3 reasons why I use Postman
- It makes my life easier. I can see what the API is all about without spending time coding it into a test program.
- It has workspaces where anyone can create a catalog for their company or their own API for others to test.
- Free for solo explorers and reasonable pricing for teams.
With that said, let's test Stipop API step-by-step to give you a good idea of how to test other APIs with Postman in the future, as the principle is mostly the same.
Ready 🚩
To get ready for testing, let's go to Postman and create an account. Then we can head to Stipop's Public Workspace.

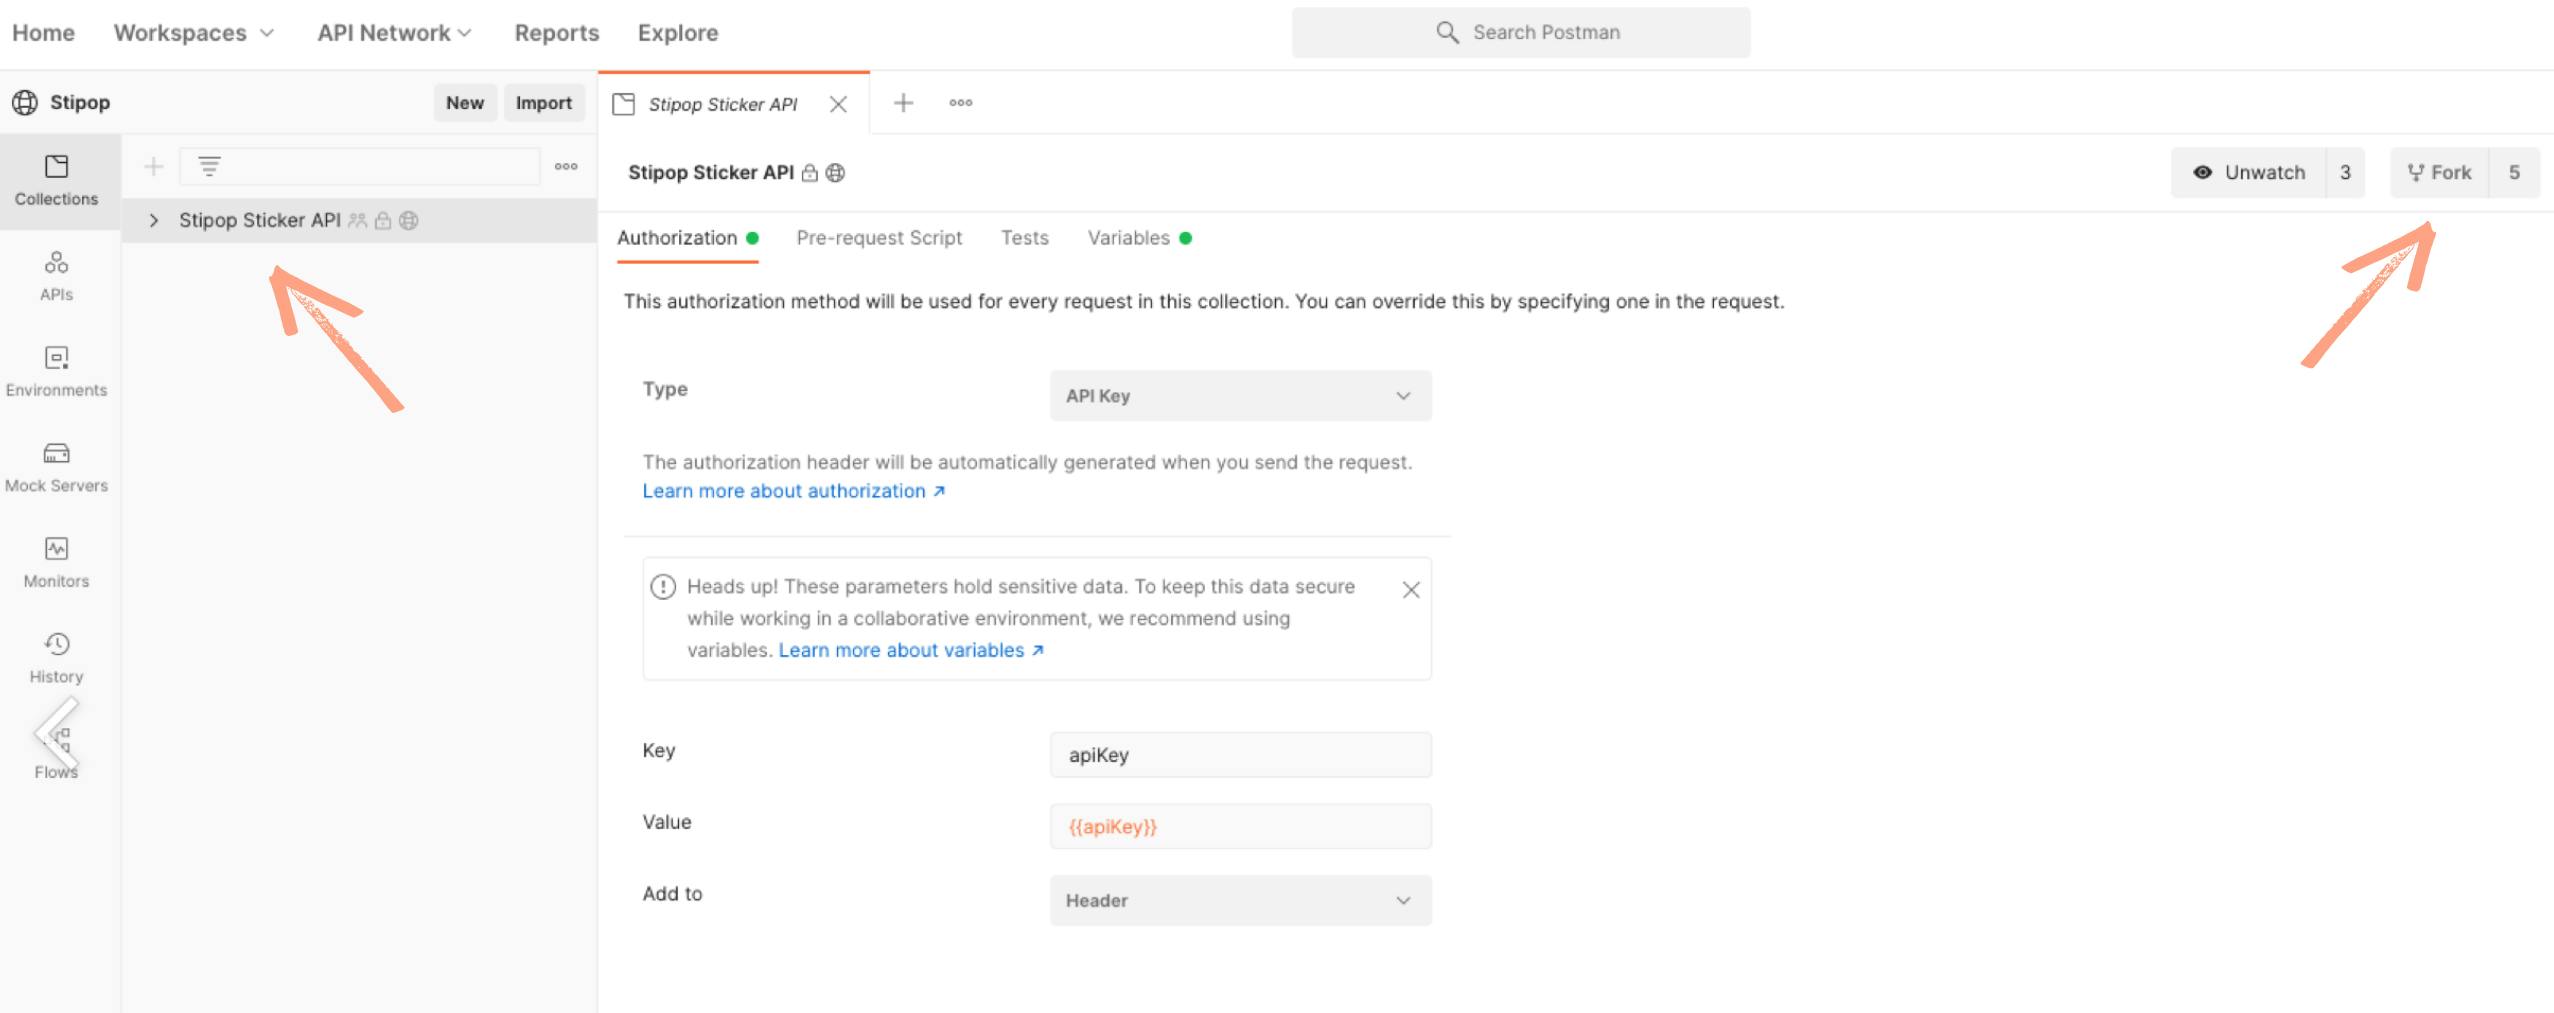
Before we do anything else, we need to fork the collection into our own to enable sending requests from public workspaces. To do that, we click on the rightmost button, the one that looks like, well, a fork:
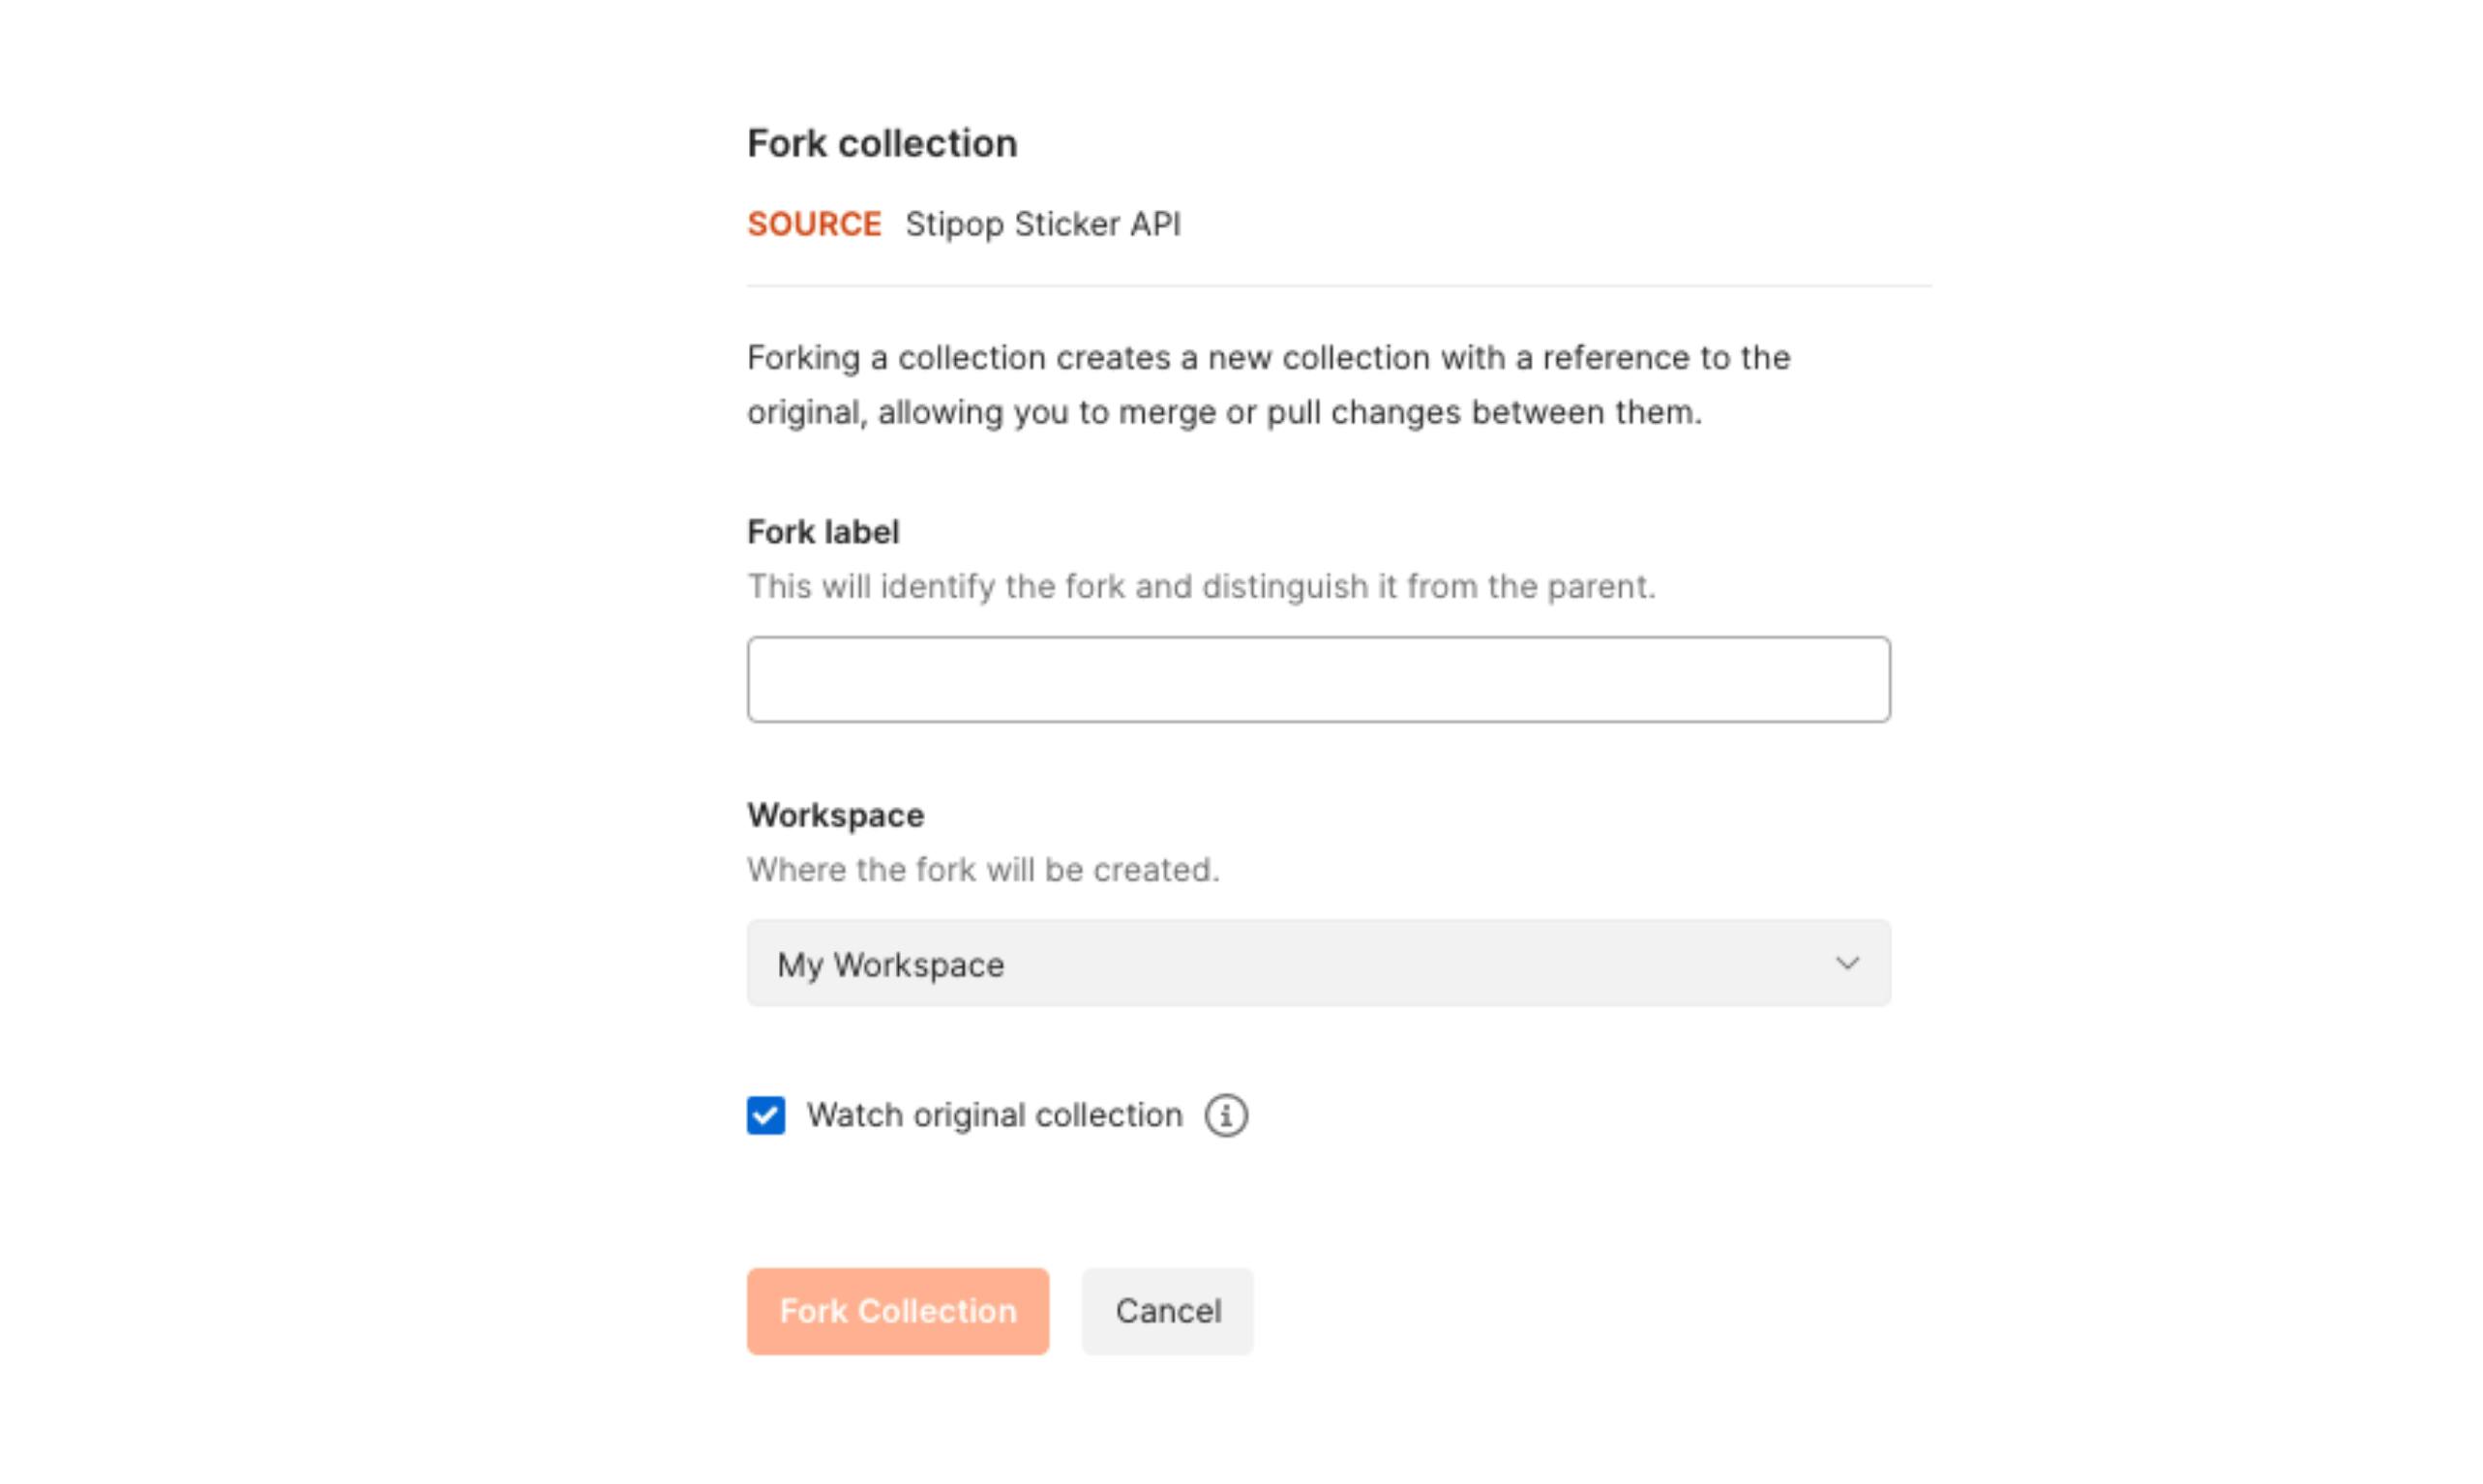
All we have to do is add a Fork label, and we're good to dive deeper.
Set ⚙️
We can now set the rest. The first thing we will do is fill up the Value field with API Key. By filling up this field, it will ensure that we can test the endpoints without having to go through all of them one by one to add the API Key.
To get the key, we go to Stipop Dashboard, create an account, and submit details about our app. We will then be redirected to the Quick Start page with the API key on top.
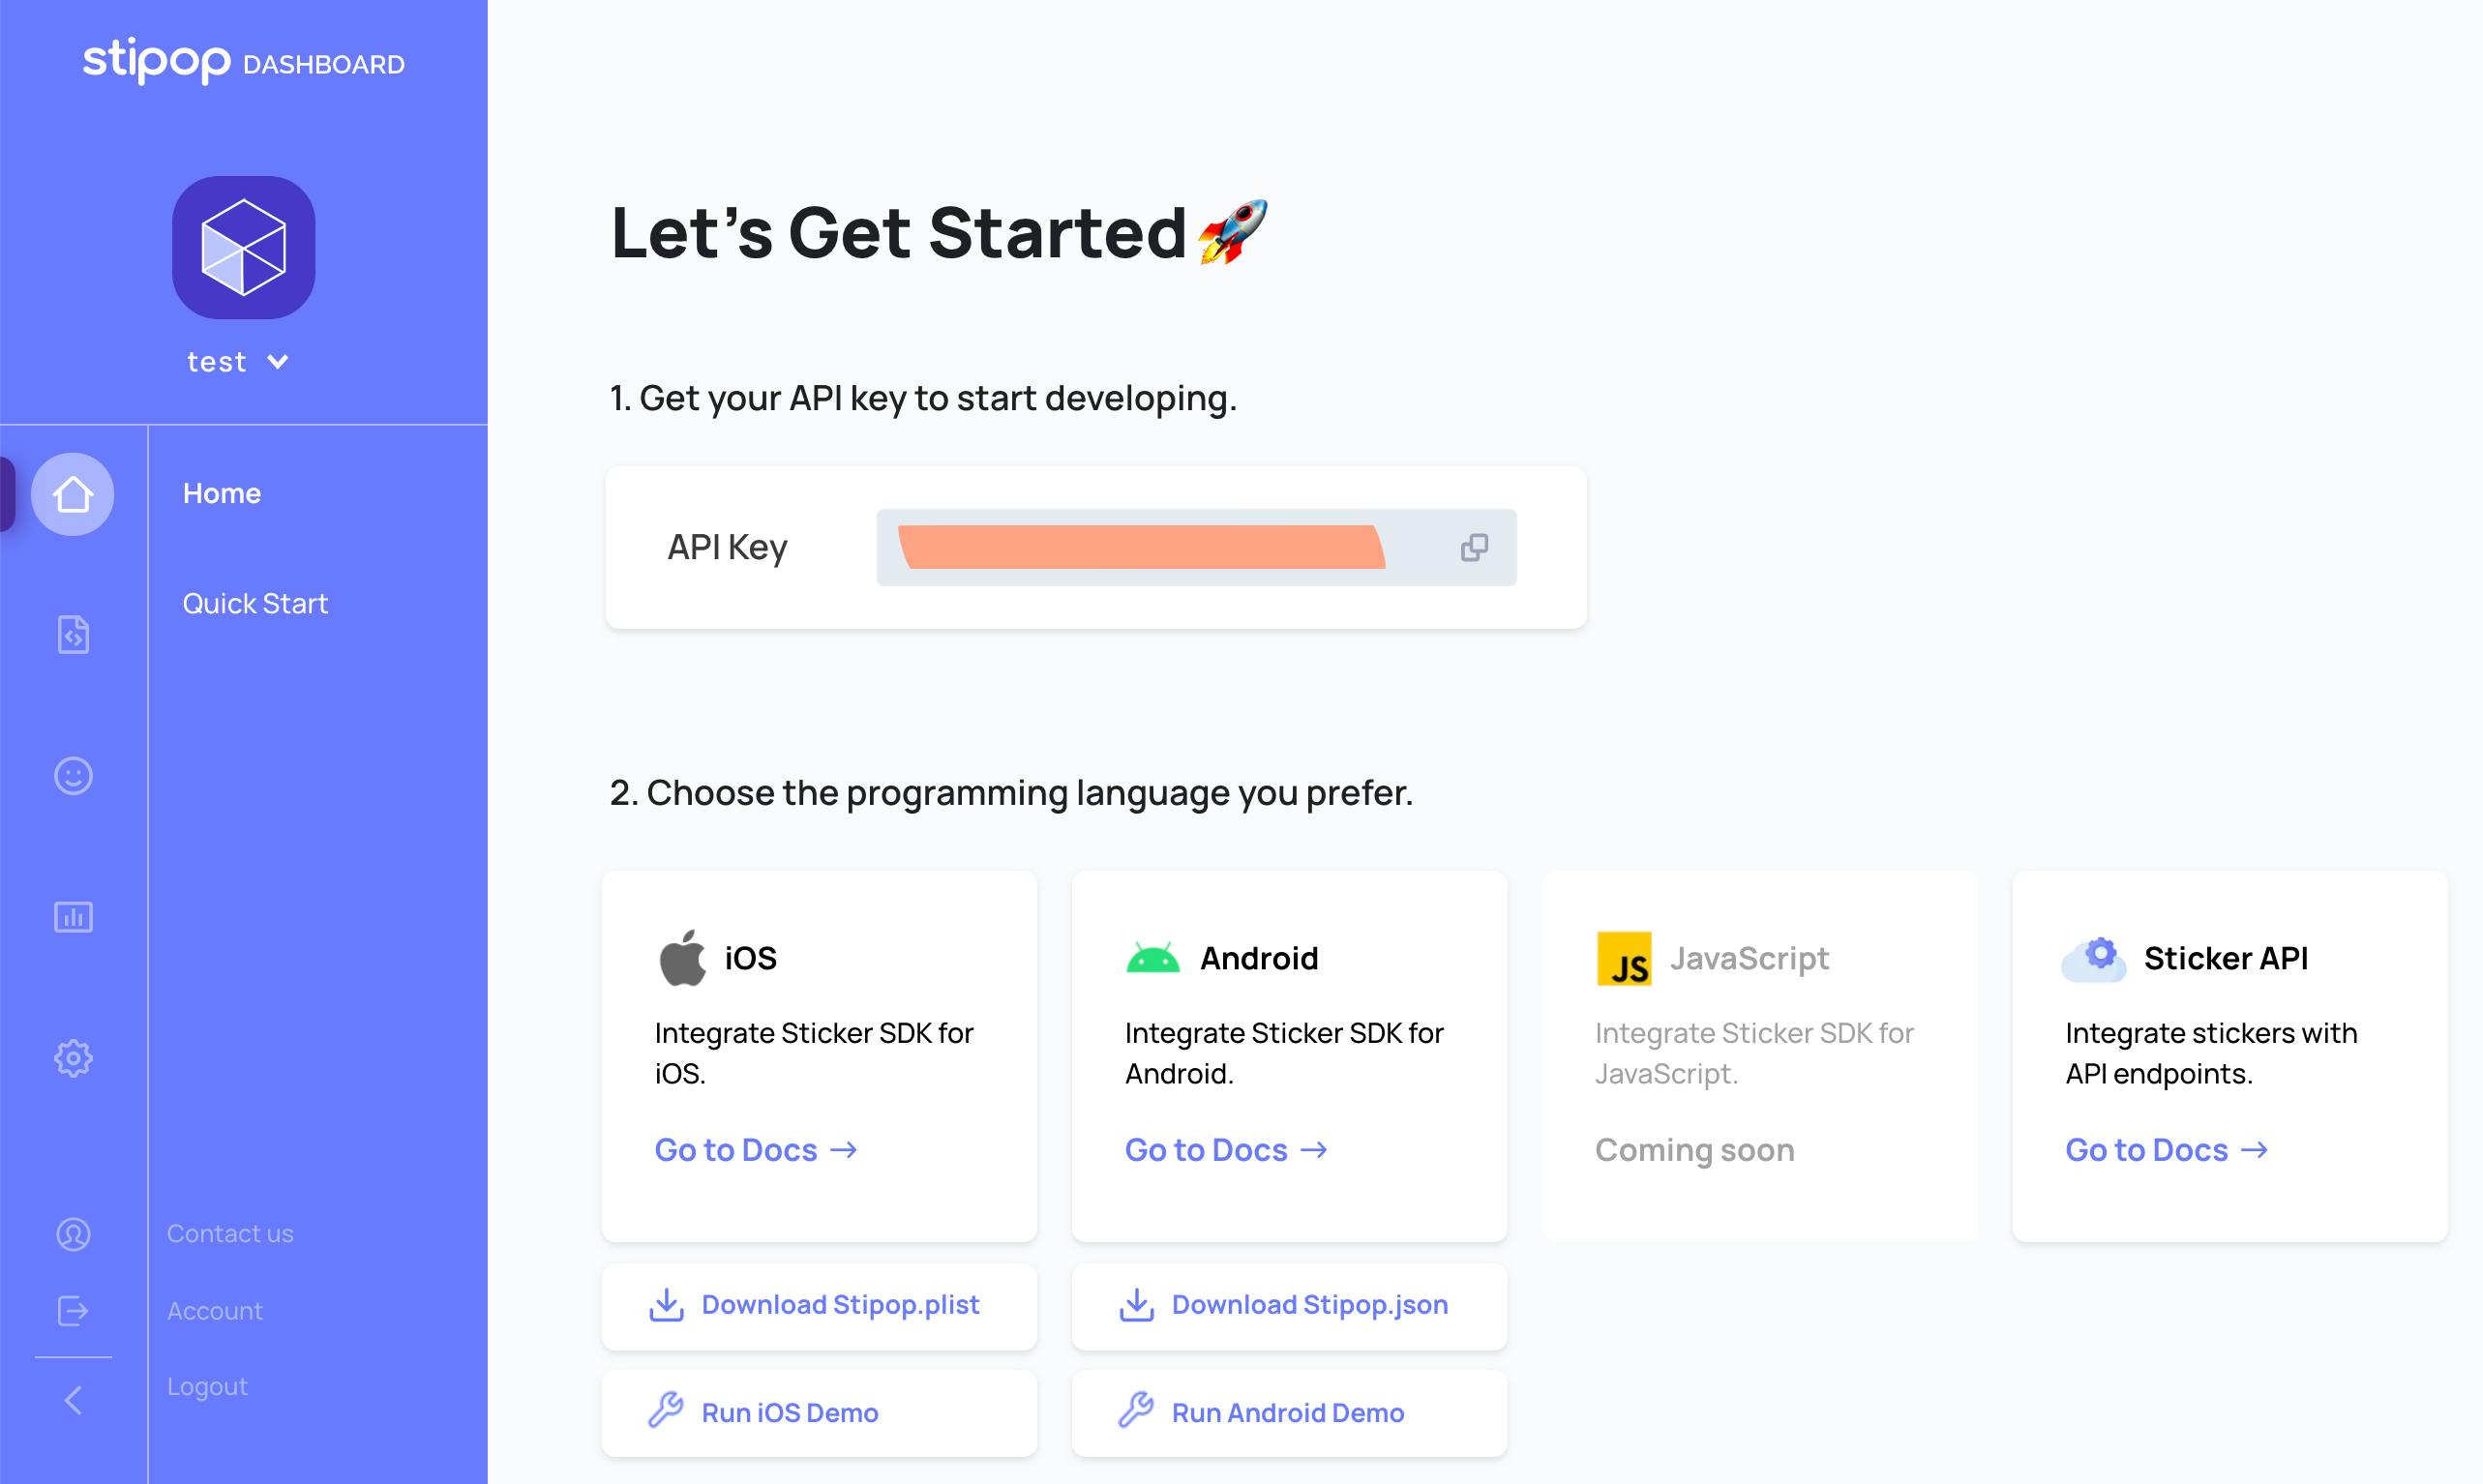
Then we click variable and copy-paste the API key into the apiKey field.

Once this part is completed, you can also change your userId and hit save. Then click on "Stipop Sticker API," and you will see all the available endpoints.
Go! 🚀
To give it a go, I will test the "Search stickers" endpoint. When implemented, it helps app users search for stickers in your app with keywords.
Firstly, we need to fill up the Parameters. To know what parameters in this particular endpoint do we need to refer to Stipop docs. In this case, it will be this page.

As you can see, there are only two required parameters, "q" for query and the userId, which we already set up earlier.
You can fill up the parameters the way we did in the image above or with your own values and then press the SEND button next to the URL. You will be able to see the response that appears below the parameters:
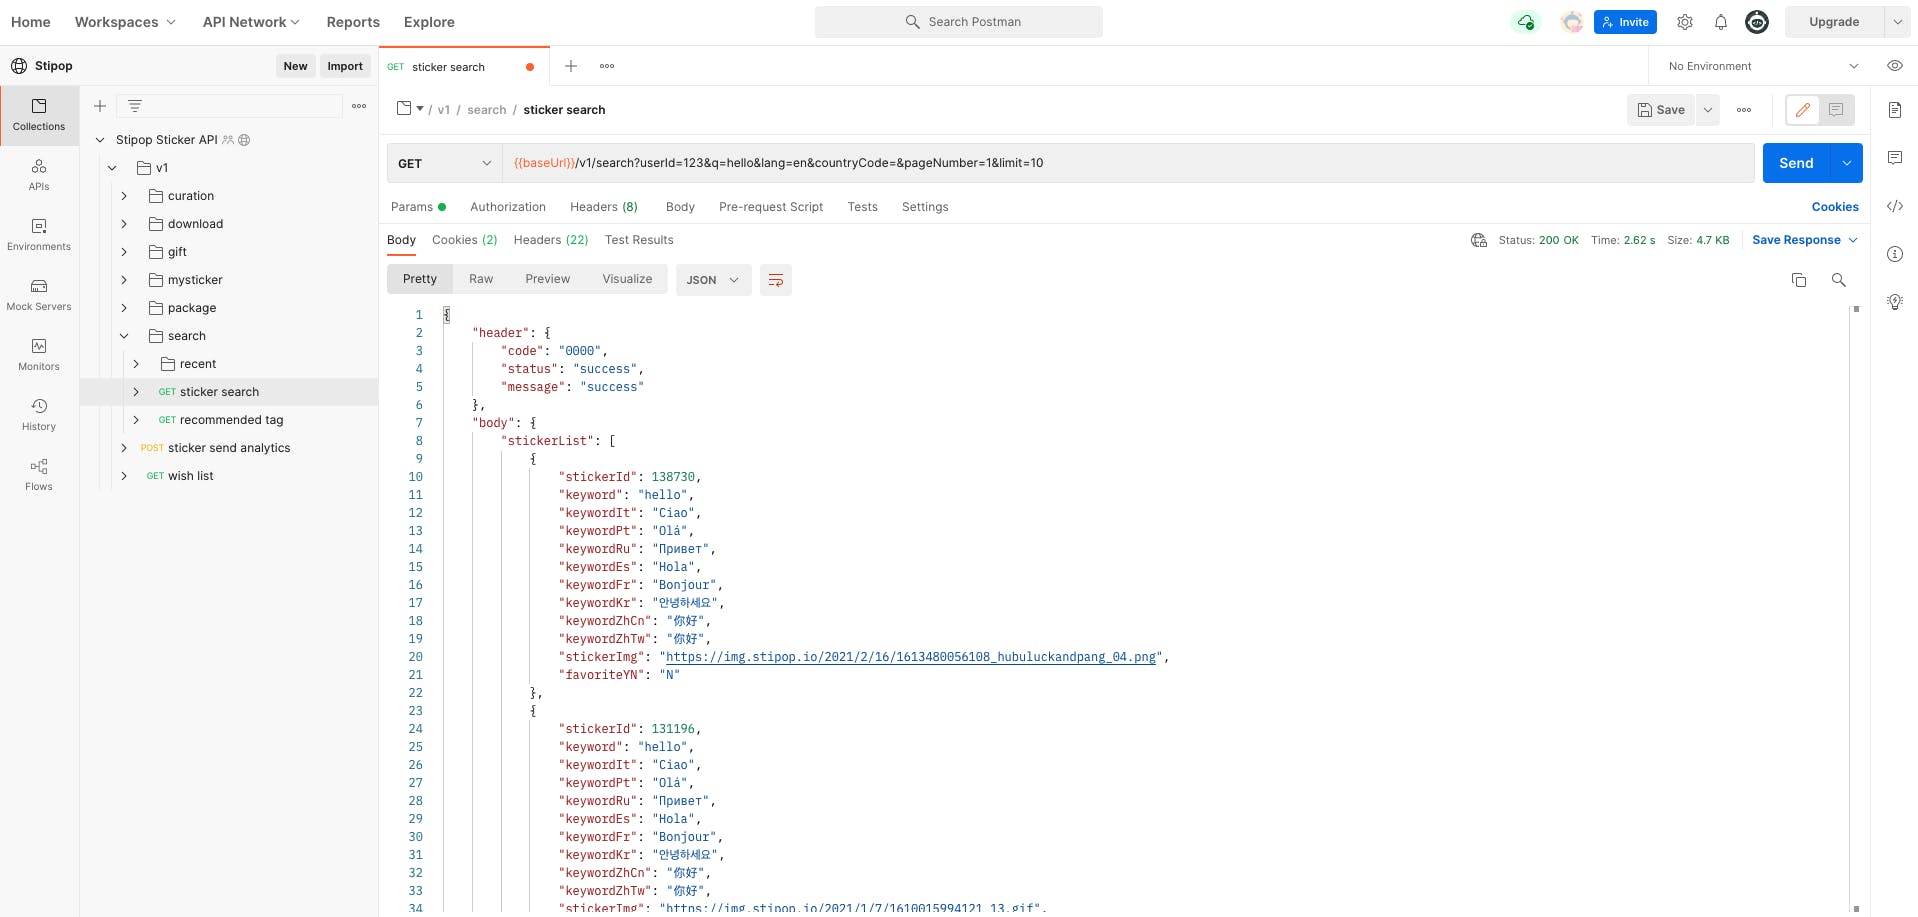
Voila! As you can see, our "hello" request was successful! If you scroll, you should see 9 stickers in different languages related to our "hello" query.
That's it!
We have just tested one of the Stipop API endpoints. Postman makes it extremely easy to test API and to work more efficiently.
Feel free to play around with other Stipop endpoints and see which ones are to your liking! Thanks for reading and happy testing! 😎
👽 About Manuel
Manuel Roque is a front-end developer and a technical writer at Stipop. Have a question about the article? Contact Manuel here.

