

Making a web app with an infinite scroll in ReactJS
Google added infinite scroll, and so should you! We will show how to do that by making a web app that loads new sticker images when scrolled down.

Integrate stickers into your app with Stipop API and SDK.
Hi there 👋
My name is Manuel, and I enjoy building apps. Today I will be building an infinite scroll app with React.js. Our app will be a simplified version of Google Images, Twitter (follow us on Twitter 😏), or, let's say, Pinterest.
To show exactly how it works, we will need some content. We will use Stipop sticker API that gives access to over 150,000 free stickers for apps, which is more than enough to make our infinite scroll app work. To learn more about Stipop API and test it with Postman, check our previous blog.
By the time we are done, we will have 2 pages with the infinite scroll: one will show currently trending stickers and the other will allow us to search for stickers and display thousands of available search results.
Enough said, let's get it going!
Getting started
Let's create our project:
create-react-app infinite-scroll
and install a couple of packages:
npm install react-router-dom
npm install styled-components (optional)
npm install axios
Our first stop will be App.js. We are going to change the simple jsx that is being returned into our Routes using react-router-dom. For that, we will import what we're going to use for now:
import { BrowserRouter as Router, Switch, Route, Link } from 'react-router-dom';
Followed by:
return (
    <Router>
      {pageSelect()}
      <div>
        <Switch>
          <Route path="/search-stickers">
            <SearchStickers />
          </Route>
          <Route path="/trending">
            <TrendingStickers />
          </Route>
          <Route path="/">
            <TrendingStickers />
          </Route>
        </Switch>
      </div>
    </Router>
  );
React-router-dom lets us set the url path that we want. On the Route tag, we set the desired path name, and between the tags, we add the components.
You can also see there is a “{pageSelect()}” function being called. This is our header.
  const pageSelect = () => {
      return (
        <Header>
          <HeaderLinkContainer>
            <Link to="/search-stickers">
              <HeaderLink>Search</HeaderLink>
            </Link>
            <Link to="/trending">
              <HeaderLink>Trending</HeaderLink>
            </Link>
          </HeaderLinkContainer>
        </Header>
      );
  }
I will briefly introduce what is what here.
<Header> tag is a styled-component I made. Right now it's a simple purple bar, so you can turn it into any design you want later. We can replace <Header> with a <div> as well.
<HeaderLinkContainer> is the same concept of <Header>. It's also a styled-component and can be replaced or modified to your liking.
<Link> is part of the react-router-dom package, the “to” callback will contain the Route we set earlier. In this case, we have 2 pages: the page where we can see trending stickers and the page where we can search stickers
That's it for the App.js file. Now let's move to the Trending Stickers page.

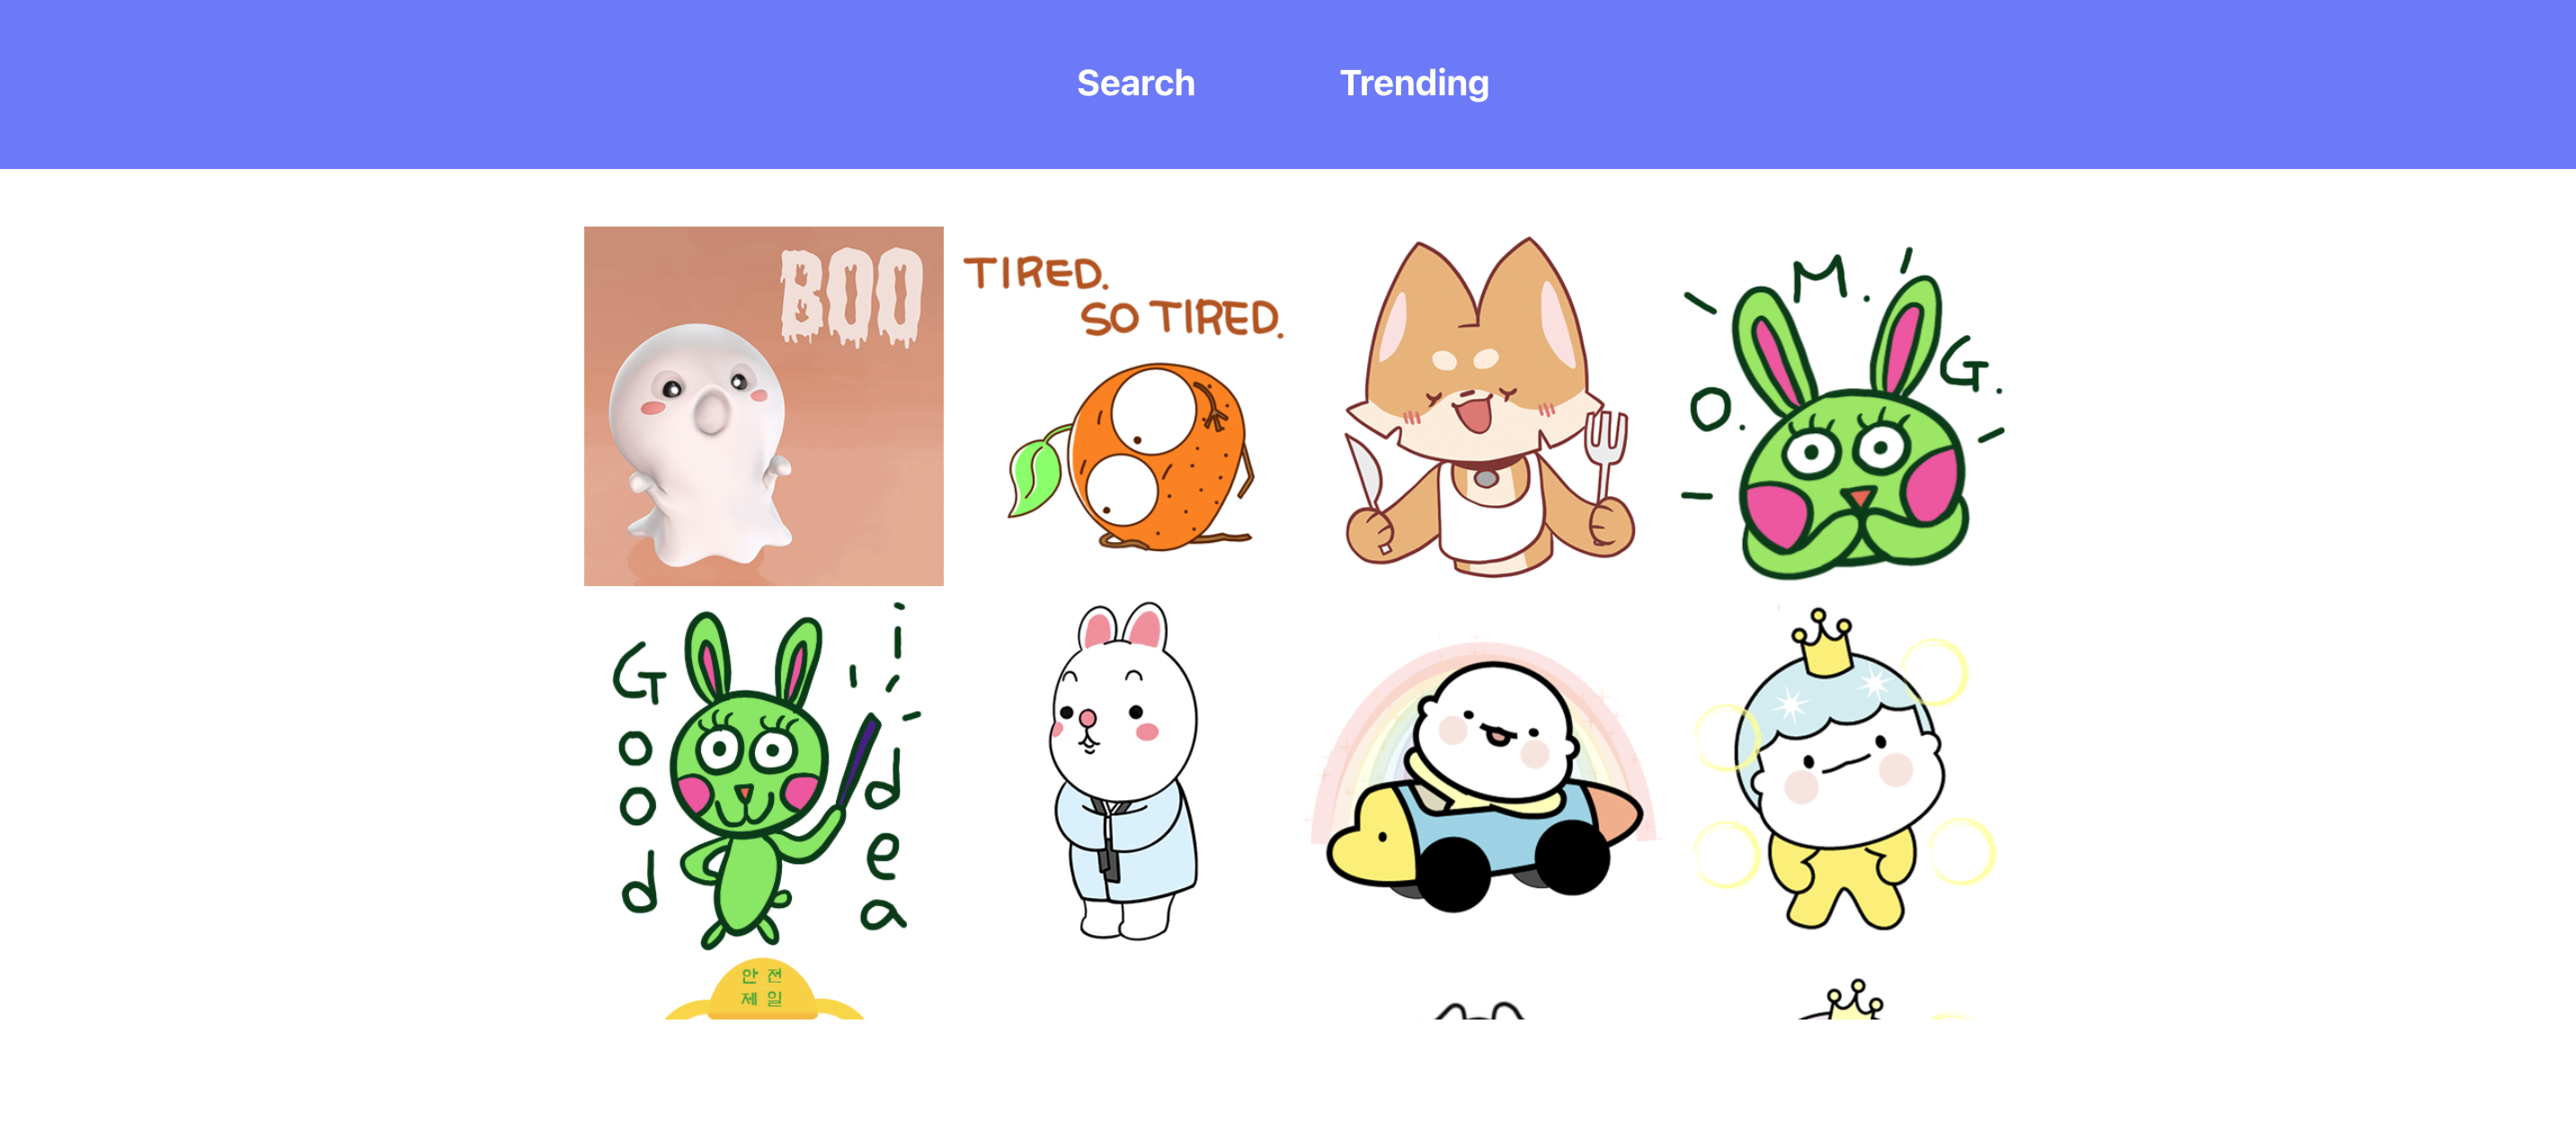
Trending Stickers page
Let’s start by creating a functional component called “TrendingStickers”. Before doing anything else we will prep some states for future use:
So here is what we got: photos: an array containing the information about our images. page: an integer that will be used when we call Stipop’s API. We need it to show stickers on the different pages bottom: tells us when we have reached the bottom of the page.
We now want to start by making our API call. For that, we will create an arrow function called "getPhotos" which takes "page" as a parameter.
    const getPhotos = (page) =>  {
        let config = {
            headers: {
                apiKey: '823bb74a52fb44f8590c87b3dfd8c4e8'
            }
        }
        if (bottom === true) {
            setPage(page + 1);
        }
        axios
        .get(`/v1/package?userId=9937&pageNumber=${page}&lang=en&countryCode=US`,
          config)
          .then(res => {
            setPhotos([...photos, ...res.data.body.packageList]);
          });
    }
The first thing we do is set the necessary headers for the API request to work. In this case, all we need is an apiKey. To get yours, go to Stipop Dashboard, sign up for a free account, and create an app. Your API key will be right on top of your account.

We then have a simple condition that will check if we have reached the bottom of the page, and if we do, it will add 1 to the page state.
We will now set our array of images so that new ones will get added with every new call to the getPhotos function.
Our page looks a bit empty, so let's add a useEffect hook where we'll simply do our first call to getPhotos:
    React.useEffect(() => {
        getPhotos(page);
    }, [])
This will fill up the page with the first set of stickers the request sends us.
We are almost done here. But we have one more function to do: the handleScroll function. This function will calculate when you have reached the bottom of the screen or container, and once at the bottom, it will call getPhotos to get more stickers. Here's how it looks:
   const handleScroll = (e) => {
       const bottom = e.target.scrollHeight - e.target.scrollTop === e.target.clientHeight;
       setBottom(true);
       if (bottom) {
           getPhotos(page);
           setBottom(false);
       }
   }
Note: Remember to setBottom to false after you call getPhotos.
And with that done, we can put it all together:
   return (
       <TrendingStickerContainer onScroll={handleScroll}>
           <div style={{ minHeight: "100px"}}>
               {photos.map(user => (
                   <img src={user.packageImg} height="200px" width="200px" />
               ))}
           </div>
           {bottom === true ? <div> Loading ... </div> : null}
       </TrendingStickerContainer>
   );
TrendingStickersContainer was made using styled-components. You can make it as big or small as you want. In our case it is this:
const TrendingStickerContainer = styled.div`
   width: 60%;
   margin-left: 23%;
   height: 70vh;
   overflow: scroll;
   position: absolute;
   top: 20%;
`;
On the onScroll event handler, we call our handlescroll function. Below that, we simply map our array for stickers to show. I've also added "loading ... " text, which will be invisible most of the time as images load very fast.
That's it! Our trending stickers page is ready 🎉
Now to the next one!
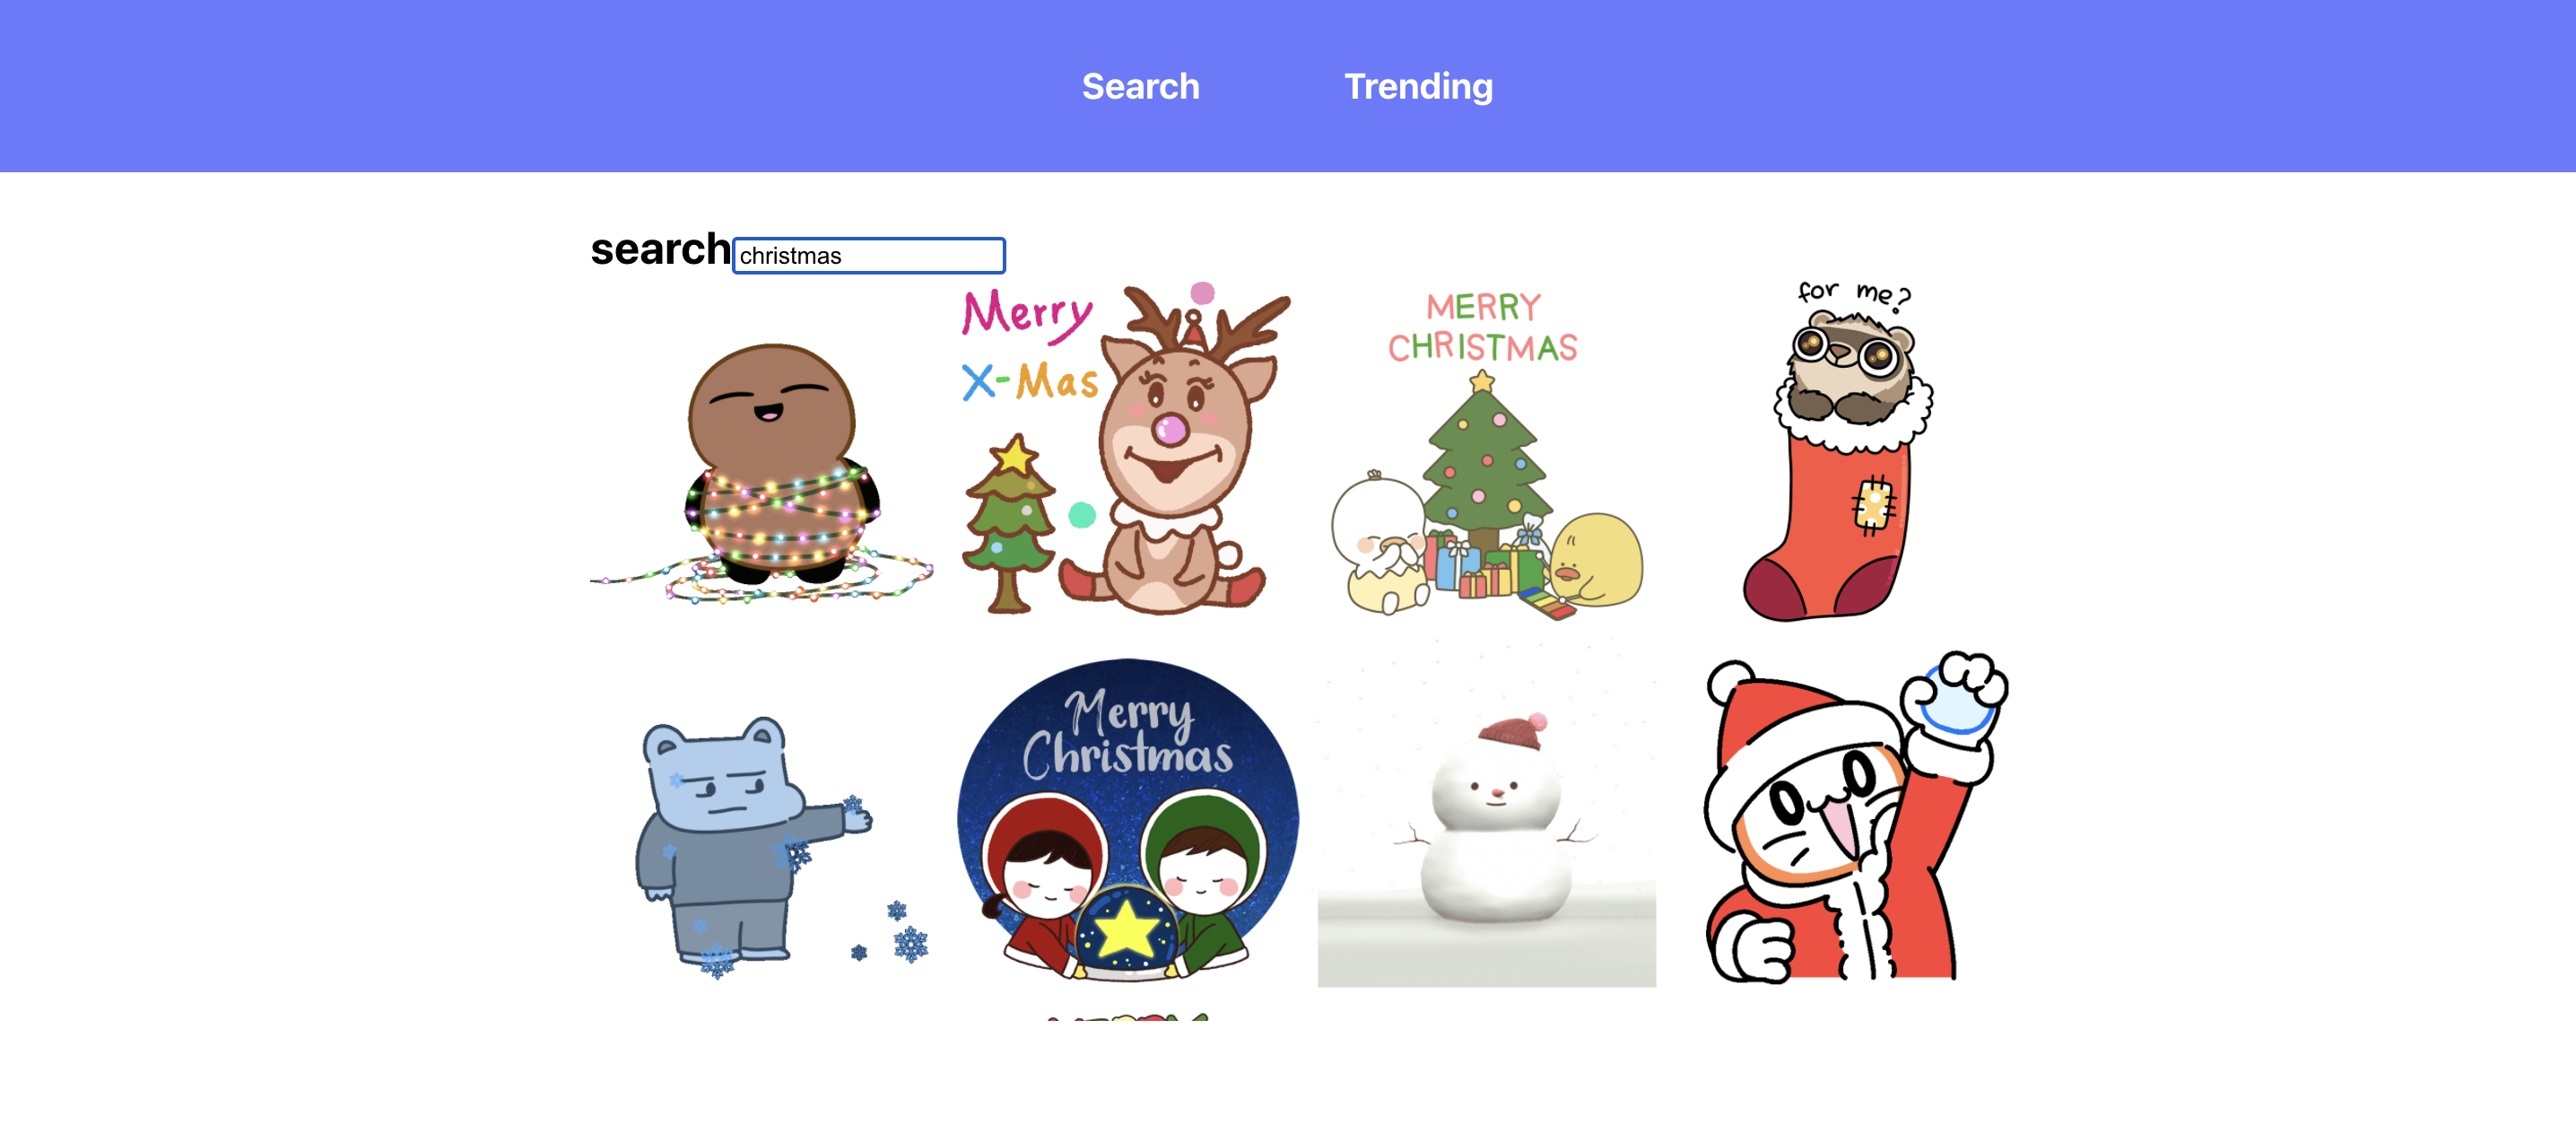
Search page
Let’s begin by making a SearchStickers functional component and just as before we’ll add some states:
   const [photos, setPhotos] = React.useState([]);
   const [page, setPage] = React.useState(1);
   const [bottom, setBottom] = React.useState(false);
   const [query, setQuery] = React.useState(null);
As you can see they are the same except for the “query”, which will contain our search query.
The code is, for the most part, very similar but there are some tiny changes that need to be done, so shall we. The main difference is that instead of “getPhotos” we have two new functions called “querySearch” and “continueQuery”. Let’s take a look at each.
   const querySearch = async (queryString, page) => {
       let config = {
           headers: {
               apiKey: '823bb74a52fb44f8590c87b3dfd8c4e8'
           }
       }

       if (queryString !== null) {
           await axios
               .get(`/v1/search?userId=9937&q=${queryString}&lang=en&pageNumber=${page}&limit=20`, config)
               .then(res => {
               if (res.data.body.stickerList !== null) {
                   setPhotos([...photos, ...res.data.body.stickerList]);
               }
           });
       }
   }
We now have a new parameter called “queryString”, which will be a search query we type into our search bar. Another difference is the endpoint where we will add our query string.
   const continueQuery = async (queryString, page) => {
       let config = {
           headers: {
               apiKey: '823bb74a52fb44f8590c87b3dfd8c4e8'
           }
       }

       if (bottom === true) {
           setPage(page + 1);
       }
       if (queryString !== null) {
           await axios
               .get(`/v1/search?userId=9937&q=${queryString}&lang=en&pageNumber=${page}&limit=20`, config)
               .then(res => {
               if (res.data.body.stickerList !== null || photos ==! null) {
                   setPhotos([...photos, ...res.data.body.stickerList]);
               }
           });
       }
   }
Continue query will be triggered only when we reach the bottom of the scroll area. Unlike querySearch, it will change the page in order to show more stickers relevant to the query.
Now let me introduce you to our search bar:
 const searchBar = () => {
       return (
           <form>
               <SearchLabel>
                   <span>search</span>
               </SearchLabel>
               <input
                   type="text"
                   id="search"
                   placeholder="search stickers"
                   onChange={(e) => [setPhotos([]), setQuery(e.target.value), querySearch(e.target.value)]}
                   value={query}
               />
           </form>
       )
   }
It is pretty simple, but I want to point out the “onChange” event.
The first thing we do here is to reset setPhotos to an empty array. This is to avoid results being appended to the end of our Array. It will return to its default state after every search query. The "continueSearch" function will take care of appending the rest of the search results as you scroll.
Next one is the event target value for our query state and we finally call querySearch to run our search as we type.
The handleScroll function is nearly identical:
   const handleScroll = (e) => {
       const bottom = e.target.scrollHeight - e.target.scrollTop === e.target.clientHeight;
       setBottom(true);
       if (bottom) {
           continueQuery(query, page);
           setBottom(false);
       }
   }
The only difference is that we call continueQuery instead of calling querySearch.
With that in mind, let’s put the layout together:
   return (
       <SearchStickerContainer onScroll={handleScroll}>
           {searchBar()}
           <div>
               <div style={{ minHeight: "100px" }}>
                   {photos && photos.map(user => (
                       <img src={user.stickerImg} height="200px" width="200px" />
                   ))}
               </div>
               {bottom === true ? <div> Loading ... </div> : null}
           </div>
       </SearchStickerContainer>
   );
All we do here is add our searchBar at the start. Now we can run it and use the search bar!
And that’s a wrap!
We have completed our infinite scroll with stickers. You can take it further and add as many other pages as you want.
Thanks for reading and happy building! 😎
👽 About Manuel
Manuel Roque is a front-end developer and a technical writer at Stipop. Have a question about the article? Contact Manuel here.


